Manual Configuration
Switch the power on (if required), and leave the phone to initialise for a minute or two. The phone will
display Initializing Please Wait on the screen.
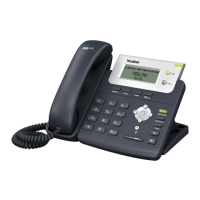
Setting up a headset
If you have a headset connected to your phone, you can set this to be the default audio device, simply
press the Headset key on the phones keypad, a picture of a headset will be shown on the phones
screen.
To answer a call, use the OK button, pick up the handset or press the Speaker button for hands-free
operation
To make calls, enter the number using the keypad and then pick up the handset. To make a call using
the speakerphone enter the number and press the speaker key
To pick up voicemails, dial *1
Setting an IP address
(Only necessary if you do not use DHCP on your network)
Press the Menu softkey to enter the phones configuration menu
Press 3 for Settings then OK
Press 2 for Advanced Settings, then OK
Using the alphanumeric keypad you now need to enter your admin password, by default this is admin.
Press the OK key
Press 2 for Network then OK
Press 1 for WAN Port then OK
Press 2 for Static IP Client then OK
Using the alphanumeric keypad enter the required IP, Subnet Mask, Gateway and DNS servers, using
the * key to enter a seperating dot (.)
Once complete, select OK, the phone will then reinitialise.
Configuring the Phone
(Only necessary for phones not purchased from Orbex)
Press the Menu softkey followed by 1 to obtain the IP address of the phone.
Using a web browser on a PC connected to the same network enter the IP Address, you will then be
prompted for a username and password, by default both of these values are set to admin (n.b. please
see this help guide if you have purchased the phone from Orbex).
 Loading...