IM 12B07D02-01E
12-6 Appendix
2/3
QIS 12B07D02-21E
3.3 Current Output Test
Connect the instruments as shown in Figure 1, and set them as follows.
Connect a shorting bar between terminals LOW and IMP.
Decade resistance box: 921.6 :
Standard voltage/current source: 0 mV
DC source: 24 V DC
Use the following procedure to enter the inspection mode.
(1) Entering Service Code 87
a. Press the [] key. The message display will show “OUTP.”
b. Press the [NO] key until the message display shows “SERV.”
c. Press the [YES] key. The data display will show “0
0” with the first digit of 0 flashing.
d. Press the [] key eight times. The data display will show “80” with the first digit of 8 flashing.
e. Press the [>] key once. The data display will show “80” with the second digit of 0 flashing.
f. Press the [] key seven times. The data display will show “87” with the second digit of 7
flashing.
g. Press the [ENT] key. The message display will show “PASS.”
(2) Setting Password 070
a. Press the [>] key once. The data display will show “000” with the second digit of 0 flashing.
b. Press the [] key seven times. The data display will show “070” with the second digit of 7
flashing.
c. Press the [ENT] key. The message display will show “HIF.”
d. Press the [YES] key.
(3) Checking the date and time
a. Press the [ENT] key. The data display will show the date in day-month-year order.
b. Press the [ENT] key. The data display will show the time in hour-minute-second order.
c. Press the [ENT] key. The message display will show “mA.”
This is the inspection mode. When the message display shows “mA”, check the current outputs.
Each time the [ENT] key is pressed, the value on the data display increases in steps of 4.0 like
“4.0,” “8.0” and “12.0.” Check the current outputs. Corresponding to the data display, the
current output must be within the range shown in Table 1.
When the data display shows “12.0,” pressing the [ENT] key causes the message display to
show “RIPPLE” and the data display to remain unchanged. Press the [ENT] key again. The
message display will show “mA” and the data display “16.0.”
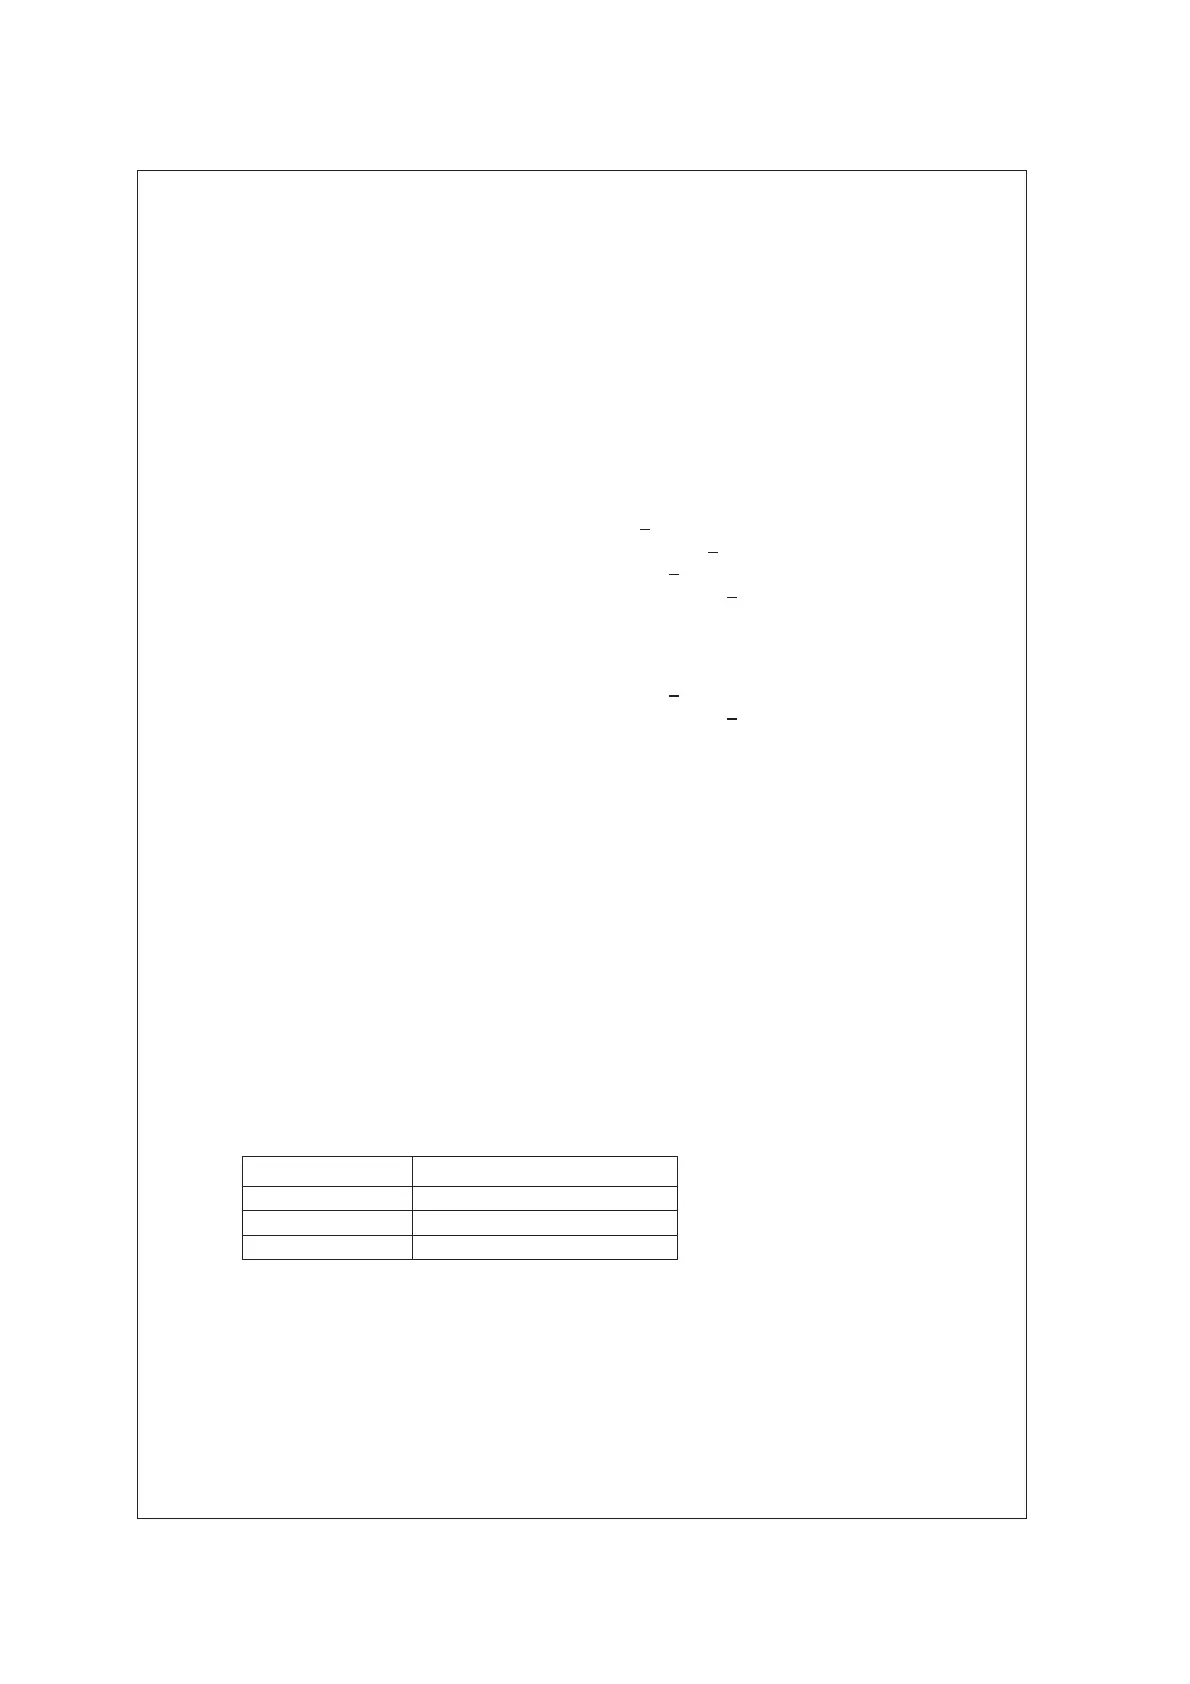
Table 1
Data Display Current Output (mA)
4.0 4 ±0.02
12.0 12 ±0.02
20.0 20 ±0.02
3.4 Temperature Indication Check
Following Section 3.3, press the [ENT] key until the message display shows “PT1000.” In this
state, change the resistance value of the decade resistance box as shown in Table 2 and check
the data display. The corresponding value on the data display must be within the range shown
in Table 2.
 Loading...