Do you have a question about the Yongnuo YN968EX-RT and is the answer not in the manual?
Prevent fire or shock by keeping the product away from rain and moisture.
Ensure correct battery installation and keep small parts away from children.
Avoid direct eye exposure and use on focused individuals. Stop use if damaged or malfunctioning.
Do not disassemble due to high voltage. Remove batteries for long-term storage.
Features an adjustable high-power LED with diffuser and color filter for versatile lighting.
Supports YONGNUO/Canon wireless systems, remote control, and optical slave modes.
GN60, 1/8000s HSS, and 20-105mm zoom for flexible shooting.
USB firmware upgrade, PC sync, external power, and auto-save settings.
Advice on power usage to extend product life and manage overheat protection.
Switching trigger/flash modes and setting flash groups as a master unit.
Accessing focal length, advanced options, and resetting to default settings.
Understanding button roles, LED operation, and short-distance shooting positioning.
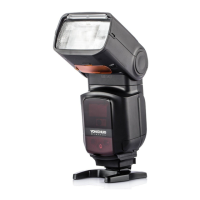
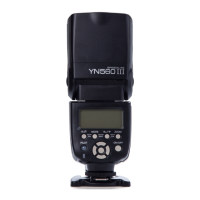
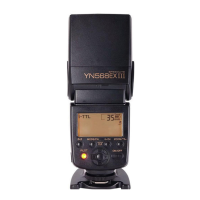
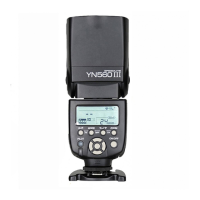
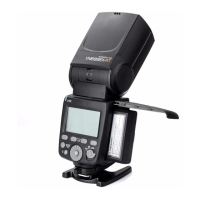
Details of the flash head (diffuser, panel, sensor) and external components like ports.
Description of the LCD panel, buttons, select dial, power switch, and status lamps.
Identification of the mini stand, LED light, color filter, and mounting foot.
Explains ETTL mode settings: Zoom, FEB, Beep, Sync, Aperture, FEC, and flash exposure level.
Details the Manual (M) flash mode, showing zoom, output level, and sync settings.
Illustrates the Multi mode display: number of flashes, frequency, and flash output.
Shows icons for set top, radio master/slave, and optical slave modes on the LCD.
Explains MASTER/SLAVE icons and related status indicators for radio transmission.
Explains SLAVE icon and related status indicators for optical transmission.
Guide to sliding the battery cover, inserting batteries correctly, and closing the cover.
Instructions for securing the speedlite to the camera's hot shoe and removing it.
Steps for setting the power switch and understanding the charging lamp status.
How to test the flash functionality using the TEST button when the charging lamp is red.
Explains the function of ON/OFF switch, MODE, Trigger mode, Select dial, Select/OK, Function buttons, and TEST button.
Meaning of Red light, Green light, and Goes off status for the charging indicator.
Details on the Quick Flash function enabling shooting when the charging lamp is green.
Interpreting Green (Transmission OK), Red (Not connect), and Orange (Second master) LINK lamp states.
Understanding audible cues like ticks for various states: OK, low battery, or overheat.
Operating ETTL, Manual (M), and Multi (stroboscopic) modes with their respective settings.
Using Gr mode for wireless master control and accessing settings via the camera menu.
Setting zoom coverage automatically or manually to specific focal lengths.
Automatic AF-assist beam activation and automatic saving of current settings.
Enabling power saving mode and managing overheat warnings and recovery.
Guidance on positioning slave units and understanding the 100m transmission range.
Configuring channel, ID, and flash modes (TTL/M/Multi/Gr) for the master unit.
The LINK lamp turns green when the master and slave units establish transmission.
Setting master flash firing, groups, and adjusting exposure compensation.
Using multiple master units and understanding LINK lamp color variations.
Setting channel, ID, and groups for slave units to match the master unit.
Using REL, MODEL, and TEST functions for slave units.
Choosing SC, SN, SC&SN, S1, or S2 trigger modes for optical slave shooting.
Details on SC (Canon), SN (Nikon), and SC&SN (Both) system compatibility.
Using S1 for synchronous flash and S2 for pre-flash cancellation in TTL mode.
Creating 1-5 slave groups (A/B/C) for multi-faceted flashing with master unit control.
Increasing slave units (up to 15) for enhanced flash output and sophisticated lighting setups.
Adjusting flash exposure compensation (FEC) and using flash exposure bracketing (FEB).
Utilizing FE Lock (FEL), High-speed Sync (FP), and Rear-curtain Sync.
Pulling out the wide panel to extend flash scopes to 14mm for softer, wider coverage.
Bouncing flash off walls/ceilings for softer light and reduced shadows.
Using the reflection board for highlighted catchlights in the subject's eyes.
Diffusing light for softer output and reduced shadows, locking zoom position.
Short distance shooting, PC sync port usage, and external battery pack connection.
Supporting high-speed continuous shooting and performing a factory reset.
Steps for downloading and installing firmware updates from the Yongnuo website.
Synchronizing multiple cameras/units (up to 16) for shooting from various angles via radio transmission.
Setting channel, ID, and switching between master/slave units for linked shooting.
Configuring slave unit cameras and checking LINK lamp status for coordinated release.
Entering custom function menu, selecting items, adjusting options, and returning to shooting state.
Details on C.Fn-00 to C.Fn-13 covering firmware, auto power off, modeling flash, FEB, sync, AF, zoom, slave timer, and metering.
Details on C.Fn-22, C.Fn-23, C.Fn-25, C.Fn-26 for LCD illumination, slave check, optical slave modes, and slave indicator.
Settings for P.Fn-01 to P.Fn-06 including LCD color, diffuser detection, wireless sequence, and linked shot toggle.
Steps for vertical positioning, turning on/off LED, and adjusting brightness.
Using the LED light while the master flash is disabled in radio wireless master mode.
Reducing glare and softening light with the built-in diffuser.
Changing color temperature using the color conversion filter for the LED light.
Resolving problems with power not turning on or flash not firing (batteries, overheat, dirty contacts).
Checking power saving mode/battery and addressing under/overexposure by reviewing settings.
Troubleshooting uneven illumination and wireless slave units not firing.
Checking LED status for test flash issues and general advice for other problems.
Details on circuit design, guide number, flash modes, trigger modes, zoom range, and rotation angles.
Information on power supply, lighting times, recycle time, color temperature, and external interfaces.
Provides physical dimensions, net weight, package contents, and additional features.
| power supply | 4xAA size batteries (Alkaline or Ni-MH are usable) |
|---|---|
| lighting times | 100~1500 times (AA alkaline cell used) |
| recycle time | Approx 3 s (AA alkaline cell used) |
| guide number | 60 (ISO 100, 105mm) |
|---|---|
| vertical rotation angle | -7~150 degrees |
| horizontal rotation angle | 0~360 degrees |
| flash color temperature | 5600 K |
|---|---|
| LED color temperature | Approx. 5500 K |
| LED luminance | Approx. 300 lux (1m) |
| dimensions | 78×60.5×206 mm |
|---|---|
| net weight | 435 g |