P5415484
27
1. Press and hold “Menu” and “Back/Help” simultaneously for at least 3 seconds during the normal mode (when unit is not in
operation). The Test Run menu is displayed.
2. Select “Contact Information” from the Test Run menu and press “OK”.
Contact Information Screen One is displayed.
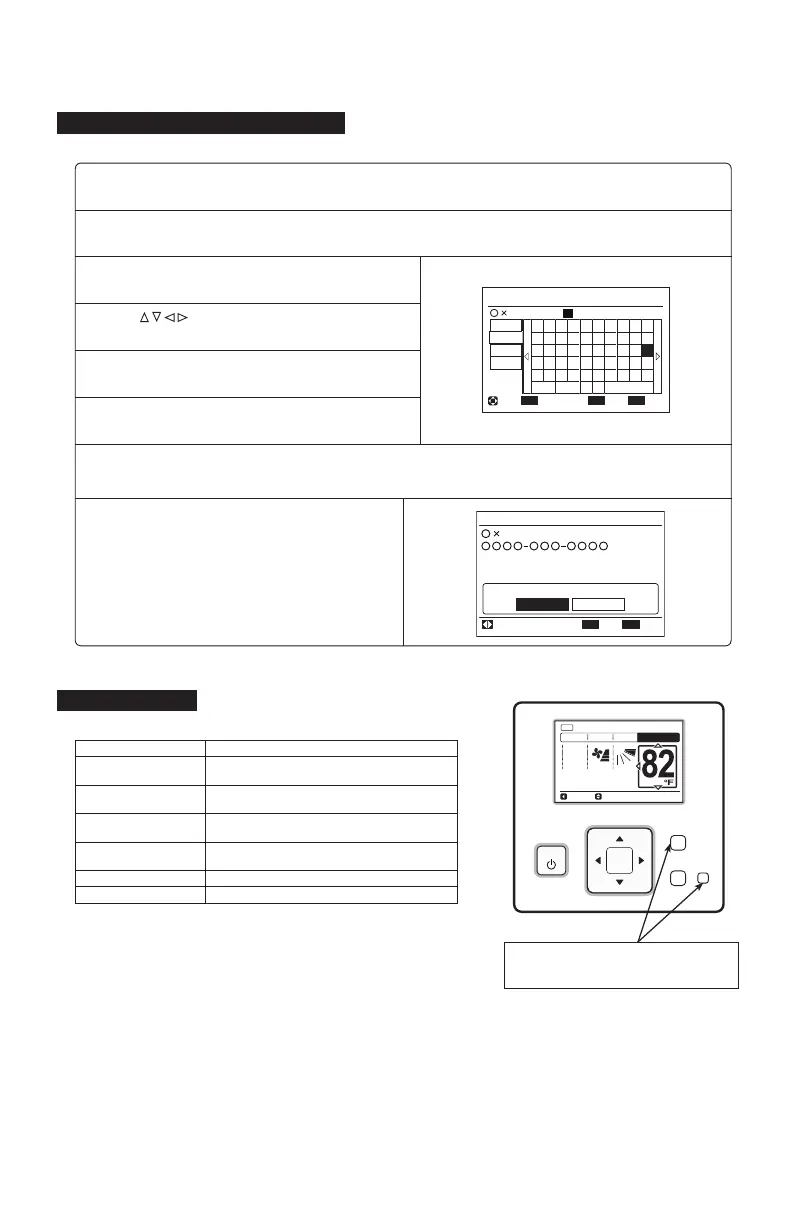
4. Press “ ” to select a letter.
8. Select “Yes” and press “OK”. The Test Run menu is
displayed after the setting is confi rmed.
If “No” is pressed, the screen returns to (3).
5. Press “OK” to confi rm the letter. (Maximum: 28 characters)
6. Select “Fin.” and press “OK” (or simply press “Menu”),
(7) is displayed.
3. Press “Back/Help” to change font type.
Contact Information 1
OK
ECO
'
1
q
€
<
+
2
w
a
>
*
3
e
s
z
;
4
r
d
x
.
5
t
f
c
?
6
y
g
v
←→
-
7
u
h
b
/
8
i
:
9
o
k
m
j
n
l
,
=
0
p
ABC
abc
Sym.1
Sym.2
Spce
Del. Fin.
Entr Fin.Sel. Letter
p
Electric Cor
Menu
7. Repeat steps (3)~(5) to register the Contact Information Two screen.
Select “Fin.” and press “OK”, the confi rmation screen is displayed. (Also, press “Menu” and the confi rmation screen is
displayed.)
OK
Register these contents?
Yes No
Electric Corp.
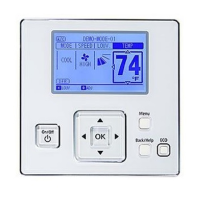
Contact Information
Sel.
Entr Rtrn
Back
OK
Menu
Back/Help
ECO
On/Off
A/C
MODE SPEED
TEMP
COOL
LOUV. Adj.
Meeting Room
LOUV.
Press and hold “Menu” and “ECO”
simultaneously for 3 seconds during the
normal mode.
Check Menu Item Function
Check 1
Sensor condition of the heat pump is monitored
and displayed.
Check 2
Sensor data from the heat pump prior to alarm
occurrence is displayed.
Alarm History Display *
Previous alarm record data: (date, time, alarm
code) is displayed.
Model Display
Model name and manufacturing number is
indicated.
Check PCB of the Units The result of PCB check is displayed.
Self Checking A checkout of the controller begins.
14. Contact Information Registration
Contact information can be registered from the Contact Information screen.
15. Check Menu
Each “Check Menu” item and its function is explained in the following table.
*To delete Alarm History
Press “OK” when an alarm or fault is recorded and displayed. After that,
a confi rmation screen appears.
Select “Yes” and press “OK” so that the alarm record is deleted.