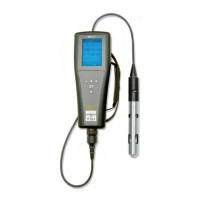
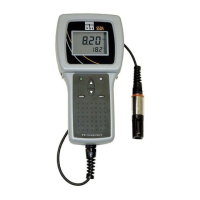
Chloride
The chloride sensor should be calibrated every day the instrument is used. The chloride sensor should only be
used in fresh water (salinity < 2 ppt) and to depths of 55 feet (17 meters) of water.
CALIBRATION TIPS
1. If using a chloride sensor with either a pH or ORP sensor on a 6051010 or Quatro cable, install the pH or
ORP sensor in port 1 and the chloride sensor in port 2.
2. If using a chloride sensor on a 6051010 or Quatro cable, calibrate the sensor in port 1 prior to calibrating the
sensor in port 2. The sensor in port 2 uses the reference of the sensor installed in port 1. Therefore, it is
important to verify that the sensor in port 1 is working properly before calibrating the sensor in port 2. See
Chloride Troubleshooting Tips for additional information on port configuration.
3. Exposure to the high ionic content of pH buffers can cause a significant, but temporary, drift in the chloride
sensor. Therefore, if calibrating a pH sensor, either:
c. Remove the chloride sensor from the cable bulkhead and plug the port. After pH calibration is
complete, reinstall the chloride sensor and proceed with its calibration with no stabilization delay.
Or,
d. Calibrate pH first, immersing both sensors in the pH buffers. After calibrating pH, place the sensors
in 1,000 mg/L chloride standard and monitor the reading. Usually, the reading starts low and may
take awhile to reach a stable value. When it does, proceed with the calibration. This may take
several hours.
4. The chloride sensor can be calibrated with up to three calibration points. For highest accuracy, perform a two
point calibration with 10 and 1000 mg/L standards within 10°C of your sample temperature
.
5. Rinse the sensors and cal cup with a small amount of chloride solution (10 mg/L for the first point and 1,000
mg/L for the second point). Fill the cup so that the chloride sensor tip and the temperature sensor are
submerged in solution. If using a Quatro cable or 6051030 cable, ensure that the conductivity sensor is also
submerged in the calibration solution. The salinity reading from the conductivity sensor is used in the
algorithm for the chloride measurement.
6. After entering the calibration screen, change the calibration value if necessary.
7. If not using a conductivity sensor, enter the salinity value of the calibration standard. After calibration, change
the salinity correction value to the salinity value of the water you will be testing in the field in order to obtain
the most accurate chloride measurement. You can change the salinity correction value in the Sensor menu.
As mentioned, the chloride sensor should only be used in fresh water (salinity < 2 ppt). The salinity of fresh
water is typically 0 to 0.5 ppt.
8. Record the Cl millivolts for each calibration point. The acceptable mV outputs for each calibration solution
are shown below.
Cl 10 mg/L = 225 mV +/- 20 mV (new sensor only)
Cl 1,000 mg/L = 80 to 130 mV < 10 mg/L mV value
•
The mV span between 10 mg/L and 1000 mg/L values should be
≈
80 to 130 mV. The slope should
be -40 to -65 mV per decade.
9. Wait for the chloride and temperature readings to stabilize in each calibration solution and then press enter
to accept each calibration point.
10. Rinse the sensor and cal cup between calibration points with a small amount of the next buffer.
11. After pressing enter to accept your last calibration point, press cal
to complete the calibration. Otherwise
you will continue calibrating up to 3 calibration points.
12. If you receive a warning message stating that the calibration is questionable, do not
continue with the
calibration. Instead, select ‘No’ and investigate what is causing the questionable results. If you accept a
questionable calibration, your chloride readings will be erroneous. Typical causes for this error message
include: incorrect Sensor/Port setup in the instrument, a dirty sensor or bad buffer solution.
21
 Loading...