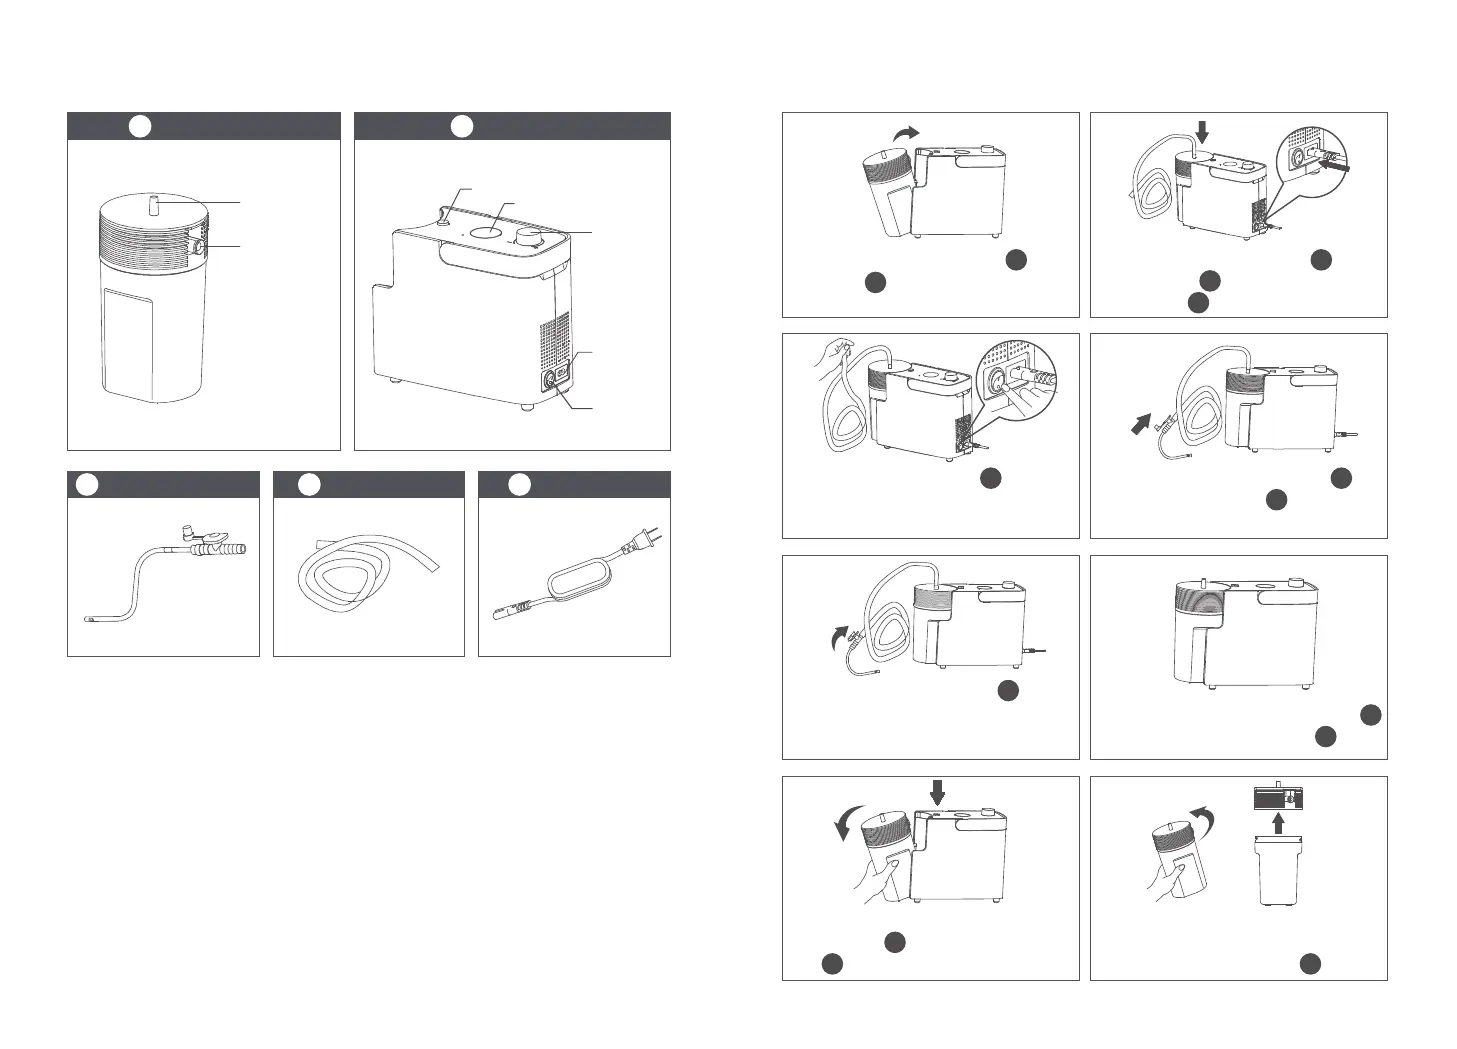
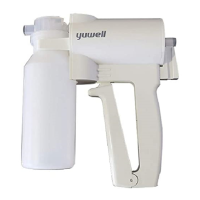
1.Connect the liquid holder to the
main unit (side with interface).
2.Connect the suction tube to the
liquid holder and then plug the
power cord into the power socket.
3.Block the suction tube , then
press the power switch, and regulate
vacuum as required through knob.
6. After use, turn off the main unit
and unplug the suction tube .
7. Press the button and remove the
liquid holder away from the main
unit .
8.Turn the holder lid counterclockwise
to separate the lid from the body, and
then clean the liquid holder .
*For details, please refer to the user's manual
Precautions
Assembly Steps
3
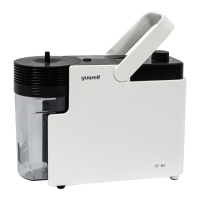
Suction catheter
4
Suction tube
5
Power cord
1. Do not run continuously for more than 30 minutes.
2. When adjusting the negative pressure, please block the suction tube to
ensure that there is no air leakage in the suction tube (air leakage will
affect the adjustment of the negative pressure).
3. During use,please make sure that the liquid level in the liquid holder does
not exceed the maximum liquid level indication.
4. When assembling the lid of the liquid holder to the canister body, make
sure that the arrow marks on the surface of the two are aligned, otherwise
air leakage may occur or the liquid holder may not be assembled with the
main unit.
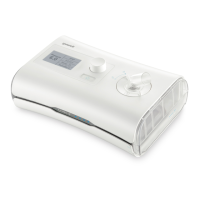
1
Liquid holder
2
Main unit
Power
switch
Inlet
Connector
Knob
Vacuum display
Power
socket
Button
2
1
1
2
4
2
1
4
5
4
1
4. Insert the suction catheter
into the suction tube .
3
4
5.Insert the suction catheter into the
desired suction site, then fold and press
the indenter on the suction catheter to
start suction.
3