Media Rewind Upgrade
Installing the Media Rewind Option Kit
14
33181L-001 Rev. A 10/23/2006
32. What printer configuration do you have?
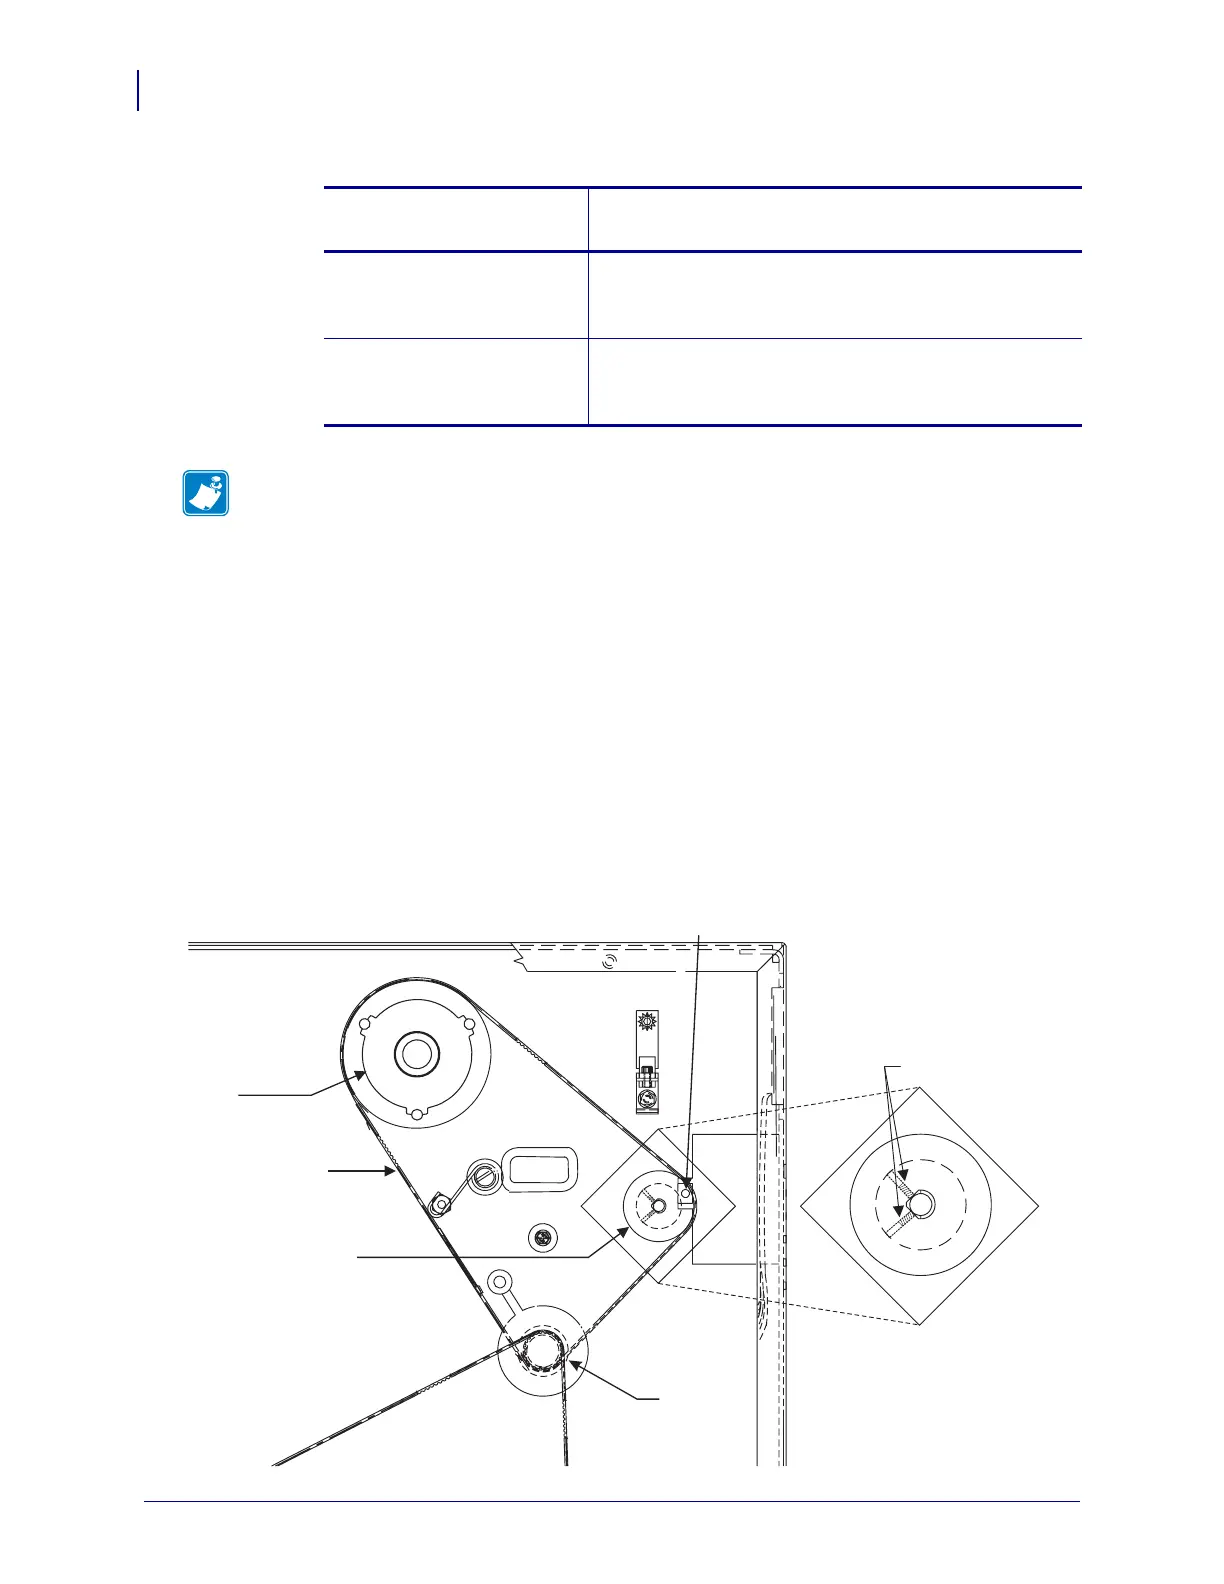
33. See Figure 8. Rotate the ribbon take-up pulley until the three holes in the pulley align with
the three mounting screws that hold the ribbon take-up spindle assembly to the printer
frame.
34. Extend the Allen wrench (provided in the kit) through the holes in the ribbon take-up
pulley and loosen the three spindle assembly mounting screws.
35. Slide the ribbon take-up spindle assembly to the right to relieve the tension on the main
drive belt.
36. Remove the main drive belt by sliding it off the ribbon take-up pulley.
Figure 8 • Main Drive Belt
If you have a printer
configuration between…
Then…
10500-0XXX-XXXX and
10500-1XXX-XXXX
a. Connect the upper take label sensor connector to J16
on the main logic PCB.
b. Connect the lower take label sensor connector to J15.
10500-2XXX-XXXX and
10500-3XXX-XXXX
a. connect the upper take label sensor connector to P2
on the main logic PCB.
b. Connect the lower take label sensor connector to P1.
Note • In peel off mode, if the two sensors are not aligned with each other, the take-label
LED illuminates, and the printer does not operate.
Main Drive Belt
Stepper
Motor
Pulley
Platen Pulley
Assembly
Inside Peel/Tear-Off Bar
Mounting Screw
Ribbon Take-Up
Pulley
Set Screws
 Loading...


