Dispenser Bezel Replacement 980358-310A
Preparations
Protect against static discharge. Your work area must be static-safe and include
a properly grounded conductive cushioned mat to hold the printer and a
conductive wrist strap for yourself.
Perform the removal steps of the Bot tom Case Re place ment pro ce dure (980358-305).
Removal
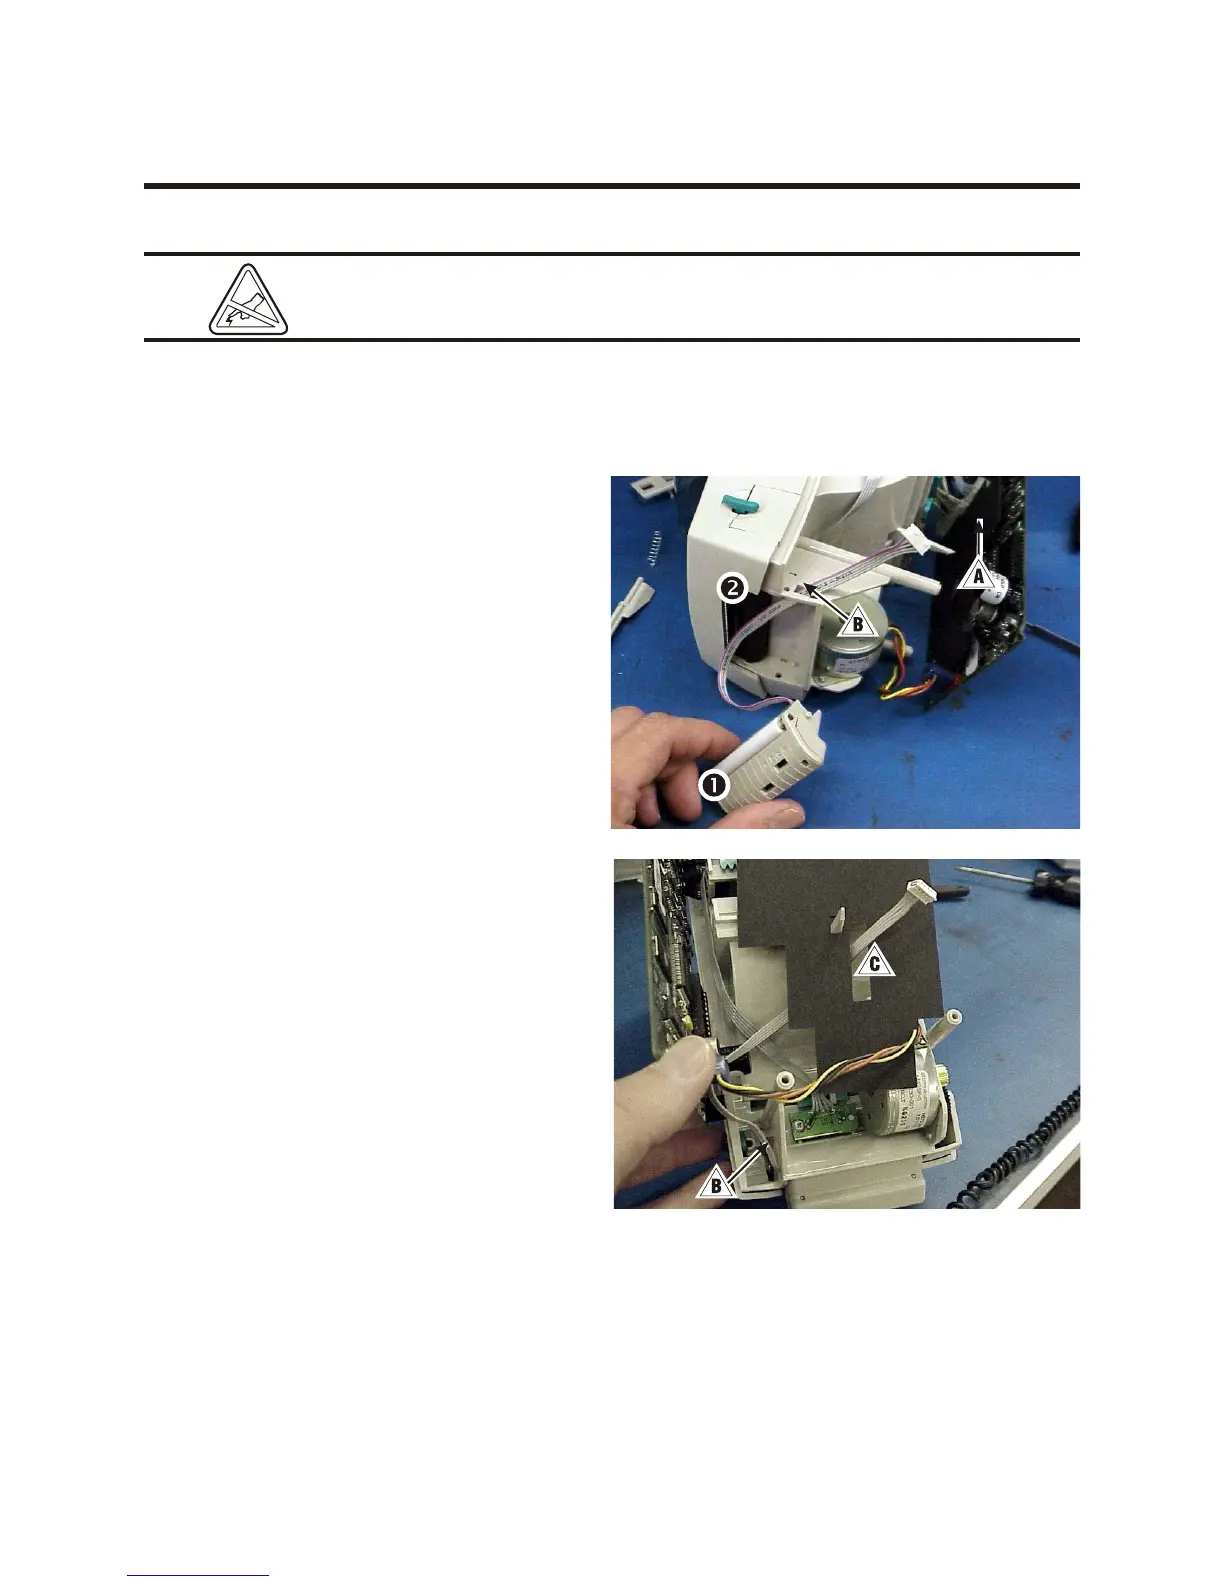
1. Pry either side free and then lift the bezel 1
away from the dis penser bar 2 and bot tom
frame as sem bly.
2. Note the location of the connector ! on
the main con trol board; then un plug it.
3. Pull the wires and connector through the
frame access ".
Assembly
1. Align the bezel so that the connector is to
the rear.
2. Thread the connector and wires through the
access in the bottom case " and the
pro tec tive sep a ra tor ("fish pa per") #.
3. Plug the connector into its location on the
main control board.
4. Align the tabs with the notches in the media
exit and snap the bezel into place.
Assembling the Printer
Perform the assembly steps of the Bot tom Case
Re place ment pro ce dure (980358-305). Check
the in stal la tion. Turn on the printer and run the
AutoSense rou tine to get a dump mode
print out. This ac tion test the printer's me dia
drive and print ing ca pa bil i ties.
60 980358-001 Rev. B