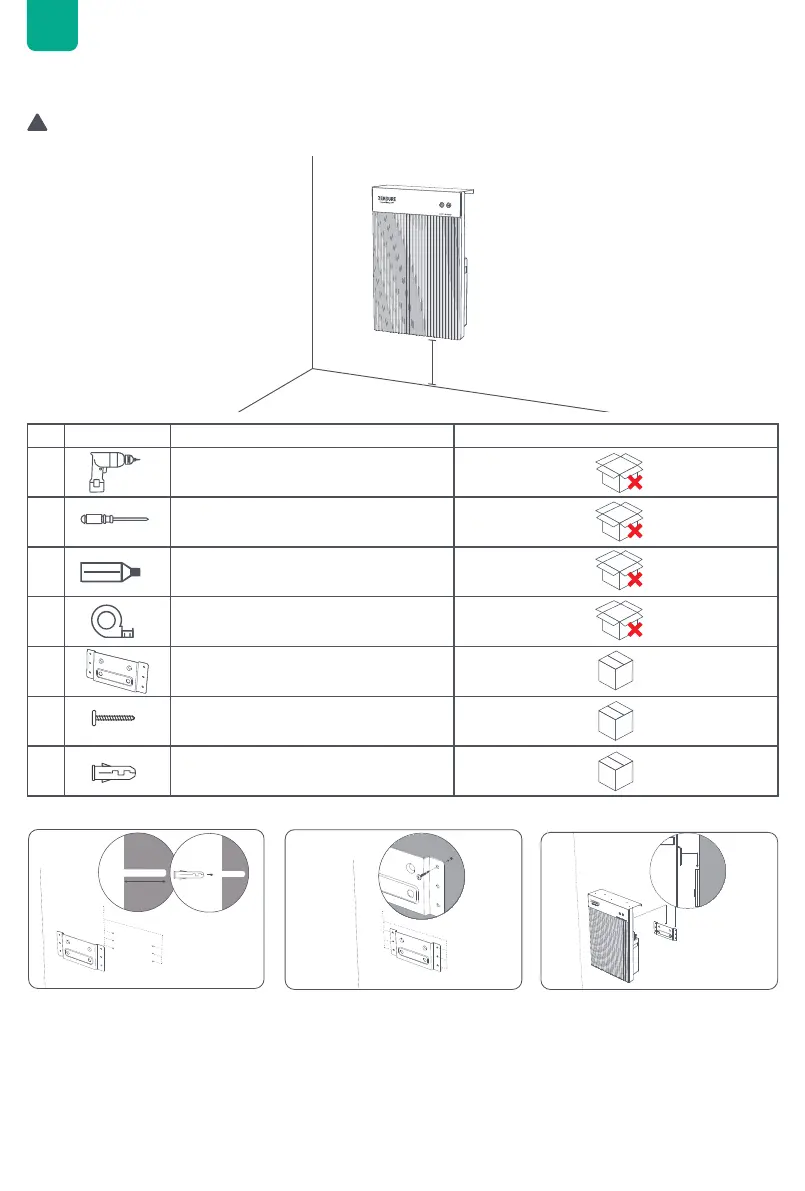
STEP 1
of AIO 2400, use the Wall Mount
Bracket as a guide to mark the
hole positions, and drill 6 holes in
the wall to a depth of 41mm.
STEP 2
Fix the Wall Mount Bracket to the
wall with anchors and screws.
STEP 3
Hang the AIO 2400 on the Wall
Mount Bracket.
Option B: Mount your AIO 2400 onto a solid concrete wall using the included mount bracket.
≤600mm
NO. Picture Name Part of a basic set / Optional (not included)
1 Electric Drill
2 Phillips Screwdriver
3 Marker/Pen/Pencil
4 Tape Measure
5 Wall Mount Bracket × 1
6 Wall Mount Bracket Screws M4.7*39 × 6
7 Plastic Anchor M8*40 × 6
Wall mounting
Wear safety glasses and gloves when drilling holes.
Tool list
√
√
√
EN
 Loading...