Single AIO 2400
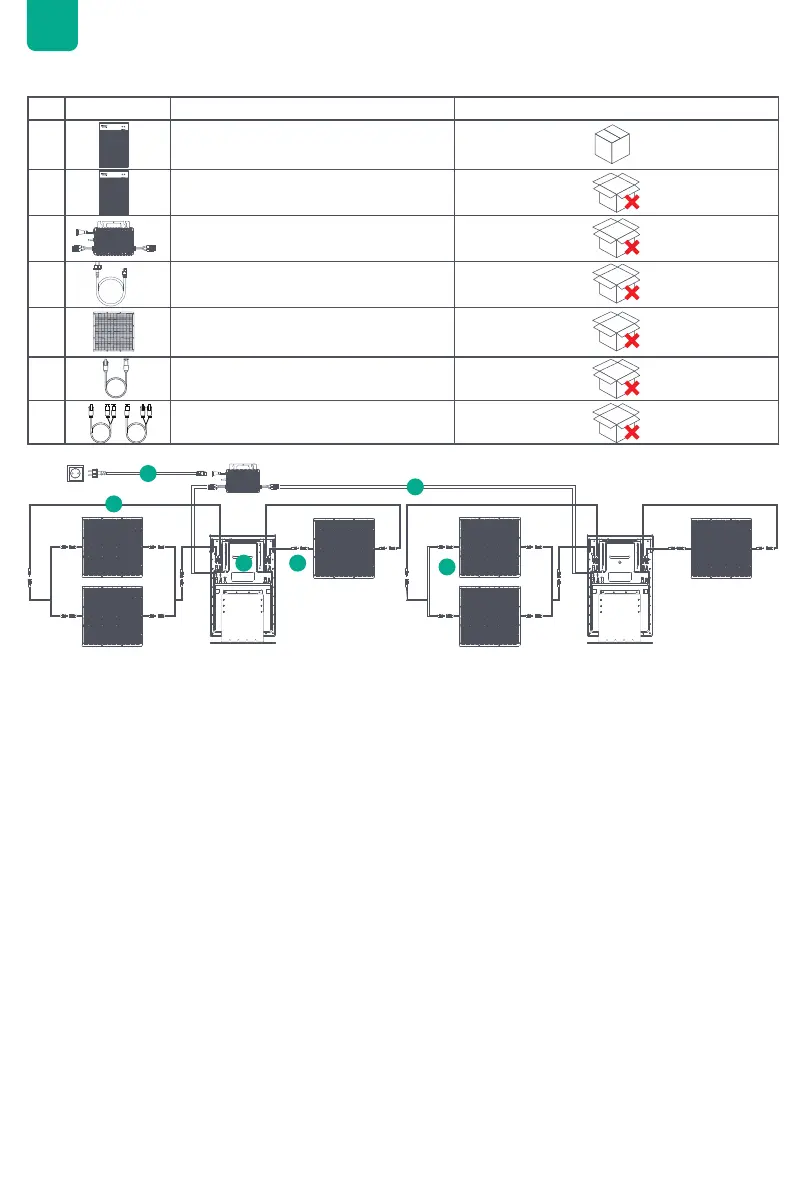
Installation list
NO. Picture Name Part of a basic set / Optional (not included)
1 AIO 2400×1
2 AIO 2400×1
3 Microinverter×1
4
BKW-AC Cable×1
(*The plug varies by region.)
5 Solar Panel
6 Solar Panel Extension Cable
7 Solar Panel Parallel Cable
√
1.
2. Connect the PV Input cables of the Microinverter to the Microinverter Output interfaces of both AIO 2400 units,
one after the other.
3. Use the original BKW-AC Cable to connect the Microinverter to a household outlet.
4. Connect one 400W solar panel to the PV Input 1 interface of each AIO 2400 unit.
5. Connect two 400W solar panels together using a solar panel parallel connection cable.
6. Connect the parallel-connected 400W solar panels to the PV Input 2 interface of each AIO 2400 unit.
400W
400W
400W
400W
1 4
5
2
6
3
EN
 Loading...