AC
leakage Test
To
prevent electrical shock after reassembly, perform
an
AC
leakage test on all exposed metal parts of the
monitor.
Do
not use an isolation transformer to perform
this test.
1.
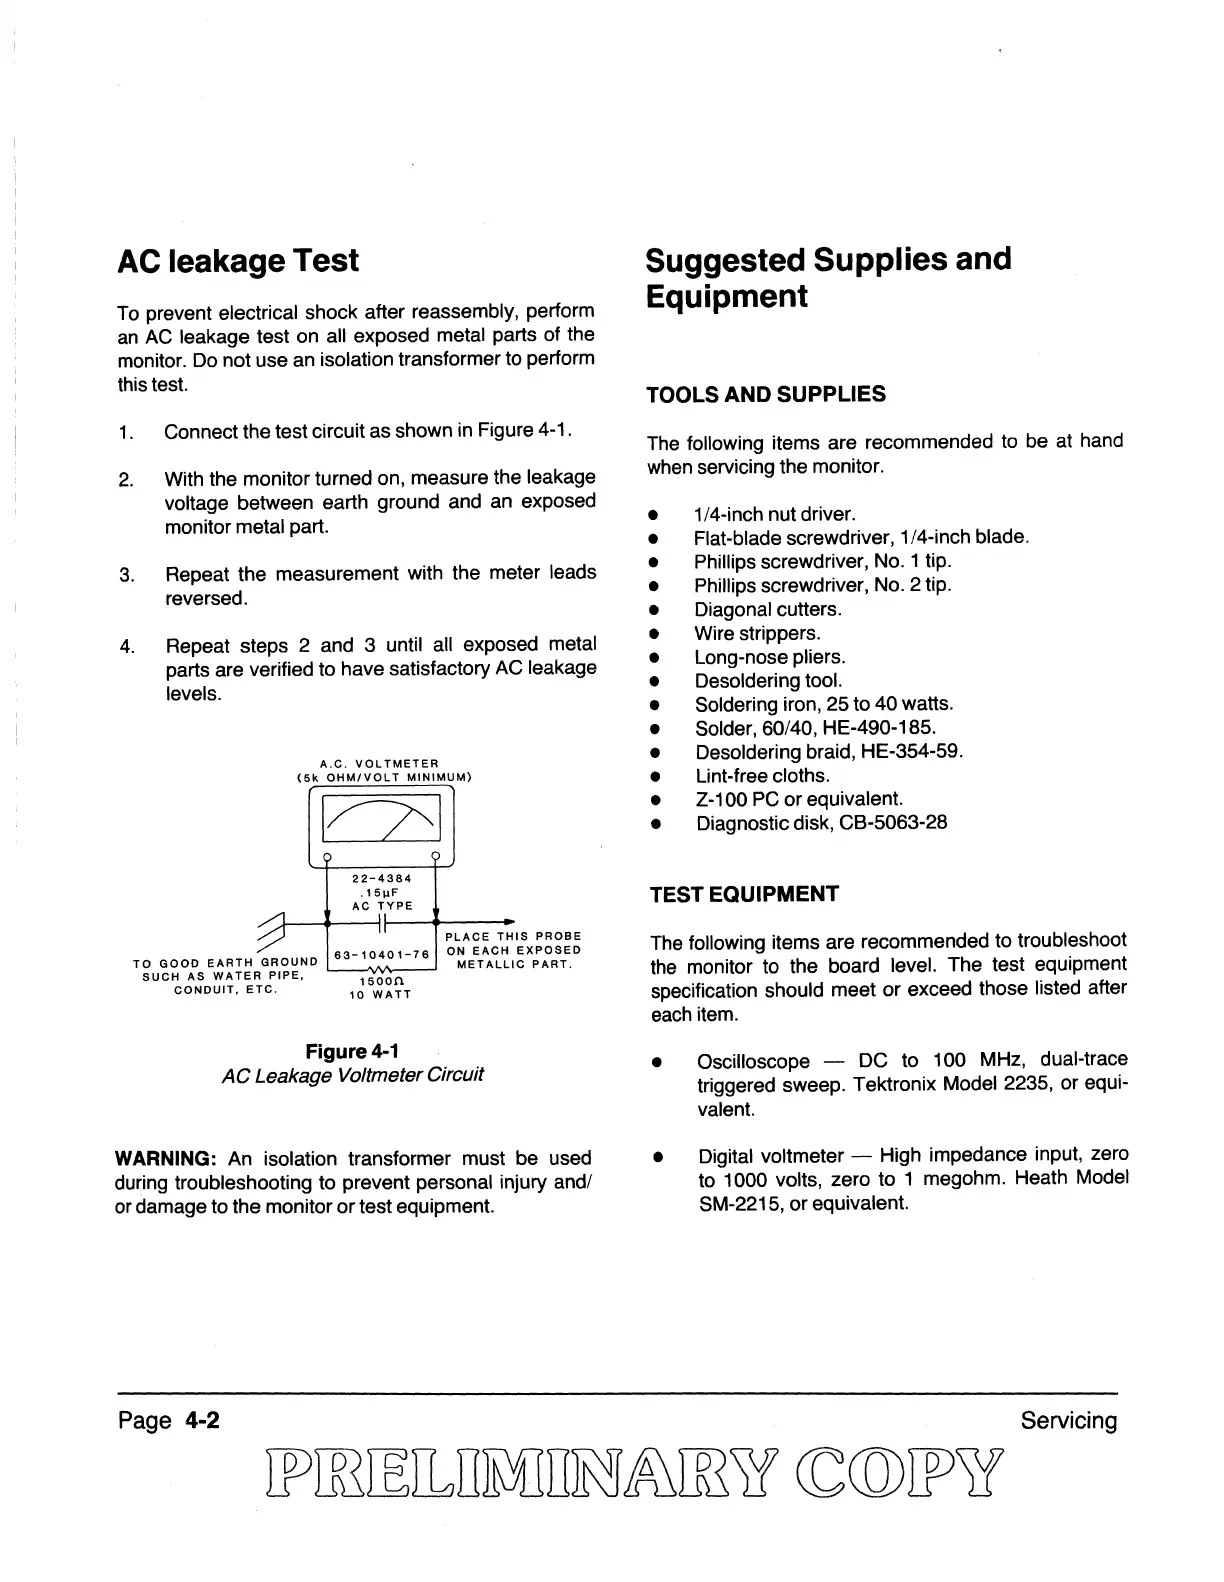
Connect the test circuit as shown in Figure 4-1.
2.
With the monitor turned on, measure the leakage
voltage between earth ground and an exposed
monitor metal part.
3.
Repeat the measurement with the meter leads
reversed.
4.
Repeat steps 2 and 3 until all exposed metal
parts are verified to have satisfactory AC leakage
levels.
A.C.
VOLTMETER
(5k
OHM/VOLT
MINIMUM)
TO
GOOD
EARTH
GROUND
SUCH
AS
WATER
PIPE.
CONDUIT.
ETC.
I~I
22-4384
.1511F
AC
ilYPE
"
63-10401-76
15000
10
WATT
Figure
4-1
PLACE
TH
ON
EACH
METALLI
AC
Leakage Voltmeter Circuit
IS
PROBE
EXPOSED
C
PART.
WARNING:
An
isolation transformer must be used
during troubleshooting to prevent personal injury and/
or
damage to the monitor or test eqUipment.
Page 4-2
Suggested Supplies and
Equipment
TOOLS AND SUPPLIES
The
following items are recommended to be at hand
when
servicing the monitor.
•
1/4-inch nut driver.
•
Flat-blade screwdriver, 1/4-inch blade.
•
Phillips screwdriver, No.1 tip.
•
Phillips screwdriver,
No.2
tip.
•
Diagonal cutters.
•
Wire strippers.
•
Long-nose pliers.
•
Desoldering tool.
•
Soldering iron, 25 to 40 watts.
•
Solder, 60/40, HE-490-185.
•
Desoldering braid, HE-354-59.
•
Lint-free cloths.
•
Z-100
PC
or equivalent.
•
Diagnostic disk, CB-5063-28
TEST EQUIPMENT
The
following items are recommended to troubleshoot
the
monitor to the board level. The test equipment
specification should meet or exceed those listed after
each
item.
• Oscilloscope - DC to 100 MHz, dual-trace
triggered sweep. Tektronix Model 2235, or equi-
valent.
• Digital voltmeter - High impedance input, zero
to 1000 volts, zero to 1 megohm. Heath Model
SM-2215, or equivalent.
SeNicing