18
■
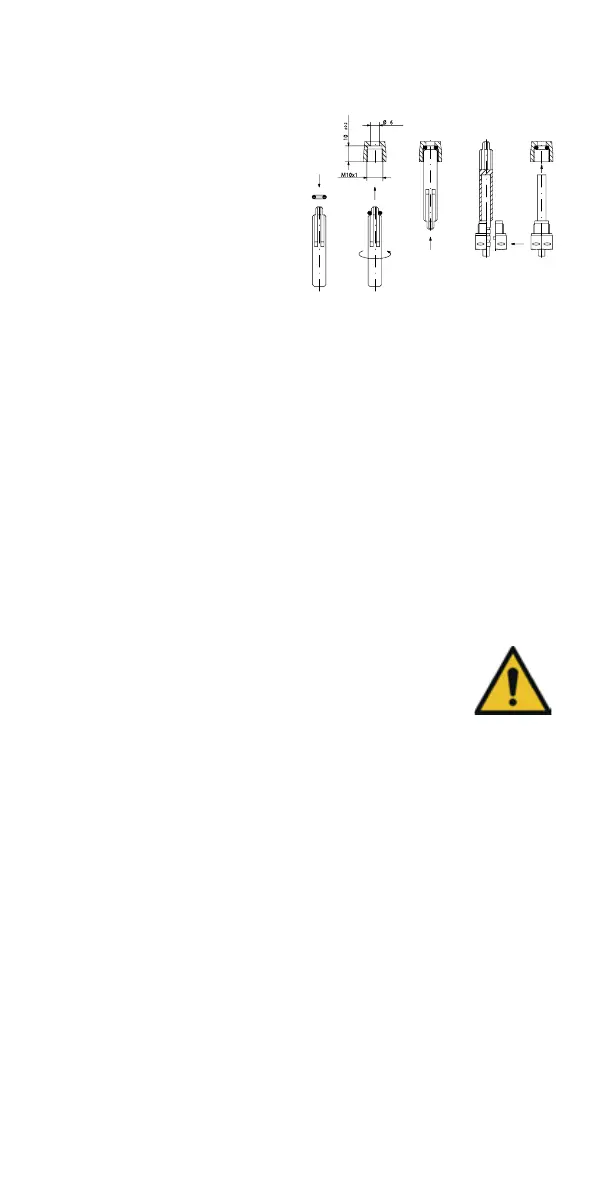
Mounting with plastic adapter:
– Insert the 2 halves of the plastic
connector into the sensor’s
threenotches(crimps)and
press them together.
■
Use the mounting aid as position-
ing aid.
■
Mounting with brass adaptor:
– Slide brass screwing with
loosely mounted groove pin
onto temperature sensor in right
position
– Slide temperature sensor into
mounting aid until mechanical
stop(28mm)
– Check again, if brass screwing is
inrightposition(thegroovepin
must be pressed in the upper
groove which is in the closest
position to the temperature
sensorcable)
– Pressingroovepinush
– Removemountingaid
■
Insert the temperature sensor
into the installation point and
screw it in tightly until the dead
stop of the seal on the 12-point
isreached(mountingtorque3-5
Nm).
■
The temperature sensor instal-
lation point which is optionally
integratedintheowsensormust
be secured.
■
Securethesensoraerinstal-
lation against unauthorised
removal with appropriate sealing
(includedinaccessorieskit)!
■
At the versions with temperature
sensortypeTS-45-5(seetype
plateatthesensorcable)both
sensors must be always immersed
directly in contact with the heat
conductinguid.Theinstallation
in sensor pockets is not allowed.
Installation with existing immersion
sleeves
InGermanytheC5canbeputinto
use in connection with existing im-
mersion sleeves in accordance with
thearticle“PuttingintouseofMID
homologated temperature sensors”
releasedinthePTBnotications119
(2009),Edition4.Basedoncurrent
information, the regulation has a pe-
riod of validity until 30.10.2026. For
theidenticationandmarkingofthe
usable existing immersion sleeves
inconnectionwiththeC5meter,an
identicationandmarkingsetcanbe
deliveredfromourcompany(order
number137382).
Commissioning
■
Open valves carefully. Vent the
system. Avoid sudden pressure
shocks. Check installation for
leakage.
■
Attention!
ForzelsiusC5with
LoRainterface,we
recommendatrst
to do the onboarding of the device
on your respective IoT platform by
putting in the key information
belongingtothedevice(DevEUI,
JoinEUIandAppKey)before
activating the device as described
below!
■
If the sleep mode of the counter is
enabled(Display:SLEEP1),then
it must be deactivated by longer
pressingthebutton(>5s).
■
While the system is operating,
check whether the volume display
advances and the temperatures
displayed correspond with the ac-
tualtemperatures(seethedisplay
overview).
■
Wait for the temperature display
to be updated.
■
Secure meter with the enclosed
sealing material against unau-
thorised removal.
Mounting example

 Loading...