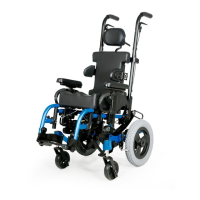
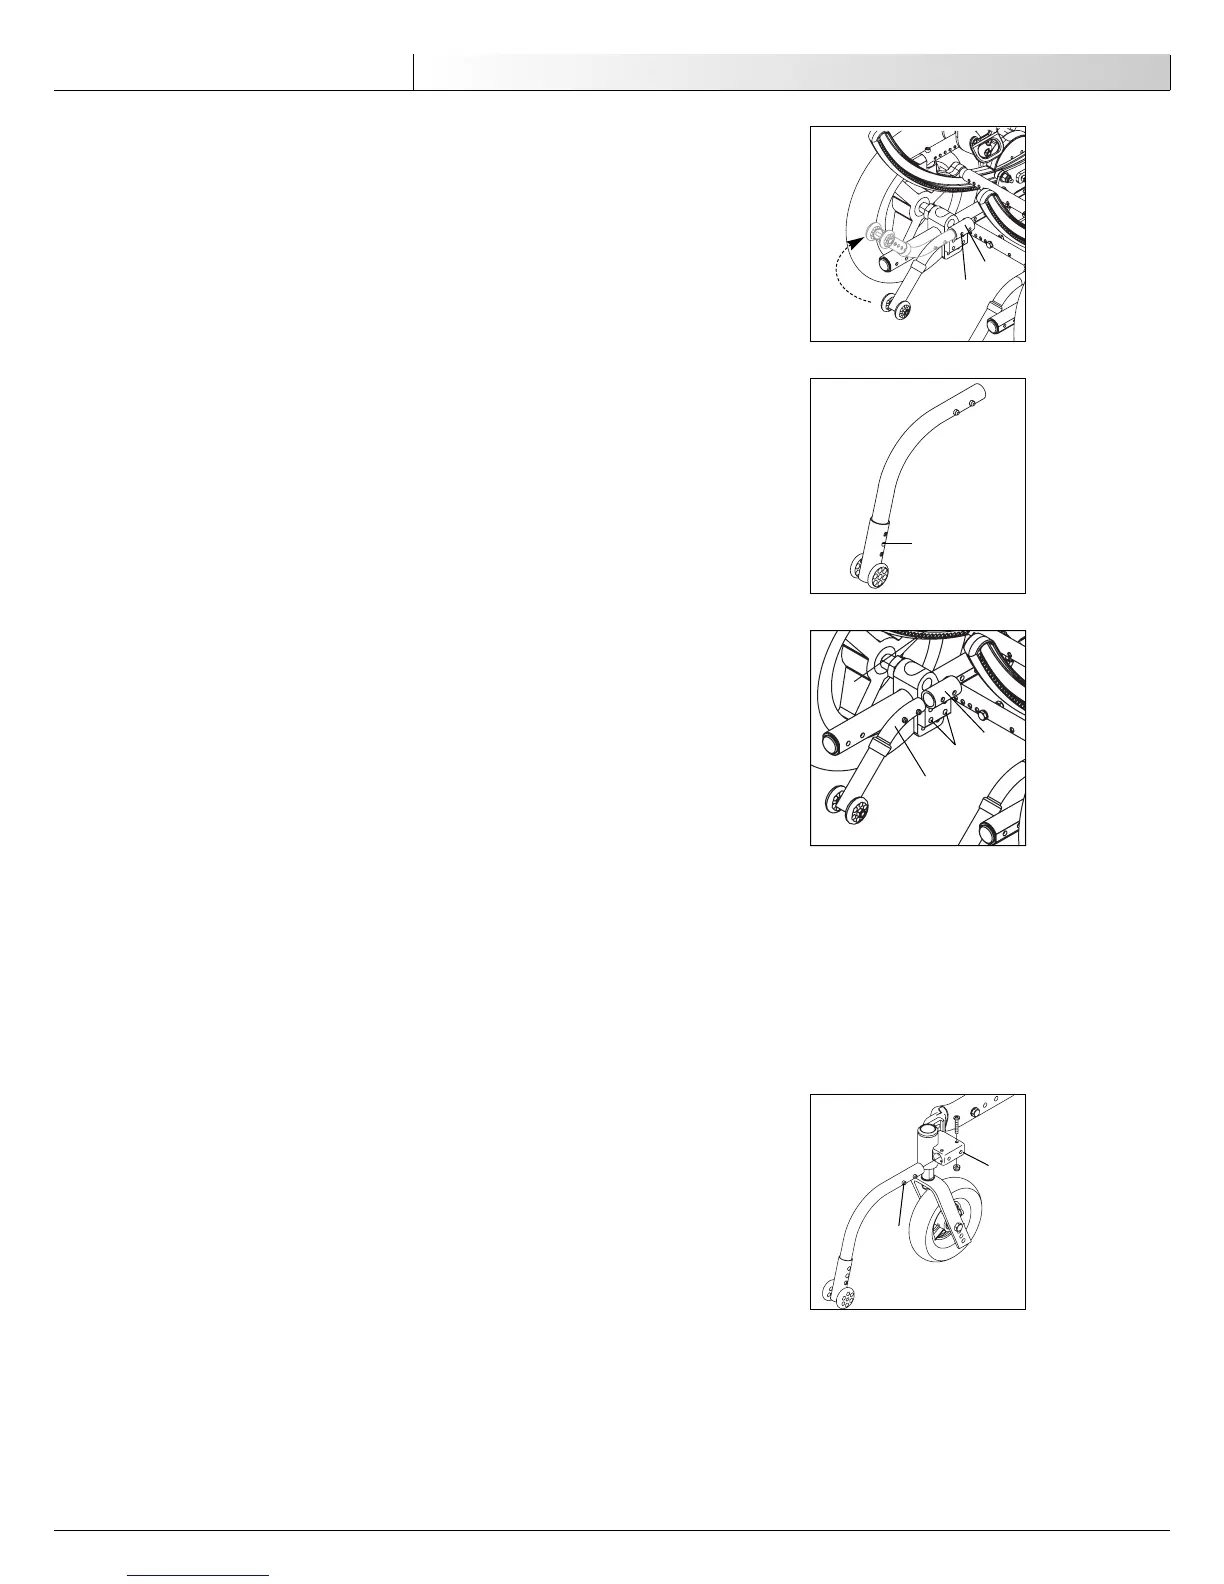
J. ANTI-TIP TUBES- REAR
Anti-tip tubes are recommended for all wheelchairs.
NOTE– Use a torque setting of 96 in.-lbs. when setting-up anti-tip tubes.
1. Inserting Anti-Tip Tubes Into Receivers
a. Press the rear anti-tip release pin (A) on the anti-tip tube so that both release pins
are drawn inside.
b. Insert the anti-tip tube into the receiver (B).
c. Turn the anti-tip tube down until release pin protrudes through the receiver mount-
ing hole.
d. Insert second anti-tip tube the same way.
2. Turning Anti-Tip Tubes Up
Turn anti-tip tubes up when being pushed by attendant, overcoming obstacles or climbing
curbs.
a. Press the rear anti-tip tube release pin (A).
b. Hold pin in and turn anti-tip tube up (C).
c. Release pin.
d. Repeat with second anti-tip tube.
e. Remember to return anti-tip tubes to down position after completing maneuver.
3. Adjusting Anti-Tip Tube Wheel
The anti-tip tube wheels may have to be raised or lowered to achieve proper ground clear-
ance (1-1/2" to 2").
a. Press the anti-tip wheel release pin (D) so that the release pin is drawn inside.
b. Raise or lower to one of the three or four pre-drilled holes.
c. Release pin (D).
d. Adjust the second anti-tip tube wheel the same way. Both wheels should be at exact-
ly the same height.
4. Height adjustment of the receivers
a. Remove anti-tip tubes (E) from anti-tip receivers (B).
b. Remove bolts (F) from anti-tip tube receiver.
c. Reposition bracket to desired height. The receiver can be positioned up or down as
needed.
d. Reinsert bolts (F) and tighten.
e. Repeat with second anti-tip tube receiver. Both brackets should be at exactly the
same height.
f. Replace anti-tip tubes.
K. ANTI-TIP TUBES- FRONT
NOTE– Use a torque setting of 100 in.-lbs. when setting-up anti-tip tubes.
1. Inserting Anti-Tip Tubes Into Receivers
a. Press the front anti-tip release pin (A) on the anti-tip tube so that both release pins
are drawn inside.
b. Insert into the anti-tip tube receiver (B).
c. Turn the anti-tip tube down until release pin is through the receiver mounting hole.
d. Insert second anti-tip tube the same way.
2. Turning Anti-Tip Tubes Up
See Turning Anti-tip Tubes Up section J-2.
3. Adjusting Anti-Tip Tube Wheel
See adjusting Anti-Tip Tube Wheel section J-3.
101510 Rev. A
24
English
IX. Set-Up & Adjustment
A
B
C
D
B
E
F
A
B