EasyManua.ls Logo

ZKTeco TL800 - User Manual

ZKTeco TL800
25 pages
Print Icon
To Next Page IconTo Next Page
Loading...
Model: TL800
Installation Guide
Version: 1.0
Question and Answer IconNeed help?

Do you have a question about the ZKTeco TL800 and is the answer not in the manual?

Summary

Installation Diagram

Installation Procedure

Door Properties

Measure door thickness and check opening direction for proper lock installation.

Drill Holes on the Door

Mark and drill holes on the door according to the installation template and door thickness.

Install Mortise and Cylinder

Install the mortise into the door hole and secure it with screws, then insert and secure the cylinder.

Uninstall the OLED Screen and Mounting Plate

Remove the OLED screen and mounting plate from the indoor unit by following specific steps.

Install Studs and Outdoor Unit

Install studs, pass cable, and attach the outdoor unit to the door, securing the mounting plate.

Install Indoor Unit

Install spindles with metal pin, connect cable, and secure the indoor unit to the mounting plate.

Install Batteries and Cover

Insert lithium batteries and attach the OLED screen and hidden cover.

Install Strike Plate and Box

Align strike box with latch bolt, drill holes, and secure strike plate and box with screws.

Physical Test

Test the lock functionality using the mechanical key, checking latch retraction.

Adjust the Direction of Latch

Important Notes

Product Overview

Definitions

How to Use

Reset the Lock

Procedure to reset the lock by pressing and holding the reset button until an audio prompt is heard.

Activate the Lock

How to activate the lock by touching the keypad with your hand or fingers.

Mechanical Adjustment

Details mechanical adjustments for direction, torque, and latch bolt time before formal use.

Register the First Administrator

Process to register the first administrator using the reset button and keypad prompts for fingerprint, password, or card.

Programming the Features through Menu Mode

Guide to programming features via the menu mode using keypad input and audio prompts after administrator verification.

System Setting

Access system settings for language, volume, date/time, and network configuration.

How to use OLED Screen Model?

Overview

Provides an overview of the OLED screen model, showing button functions and activation.

Programming the Features through Menu Mode

Instructions for programming features using the OLED screen's menu mode via power and down buttons.

Camera Features

Details the camera mode for viewing outside and its functionalities.

Files Management

Explains how photographs and videos are saved and managed on the TF card.

Set Menu Options

Describes various settings available in the 'Set' menu, including record mode, language, and Wi-Fi quality.

How to connect USmart Go APP?

Step 1: Download the App

Instructions to download the 'USmart Go' app from the Apple App Store or Google Play Store.

Step 2: Create an Account

Guide on launching the app and registering a new account using phone number or email.

Step 3: Create Family

Steps to create a family within the app to associate devices, using the '+' button.

Step 4: Setting Security Password

Procedure to set up a security password for two-step verification within the app's settings.

Step 5: Connect the Lock

Instructions to add the lock device via Wi-Fi by selecting 'Add Wi-Fi Device' and connecting to the 'CloudHome' hotspot.

Step 6: Finish

Final steps to connect to a valid Wi-Fi network and complete the lock setup in the app.

Functions

Remote Unlock

How guests and owners can remotely unlock the door using the app via doorbell or unlock icon.

Add User

Steps to add a new user by generating a password via the app's 'Password' function.

Name the Lock

Instructions to rename the smart lock within the app's settings for easier identification.

Mark the App Remote Unlock Person to be a User

How to assign a name to a user associated with an unlock event in the app's edit user page.

Check Records

How to view event records such as locked/unlocked doors and doorbell alarms on the lock page.

FCC Warning

Overview

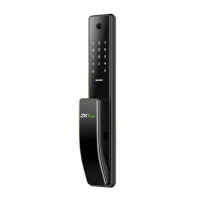
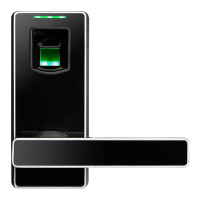
The TL800 is an intelligent Smart Lock designed for secure and convenient access control. This device integrates multiple access methods, including fingerprint, password, and access card, along with a mechanical key for emergency situations. It also features a unique OLED screen model that enhances its functionality by providing a visual interface for various operations and a camera for outdoor monitoring.

Function Description:

The primary function of the TL800 is to provide secure access to a door. It supports two user roles: Administrator and User. Administrators have full privileges, including accessing the menu and opening the door, while Users can only open the door. Each user can register up to ten fingerprints, one password, and one card.

The lock incorporates several advanced security and convenience features:

  • Multiple Access Methods: Fingerprint, password, access card, and mechanical key.
  • Random Password: Enhances security by allowing users to enter random digits before or after the actual password, with a maximum of 30 entered digits.
  • Double Locking: Prevents the lock from being unlocked from the outside, activated by rotating the double locking knob.
  • Quick Close Function: Automatically locks the door by pressing the Quick Close Key on the keypad or the Quick Close Button on the indoor unit.
  • Remote Unlock: Guests can trigger a remote unlock request by pressing the "Doorbell" key twice within 30 seconds on the keypad. The owner can then unlock the door via the USmart Go app by entering a security password. Owners can also self-unlock by clicking the unlock icon in the app, verifying with a security password, and pressing the "Doorbell" key once.
  • OLED Screen Model: This integrated screen provides a visual interface for camera mode, file management, and settings. In camera mode, users can view the outside through the outdoor unit's camera.
  • Emergency Charging: A Micro-USB interface on the outdoor unit allows for charging the lock with a power bank if the battery runs out.
  • Emergency Mechanical Key: Provides a failsafe in case of electronic malfunction.
  • Anti-prying Detection: An alarm feature that can be enabled or disabled through the system settings.
  • Passageway Mode: Allows the door to remain unlocked, suitable for meeting rooms or areas without access restrictions.

Important Technical Specifications:

  • Model: TL800
  • Version: 1.0
  • Door Thickness Compatibility: 45 to 60mm (requires appropriate Spindle length).
  • Password Length: 6 to 12 digits (7 digits by default for generated passwords, with the last digit being '1').
  • Battery: Lithium Battery.
  • USB Adapter Requirement (for OLED Screen Model): DC 5V, 2A.
  • Connectivity: Wi-Fi for USmart Go APP integration.
  • Storage (OLED Screen Model): Supports TF card for storing photographs and videos.

Usage Features:

  • Installation: The installation process involves drilling holes, installing the mortise and cylinder, attaching the outdoor and indoor units, and securing them with screws. The direction of the latch can be adjusted if needed.
  • Resetting the Lock: Press and hold the Reset button for 5 seconds until an audio prompt is heard, then press '#' to confirm.
  • Activating the Lock: Touch the keypad with the back of your hand or fingers.
  • Mechanical Adjustment: Before formal use, mechanical adjustments can be made through a menu accessed by inputting "888#". This menu allows configuration of motor direction, motor torque, latch bolt drive time, auto lock, and latch bolt delay.
  • Administrator Registration: The first administrator is registered by activating the keypad, pressing '*#', and then providing a fingerprint (five times), group password, or access card.
  • Menu Mode Programming: Access the menu by activating the keypad and pressing '*+#'. Administrators verify their identity, then select functions from an audio-guided menu.
  • User Management: Add or delete users (by number, fingerprint, password, or card) through the menu.
  • System Settings: Configure passageway mode, auto lock, latch bolt delay, anti-prying detection, restore factory status, language, volume, date/time, and network configuration.
  • OLED Screen Model Usage:
    • Camera Mode: Press the Power On button to activate and view outside.
    • Menu Navigation: Press the Down button to enter the menu, then navigate between Camera, Files, and Set modes.
    • Record Mode: Choose between "Photograph" or "Record" (video) for saving media.
    • Continuous Shooting: Set to one, two, or five pictures per shooting.
    • Door Answer: Configure whether the model powers on automatically ("Auto") or requires manual activation ("Handmovement") when the doorbell is pressed.
    • Camera Angle: Select "All Angle" for a 360° view (may distort objects) or "Undeformed" for a standard view.
    • Auto Power Off: Schedule power-off timing.
    • Language: Change the display language.
    • Date/Time: Set the current date and time.
    • WIFI Quality: Adjust picture and video clarity under Wi-Fi configuration.
  • USmart Go APP Integration:
    • Download: Search "USmart Go" on app stores.
    • Account Creation: Register an account using a phone number or email.
    • Family Creation: Organize devices into "Families" within the app.
    • Security Password: Set a security password for two-step verification.
    • Connecting the Lock: Use the app to add the device via Wi-Fi, connecting to the lock's hotspot ("CloudHome-XXXX-16") and then to a valid Wi-Fi network.
    • Naming the Lock: Rename the lock in the app settings.
    • User Identification: Mark remote unlock events with user names in the app.
    • Check Records: View event records (locked/unlocked, doorbell alarms, unlock frozen alerts) on the lock page in the app.

Maintenance Features:

  • Low Battery Warning: The lock prompts "Low battery, please change!" when power is low, and "Low battery, shut down soon!" when critically low, preventing access to the Main Menu.
  • Format Function (OLED Screen Model): Deletes all records on the TF card.
  • Default Setting (OLED Screen Model): Resets all records on the TF card to default.
  • Firmware Version Check (OLED Screen Model): Allows users to check the current firmware version.
  • Initialization: Deletes all registered user data and restores factory settings. This is recommended after installation and before setting the first administrator to prevent unauthorized access.
  • Backup Enrollment: Allows administrators to change registered passwords and cards or register additional fingerprints after initial setup.

FCC Compliance:

The device complies with Part 15 of the FCC Rules, ensuring it does not cause harmful interference and accepts any received interference. It is designed to provide reasonable protection against harmful interference in residential installations. Users are advised to reorient/relocate receiving antennas, increase separation between equipment, connect to different circuits, or consult a technician if interference occurs. The device also complies with RF radiation exposure limits for an uncontrolled environment. Any unauthorized changes or modifications could void the user's authority to operate the equipment.

ZKTeco TL800 Specifications

General IconGeneral
BrandZKTeco
ModelTL800
CategoryLocks
LanguageEnglish

Related product manuals