H0412500.A - EN - 2013-02
5
2.2 Installing the TRi pH or TRi PRO module
• Turn o your Zodiac TRi salt chlorina-
tor and then ltraon by cung o the
main electricity supply in order to iso-
late the installaon.
• Close the isolang valves in the pipe-
work.
• Remove the silver cover by pressing the
sides and raising it, then unscrew the
four screws aaching the original (emp-
ty) lower module to the main unit.
• Remove the empty module and oer up
the TRi pH or TRi PRO module.
• Connect the ribbon cable from the TRi
pH or TRi PRO to the connector on the
TRi power pack.
• Put the TRi pH or TRi PRO module in po-
sion, replace the four screws and re-
place the silver cover.
• Do not reconnect the electricity supply unl the TRi pH or TRi PRO module, the sensor-holding POD and the pH
minus injecon pipe have been installed (see § 2.3.3).
• Always wait 2 minutes, parcularly when performing any technical work, between disconnecng the TRi from
the mains electricity supply and connecng the TRi pH or TRi PRO module.
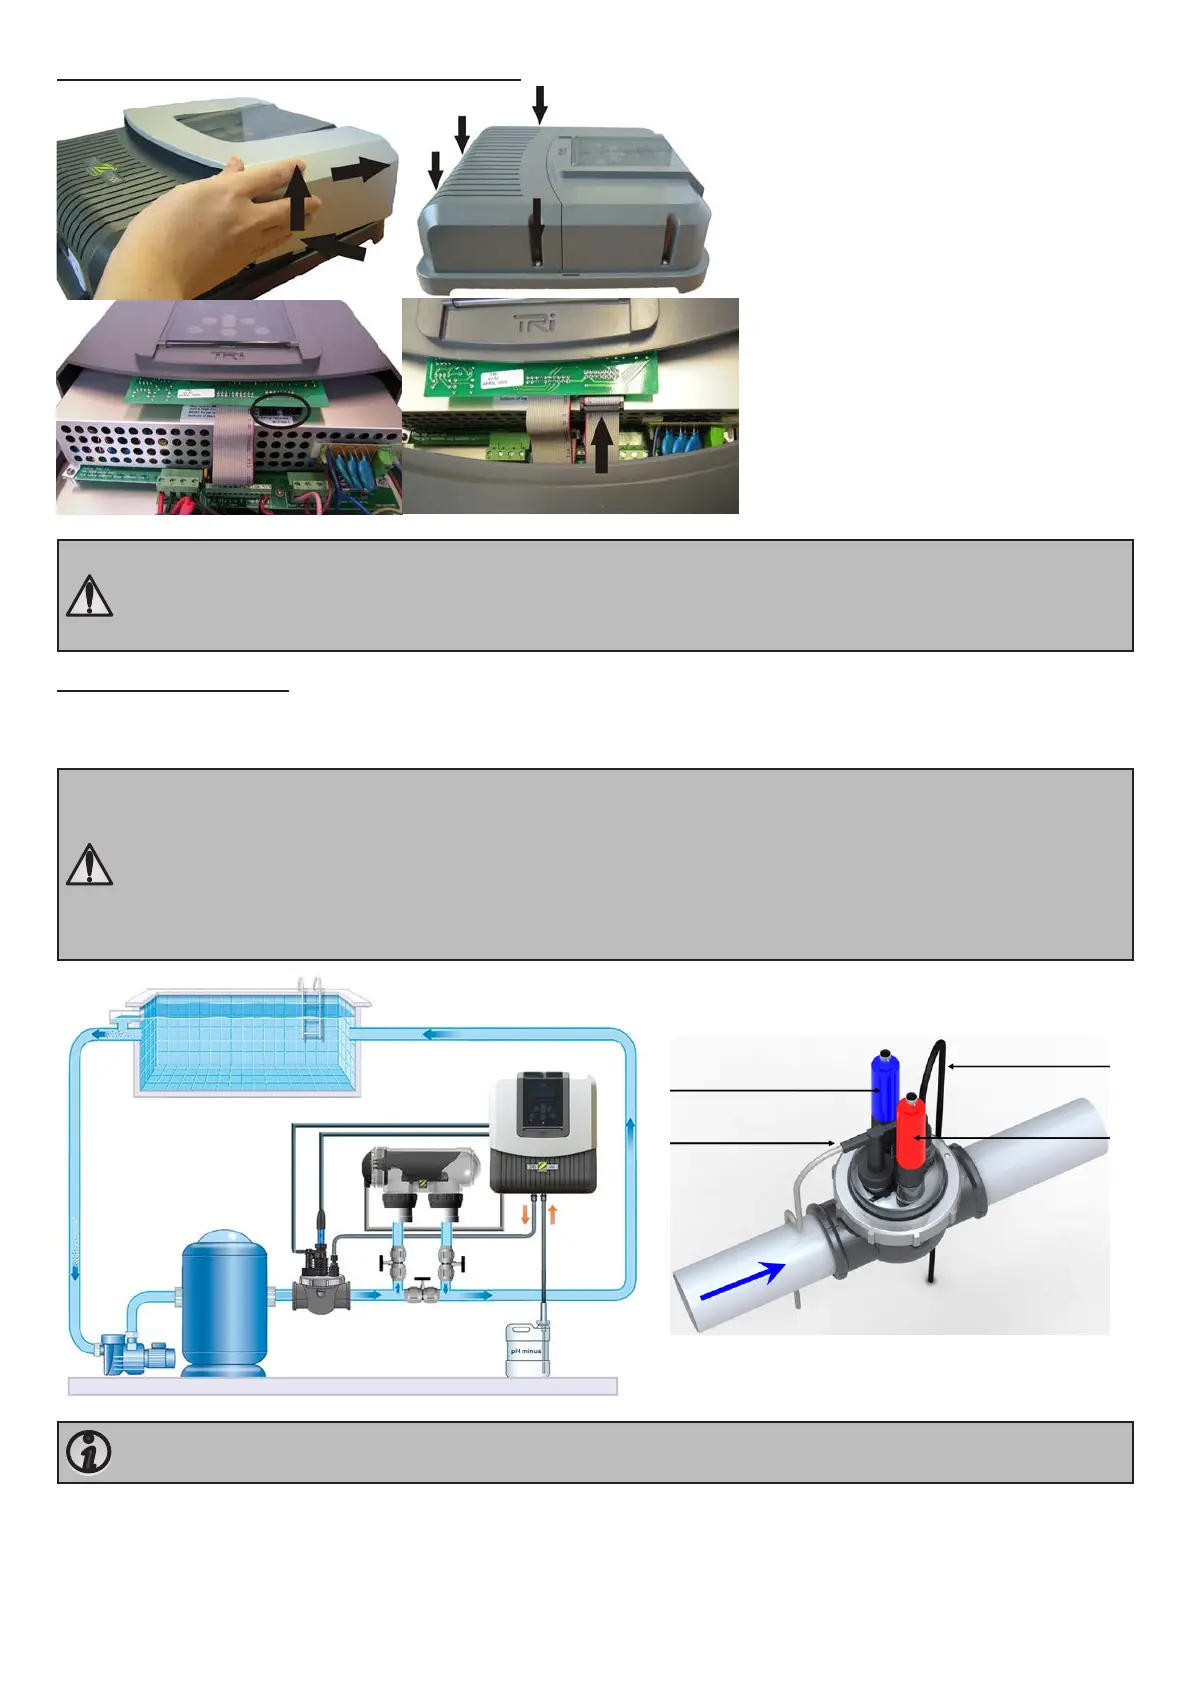
2.3 Installing the POD
The sensor-holding POD is a single assembly including the ow rate detector (used by your TRi chlorinator, see § 2.3.2),
the pH and ACL sensors and pH minus injecon.
• The TRi unit bypass valves must always be open.
• The sensor-holding POD must always be posioned on a horizontal pipe so that the sensors are vercal.
• The POD must be the rst unit ed aer the pool lter.
• If the pool is ed with a heang system (heat pump, heat exchanger, electric heater, etc.), the POD must be
installed before it (to take readings on unheated water).
• We recommend posioning the POD more than 20 cm from an elbow in the pipe.
• The sensor cables must not be posioned near high voltage mains electricity cables.
pH sensor
Flow switch
Water circulaon direcon
pH minus injecon
ACL sensor
A badly-installed sensor may give false readings and cause inappropriate operaon of the TRi unit. Neither the
manufacturer nor the unit shall be liable in this event.