H03818-00.A3 EN – 2012-03 3
1. Information before use
1.1 Important
Ensure that the unit has not been damaged in transit (impact, broken parts, etc.). Please report any damage,
however minor, to your retailer immediately, before using.
1.2 Package contents
The packaging should contain the following items:
• The robot
• a transport caddy,
• a control unit,
• a user manual,
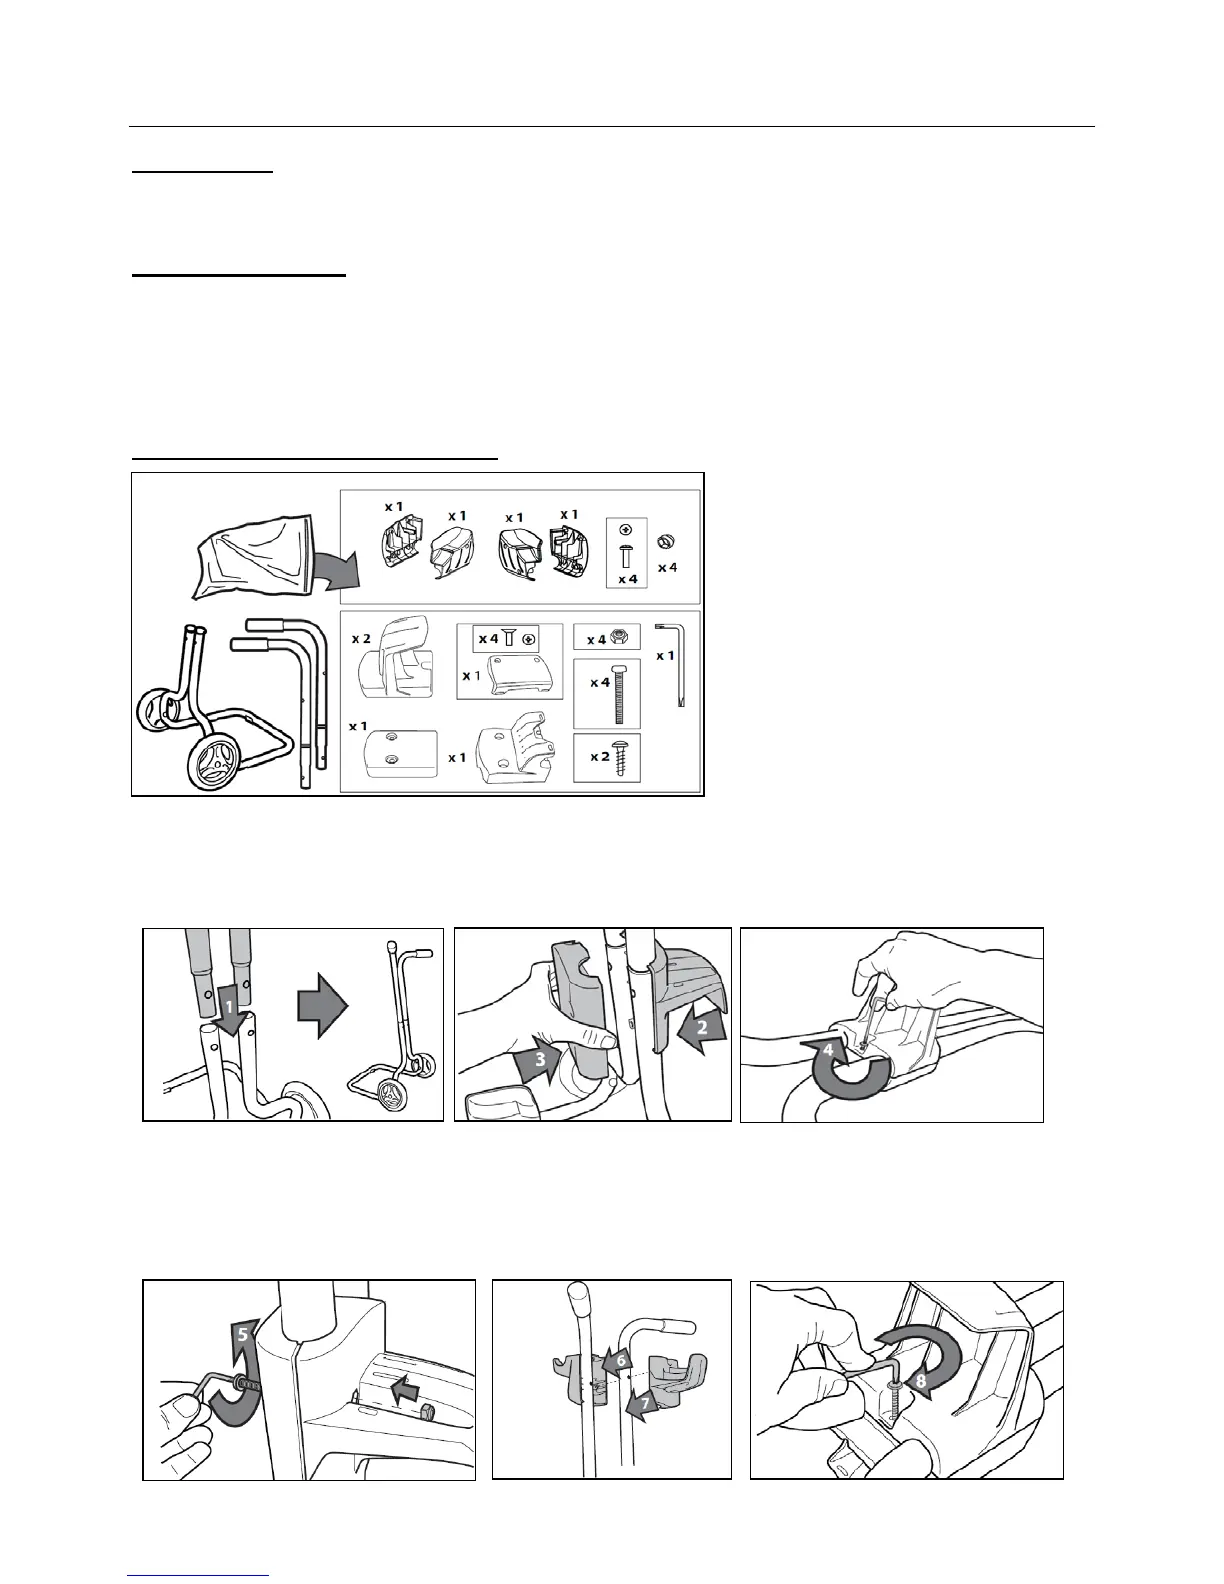
1.3 Assembling the transport trolley
• Insert the upper tubes (handles) into the bottom tubes on the cart as shown (1). Make sure the upper tubes
(handles) are in the proper orientation and align the screw holes.
• Position the bottom power cable hook as shown (2). Place the cable hook plate opposite the power cable hook.
Secure using a screw and tightening with the Torx® wrench (3).
• Secure the cable hook plate using two bolts and two nuts and tighten with Torx® wrench (4).
• Position the power cable hook and control unit hook on the upper tubes (5).
Make sure the upper tubes (handles) are in the proper orientation.
• Secure the power cable hook and control unit hook around the tubes using a screw and hand tighten with the
Torx wrench (supplied with unit). (6).