017
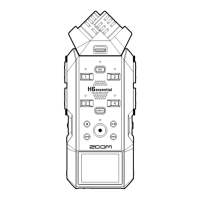
)\[[VUVWLYH[PVUZ<ZPUN[OL76>,9/63+Z^P[JOHUK[\YUPUN[OLWV^LYVUVɈ
<ZPUN[OL76>,9/63+Z^P[JOHUK[\YUPUN[OLWV^LYVUVɈ
3LM[ZPKL
POWER/HOLD
switch
1
;\YUHSSJVUULJ[LK
LX\PWTLU[VɈÄYZ[
2
0UZLY[HU:+JHYK
3
:SPKL[OL76>,9
Z^P[JO[V[\YU[OL
WV^LYVUHUKZ[HY[\W
4
Turn connected
PUZ[Y\TLU[ZHUK
TVUP[VYPUNLX\PWTLU[
VUPU[OH[VYKLY
;\YUPUN[OLWV^LYVUHUKZ[HY[PUN\W
• Before turning the power on, lower the
volume of instruments and monitors
connected to the H4n Pro.
• If the display reads
“No Card” when
starting up, make
sure that an SD
card is inserted
correctly.
• If the display says “Reset DATE/TIME”
when starting
up, the date and
time have been
set to their default
values.
9LM
P.026
Date and time setting
;\YUPUNT\S[PWSLKL]PJLZVU
When many devices are connected, turn
them on in the following order.
Instruments
H4n Pro
ON ON ON ON
Mixer Amp