14
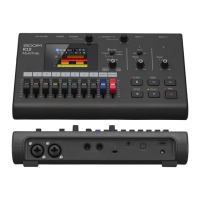
Functions of parts
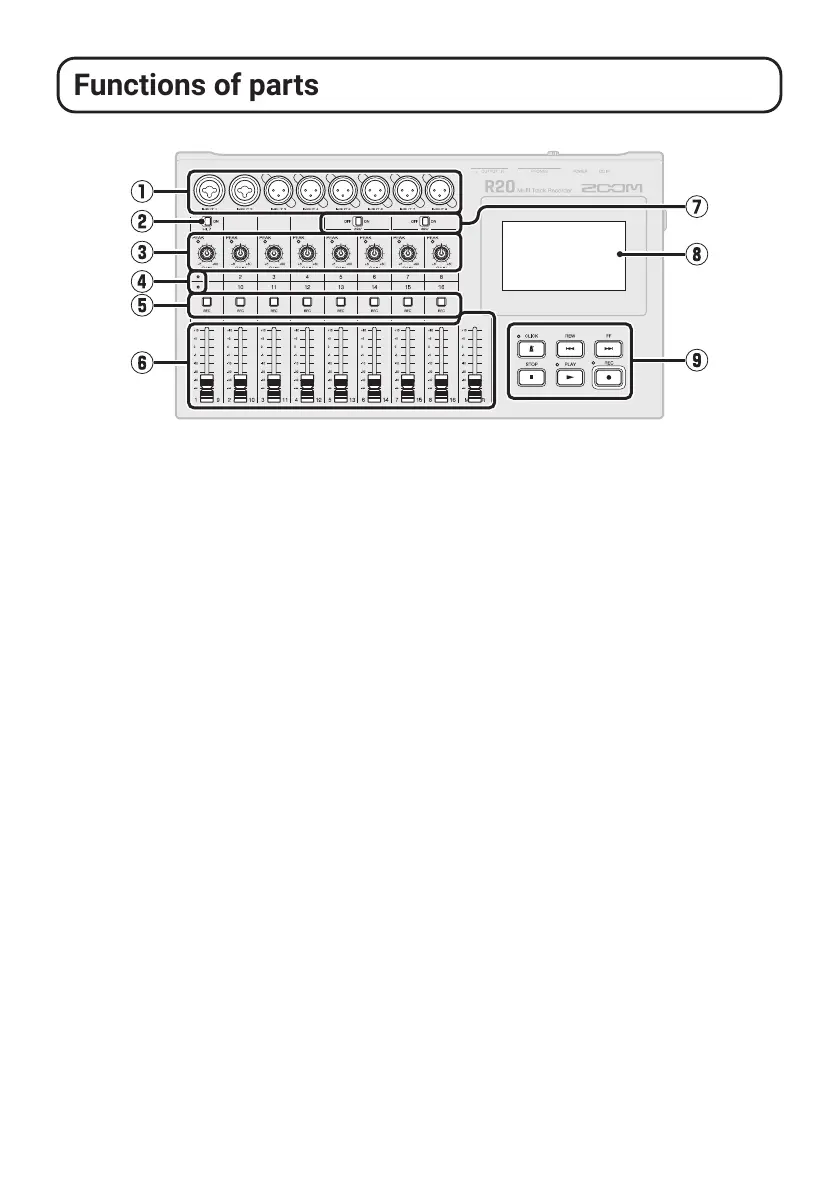
①
Input jacks
Use INPUTS 1 and 2 to connect mics,
keyboards and guitars. These support XLR
and 1/4-inch phone (unbalanced) plugs.
Use INPUTS 3–8 to connect mics and
keyboards. These support XLR plugs.
②
Hi-Z switch
Turn Hi-Z on/off for INPUT 1. Turn it on as
necessary for the connected guitar or bass.
③
Input PEAK indicators/GAIN knobs
Use these input gain knobs to adjust input
signals. Adjust them so that the PEAK
indicators do not light.
④
Track indicators
These show whether the channel inputs
and the faders are connected to tracks 1–8
or 9–16.
⑤
Track REC buttons
Press these buttons to enable recording on
tracks. Buttons light red when recording is
enabled.
⑥
Channel/MASTER faders
Channel faders: These adjust individual
track signal levels in a range from −∞ to
+10 dB.
MASTER fader: This adjusts the signal
levels output from the OUTPUT jacks in a
range from −∞ to +10 dB.
⑦
PHANTOM switches
These turn +48V phantom power on/off.
Turn these on when, for example, connect-
ing condenser mics that support phantom
power to INPUTS 5–8.
⑧
Touchscreen
This shows various types of information
and allows operation by touch.
⑨
Other buttons
CLICK: This turns the metronome on/off.
The indicator lights when it is on.
REW: This moves the playback position
one bar back. Press and hold to search
backward.
FF: This moves the playback position one
bar forward. Press and hold to search
forward.
STOP: This stops recording/playback. Press
when stopped to move the recording/play-
back position to the project beginning.
PLAY: This starts/pauses playback of
recorded les. The indicator lights during
playback and recording.
REC: This starts recording. The indicator
lights during recording.

 Loading...