17
Using Digital Audio Equipment
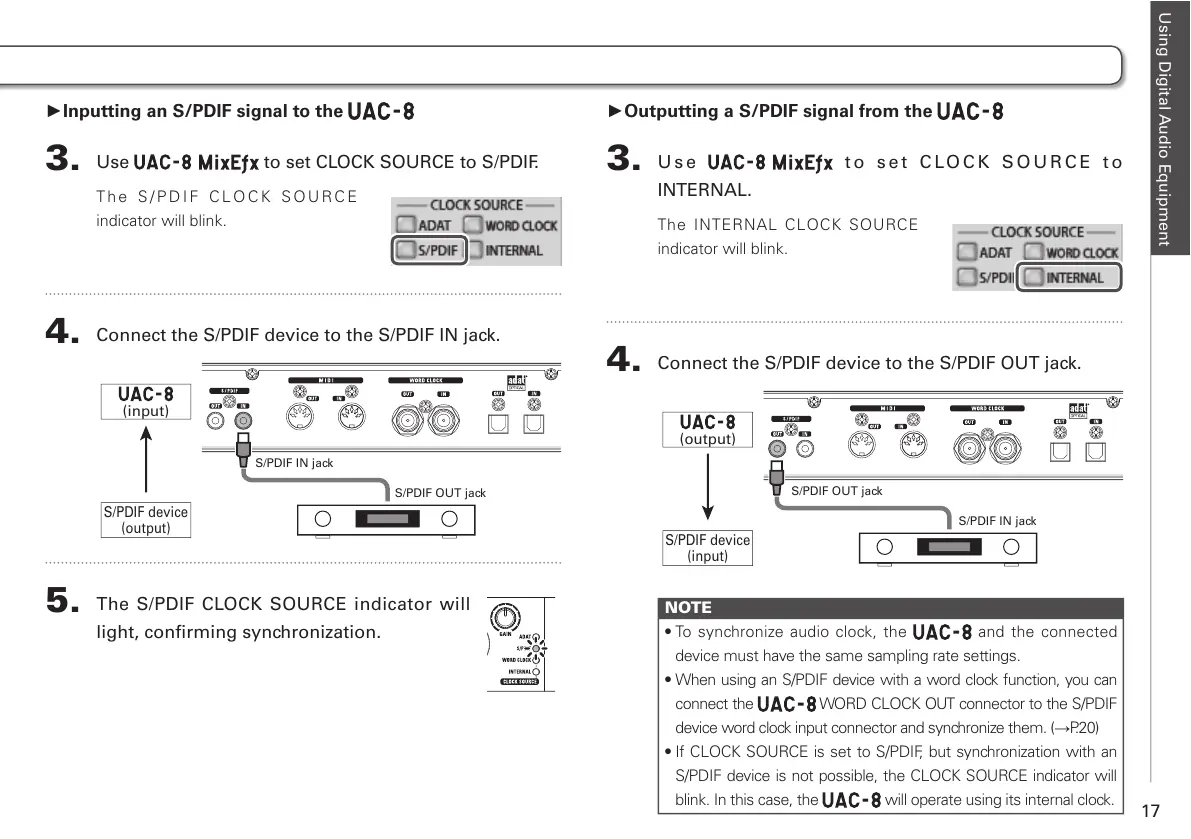
►Inputting an S/PDIF signal to the
3.
Use to set CLOCK SOURCE to S/PDIF.
T h e S / P D I F C L O C K S OU RC E
indicator will blink.
4.
Connect the S/PDIF device to the S/PDIF IN jack.
S/PDIF OUT jack
S/PDIF IN jack
S/PDIF device
(output)
(input)
5.
The S/PDIF CLOCK SOURCE indicator will
light, confirming synchronization.
►Outputting a S/PDIF signal from the
3.
Use t o s e t C LO C K S O U R C E t o
INTERNAL.
The INTERNAL CLOCK SOURCE
indicator will blink.
4.
Connect the S/PDIF device to the S/PDIF OUT jack.
S/PDIF IN jack
S/PDIF OUT jack
S/PDIF device
(input)
(output)
NOTE
t5P TZODISPOJ[F BVEJPDMPDLUIF
and the connected
device must have the same sampling rate settings.
t8IFOVTJOHBO41%*'EFWJDFXJUIBXPSEDMPDLGVODUJPOZPVDBO
connect the WORD CLOCK OUT connector to the S/PDIF
device word clock input connector and synchronize them. (→P. 2 0 )
t*G$-0$,4063$&JTTFUUP41%*'CVUTZODISPOJ[BUJPOXJUIBO
S/PDIF device is not possible, the CLOCK SOURCE indicator will
blink. In this case, the will operate using its internal clock.