31
Special Set-Up Procedure (Continued)
Upper Taping Head Frame Re-positioning
Figure 5-3
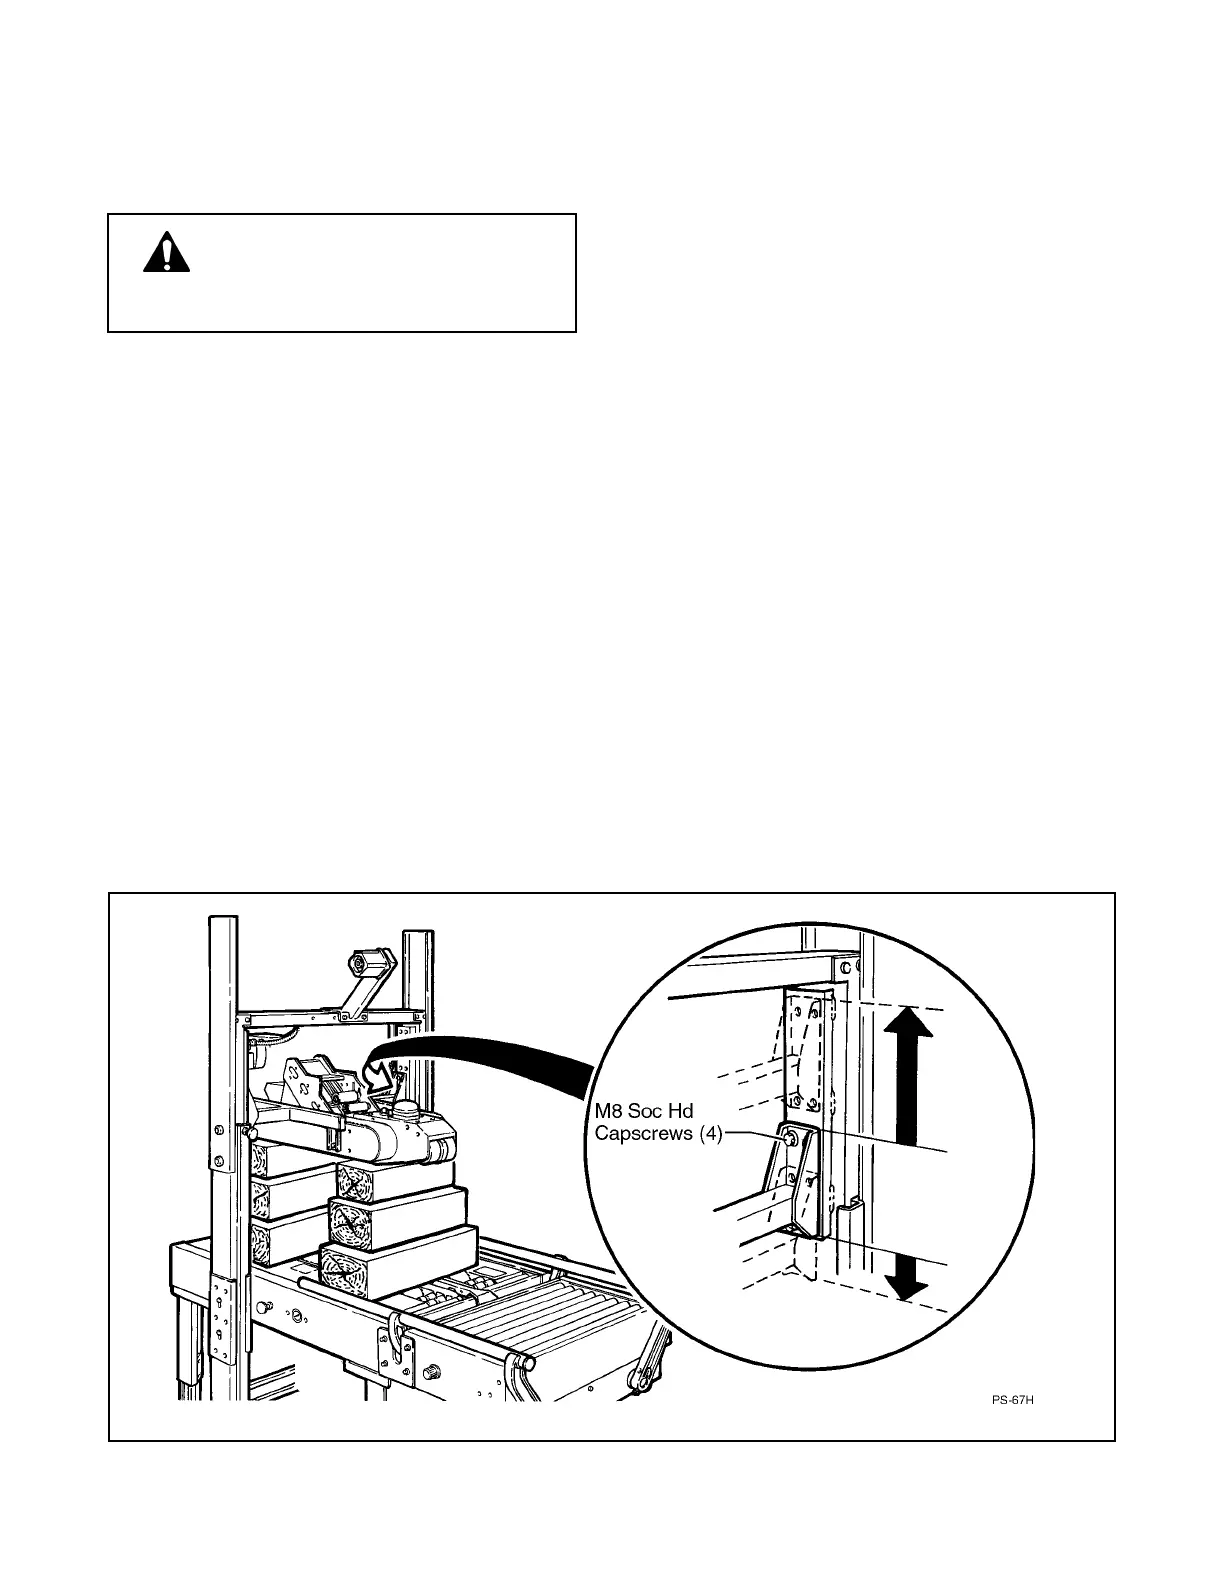
Figure 5-3 Upper Taping Head Frame, Re-Positioning
WARNING It is recommended that
no less than two people assist on this
set-up or severe injury or equipment
damage could result.
1. Raise and latch the upper taping head frame in
its full "Up" position.
2. Place solid blocks (minimum 305 mm [12
inches] high) beneath upper frame in front of
upper taping head applying roller and behind
taping head buffing roller. Important blocks
must be the same height in order to keep
drive belts parallel with machine bed.
3. Unlatch upper frame and allow it to come to rest
on blocks.
4. Turn off and disconnect air supply to machine.
5. Remove the four M8 socket head capscrews with
6 mm hex key wrench from each side of the
upper frame crossbar.
6. Move inner column assembly up/down until the
desired hole location is achieved. Note: When
adjusting frame to lowest position on
columns (small boxes), the four mounting
holes ABOVE the upper frame crossbar are
used.
7. Install four M8 socket head capscrews on each
side of upper frame crossbar. Do not tighten.
8. Check to be sure upper drive belts are parallel to
machine bed. Measure from machine bed to
upper belts, front and rear and adjust upper
frame as necessary to make it parallel with
machine bed. Tighten belts installed in step 8.
9. Connect/turn on air supply to machine and raise
upper frame, latch in place, remove blocks and
unlatch upper frame allowing it to return to its
rest position
 Loading...