Do you have a question about the 3M 3M-Matic 8000a and is the answer not in the manual?
Contact information for technical help and ordering manuals.
Details about the machine's identification plate for referencing.
Glossary of terms and abbreviations used in the manual.
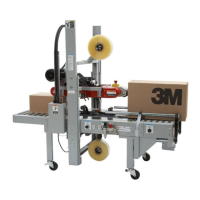
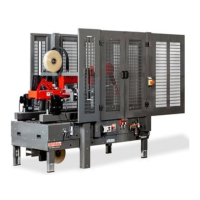
Details the machine's specifications, purpose, and design.
Guidance on understanding and utilizing the manual for safe operation.
Information to identify the machine and its manufacturer.
Contact details for obtaining technical support and service.
Outlines the equipment warranty terms, limitations, and remedies.
Essential safety instructions for operating and maintaining the equipment.
Explains safety alert symbols and their potential consequences.
Lists various warnings and precautions to prevent hazards.
Defines the necessary qualifications for machine operators.
Specifies the recommended number of operators for safe operation.
Guidelines for safe machine use and operator qualification definitions.
Highlights hazards that cannot be entirely eliminated.
Advice on preventing unavoidable hazards.
Recommends personal safety equipment and practices.
Lists forbidden actions to ensure safe operation.
Details the skill levels needed for various machine operations.
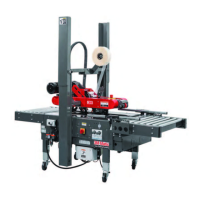
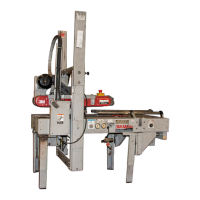
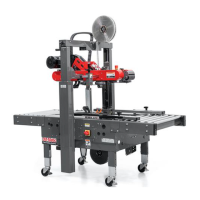
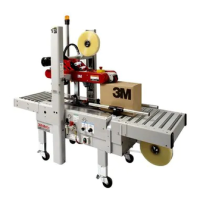
Identifies and illustrates the locations of machine components.
Lists warnings and corresponding replacement labels with part numbers.
Electrical specifications including voltage, frequency, and wattage.
Details the machine's operational speed and rate.
Specifies environmental conditions for optimal machine performance.
Information on the acoustic pressure and noise levels of the machine.
Guidelines for proper machine setup and configuration.
Specifies the type of tape suitable for the machine.
Indicates the range of tape widths compatible with the machine.
Specifies the maximum tape roll diameter and core size.
Details the standard length for tape application legs.
Describes the specifications for the box board material.
Outlines the capacities for box weight and dimensions.
Illustrates box height ranges based on machine positioning.
Provides detailed physical dimensions of the machine.
Instructions for safe shipment and handling of the packaged machine.
Details options for packaging machines for international shipping.
Guidance on moving and transporting the machine without its packaging.
Recommendations for storing the machine properly.
Steps for safely removing the machine from its shipping container.
Guidelines for disposing of packaging materials responsibly.
Specifies the environmental conditions for machine installation.
Details the necessary space and clearance for operation and maintenance.
Lists the tools provided with the machine for setup.
Instructions for adjusting the machine's bed height.
Steps for removing securing plastic ties from the machine.
Final steps for completing the machine assembly.
Procedures for finishing the taping head installation.
Instructions for installing an optional outboard tape roll holder.
Checks to perform before connecting the machine electrically.
Steps for connecting the machine to the power supply.
Explains how the machine operates during its working cycle.
Defines the machine's single automatic operating mode.
Steps for properly stopping the machine during normal operation.
Describes the function and location of the emergency stop button.
Details the operation of knobs used for adjusting box width.
Explains how to use the crank for adjusting box height.
Identifies the main switch for turning the machine on and off.
Describes the function and location of the emergency stop button.
Information on the blade guards that protect the cutting blades.
Details on how to use the emergency stop button to halt the machine.
Explains the electric system protection and circuit breaker function.
Steps for adjusting the machine to accommodate different box widths.
Procedure for setting the machine to the correct box height.
How to adjust the compression rollers for proper flap sealing.
Instructions for modifying the tape leg length for different box types.
Advanced steps for re-positioning outer columns for height adjustment.
How to test adjustments by running boxes through the machine.
Guides the operator on the correct stance and workflow.
Steps for safely starting the machine before operation.
Procedures for commencing production after setup.
Instructions for replacing and threading the tape.
Refers to the set-up section for adjusting box sizes.
Guidelines for cleaning the machine components.
Summary of adjustments and operator qualifications needed.
How to inspect the machine's safety features.
A guide to diagnosing and resolving common operational problems.
Safety precautions to observe during maintenance and repair tasks.
Information on tools and spare parts included with the machine.
Schedule for routine inspections and maintenance tasks.
Procedures for inspections before and after maintenance.
How to verify the proper functioning of safety features.
Routine cleaning procedures for the machine.
How to clean the cutter blade to prevent adhesive buildup.
Step-by-step guide for replacing the drive belts.
Guidance on checking and replacing drive pulley rings for wear.
Instructions for adjusting drive belt tension for optimal performance.
Procedures related to the maintenance and adjustment of taping heads.
A log for recording performed maintenance operations.
Information on the proper disposal of the machine according to regulations.
Actions to take in case of emergencies like fire or danger.
Declaration of the machine's compliance with standards.
Information regarding any hazardous substances emitted by the machine.
Electrical diagrams illustrating the machine's wiring and components.
Instructions and information for ordering replacement parts.
Lists available optional accessories and their part numbers.
Contact info for technical help, replacement parts, and manuals.
Details about the identification plate for referencing machine info.
Outlines warranty terms, limitations, and remedies for taping heads.
Covers safety, handling, installation, operation, and specs.
Guidance on understanding and utilizing the manual for safe operation.
Explains safety alert symbols and their potential consequences.
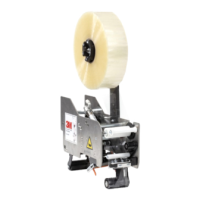
Specifies the type of tape suitable for the taping heads.
Indicates the range of tape widths compatible with the heads.
Specifies the maximum tape roll diameter and core size.
Details the standard length for tape application legs.
Specifies capacities for box size when used with case sealers.
Details the operational speed and rate for the taping heads.
Specifies environmental conditions for optimal head performance.
Provides physical dimensions and weight of the taping heads.
Instructions for inspecting the taping head assembly upon receipt.
Guidelines for mounting taping heads in existing machinery.
Instructions for adjusting tape leg length for different box types.
Procedures for adjusting tape width or aligning tape.
Steps for loading tape into the upper taping head.
Steps for loading tape into the lower taping head.
Step-by-step guide for replacing the taping head blades.
Information on the function and maintenance of blade guards.
Details on the blade oiler pad and its maintenance.
Procedures for cleaning taping head components to prevent wear.
Instructions for replacing the applying and buffing rollers.
Adjusting the tape latch for proper alignment with tape core width.
Instructions for adjusting the tape drum friction brake tension.
Adjusting the spring for applying/buffing roller pressure.
Procedures for adjusting the one-way tension roller.
Adjusting tape leg length for different box dimensions.
Adjusting the one-way tension roller for leading tape leg length.
Steps to convert tape leg length from 70mm to 50mm.
Guide to diagnosing and resolving common taping head problems.
Lists spare parts recommended for replacement due to normal wear.
Refers to other sections for replacement parts ordering information.
Provides illustrations and lists for replacement parts.
Contact info for technical help, replacement parts, and manuals.
Details about the identification plate for referencing machine info.
Outlines warranty terms, limitations, and remedies for taping heads.
Covers safety, handling, installation, operation, and specs.
Guidance on understanding and utilizing the manual for safe operation.
Explains safety alert symbols and their potential consequences.
Specifies the type of tape suitable for the taping heads.
Indicates the range of tape widths compatible with the heads.
Details the standard length for tape application legs.
Specifies capacities for box size when used with case sealers.
Specifies environmental conditions for optimal head performance.
Provides physical dimensions and weight of the taping heads.
Instructions for inspecting the taping head assembly upon receipt.
Guidelines for mounting taping heads in existing machinery.
Instructions for adjusting tape leg length for different box types.
Procedures for adjusting tape width or aligning tape.
Steps for loading tape into the upper taping head.
Steps for loading tape into the lower taping head.
Step-by-step guide for replacing the taping head blades.
Information on the function and maintenance of blade guards.
Details on the blade oiler pad and its maintenance.
Procedures for cleaning taping head components to prevent wear.
Instructions for replacing the applying and buffing rollers.
Adjusting the tape latch for proper alignment with tape core width.
Instructions for adjusting the tape drum friction brake tension.
Adjusting the spring for applying/buffing roller pressure.
Procedures for adjusting the one-way tension roller.
Adjusting tape leg length for different box dimensions.
Adjusting the one-way tension roller for leading tape leg length.
Steps to convert tape leg length from 70mm to 50mm.
Guide to diagnosing and resolving common taping head problems.
Lists spare parts recommended for replacement due to normal wear.
Refers to other sections for replacement parts ordering information.
Provides illustrations and lists for replacement parts.
| Brand | 3M |
|---|---|
| Model | 3M-Matic 8000a |
| Category | Food Saver |
| Language | English |