EasyManua.ls Logo

ABB ACH580-01 BxR Frame R1 - User Manual

ABB ACH580-01 BxR Frame R1
8 pages
To Next Page IconTo Next Page
Loading...
ACH580-01 BxR, UL Type 1/12
Frame R1/R2
Base drive replacement instructions
Purpose or Scope
The following are the instructions for replacing an ACH580-01 UL Type 1 and 12 (Frames
R1 & R2) drive in BxR enclosures.
Equipment required*:
Replacement drive (see note below)
T20 bit
T30 bit
PZ2 bit
PZ3 bit
Torque wrench
Zip ties
Basic overview of steps
Back-up drive parameters (if you can)
Remove power and verify after 5 minutes
Open enclosure
Disconnect all wiring
Remove flange plate
Remove drive
Prepare replacement drive
Remove conduit assembly
Install in reverse order
Check connections
Power drive
Reprogram and test
Notes and cautions
CAUTION! Review complete safety and electrical considerations prior
to replacing the drive. See ACH580 IOM (3AXD50000049127).
CAUTION! Two people are recommended for this job. The drive is
heavy and can fall, causing property damage and injury.
NOTE: UL Type 12 drives require a UL Type 12 replacement drive,
UL Type 1 drives are not allowed as substitutes for UL Type 12.
* Not all of these tools are needed for each frame size.
Question and Answer IconNeed help?

Do you have a question about the ABB ACH580-01 BxR Frame R1 and is the answer not in the manual?

ABB ACH580-01 BxR Frame R1 Specifications

General IconGeneral
BrandABB
ModelACH580-01 BxR Frame R1
CategoryDC Drives
LanguageEnglish

Summary

Base Drive Replacement Instructions

Purpose and Scope

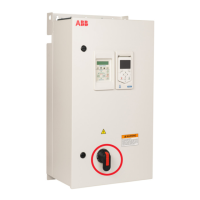
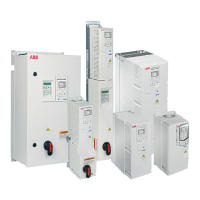
Details the instructions for replacing ACH580-01 UL Type 1 and 12 drives in BxR enclosures.

Equipment Required

Lists essential tools and components needed for the drive replacement procedure.

Basic Overview of Steps

Provides a high-level summary of the key actions involved in replacing the drive.

Notes and Cautions

Highlights critical safety warnings, precautions, and important notes for the replacement.

Step 1: Power Off and Discharge

Back-up Parameters

Optional step to back up drive parameters before disconnecting power.

Disconnect Power

Turn off source power and wait 5 minutes for DC bus capacitors to discharge.

Step 2: Open Enclosure

Rotate Latches

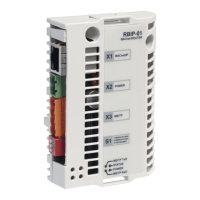
Rotate enclosure latches clockwise to open the enclosure door.

Step 3: Verify Power Off

Perform Voltage Check

Check for absence of voltage to ensure the system is safe.

Disconnect Control Wiring

Disconnect control wiring from the Control Unit if present.

Step 4: Disconnect Drive Wiring

Remove CDPI and RS485 Cable

Cut zip ties, remove CDPI and RS485 cable from the drive.

Remove Additional I;O Wiring

Ensure any other drive I/O wiring is also removed.

Step 5: Remove Input Wires

Loosen Input Terminals

Using a PZ2 bit, loosen and remove wires from the Input Terminals.

Step 6: Remove Motor Wires

Loosen Motor Terminals

Using a PZ2 bit, loosen and remove wires from the Motor Terminals.

Step 7: Remove Ground Wire

Loosen Ground Terminal

Using a PZ3 bit, loosen and remove the ground wire.

Step 8: Remove Flange Plate

Remove Securing Screws

Using a T20 bit, loosen and remove six screws securing the flange plate.

Step 9: Loosen Drive Securing Screws

Loosen M6 Screws

Using a T30 bit, loosen the four M6 screws securing the drive.

Step 10: Remove Drive

Lift Drive Off Screws

Carefully push drive up and lift it off the screws and out of enclosure.

Step 11: Prepare Replacement Drive

Unpack Replacement Drive

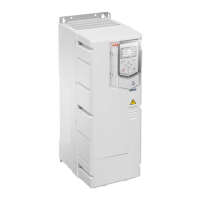
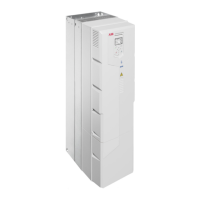
Unpack the new drive and remove its cover by pushing up on sides.

UL Type Compatibility

Note that UL Type 12 drives require UL Type 12 replacements.

Step 12: Remove Conduit Assembly

Remove M4 x8 Screws

Using a T20 bit, loosen and remove two M4x8 screws for conduit assembly.

Step 13: Install Replacement Drive

Position Drive

Slide drive mounting holes over the four screws and slide drive in place.

Torque Mounting Screws

Torque all four mounting screws to 27 in-lb (3 Nm).

Step 14: Secure Drive

Attach Drive with Screws

Place collar, then secure drive using six M4x20 screws.

Torque Drive Screws

Using a T20 bit, torque the six screws to 14 in-lb (1.5 Nm).

Step 15: Secure Ground Wire

Connect and Torque Ground Wire

Using a PZ3 bit, secure the ground wire to the drive, torque to 14 in-lb (1.5 Nm).

Step 16: Connect Input Wires

Wire Input Terminals

Connect input wires (U1, V1, W1) to drive input terminals L1, L2, L3.

Torque Input Terminals

Torque terminals to 5 in-lb (R1) or 14 in-lb (R2) using PZ2 bit.

Step 17: Connect Motor Wires

Wire Motor Terminals

Connect motor wires (U2, V2, W2) to drive motor terminals T1/U, T2/V, T3/W.

Torque Motor Terminals

Torque terminals to 5 in-lb (R1) or 14 in-lb (R2) using PZ2 bit.

Step 18: Re-install Control Unit Components

Re-install CDPI

Re-install CDPI into control unit and secure with zip ties.

Reconnect RS485 Terminal Block

Reconnect RS485 terminal block to EFB and secure with zip ties.

Reconnect Control Wiring

Reconnect any control wiring removed in previous steps.

STO Warning

Configuration does not support Safe Torque Off (STO) in bypass mode.

Step 19: Close Enclosure Door

Rotate Latches Counterclockwise

Close the enclosure door and rotate latches counterclockwise.

Step 20: Power Up and Test

Power and Reprogram Drive

Power the drive and reprogram it with necessary parameters.

Test Operation

Test and verify drive operation and correct motor direction.

Save Parameters

Back up and save parameters to the keypad before returning to service.

Related product manuals