6
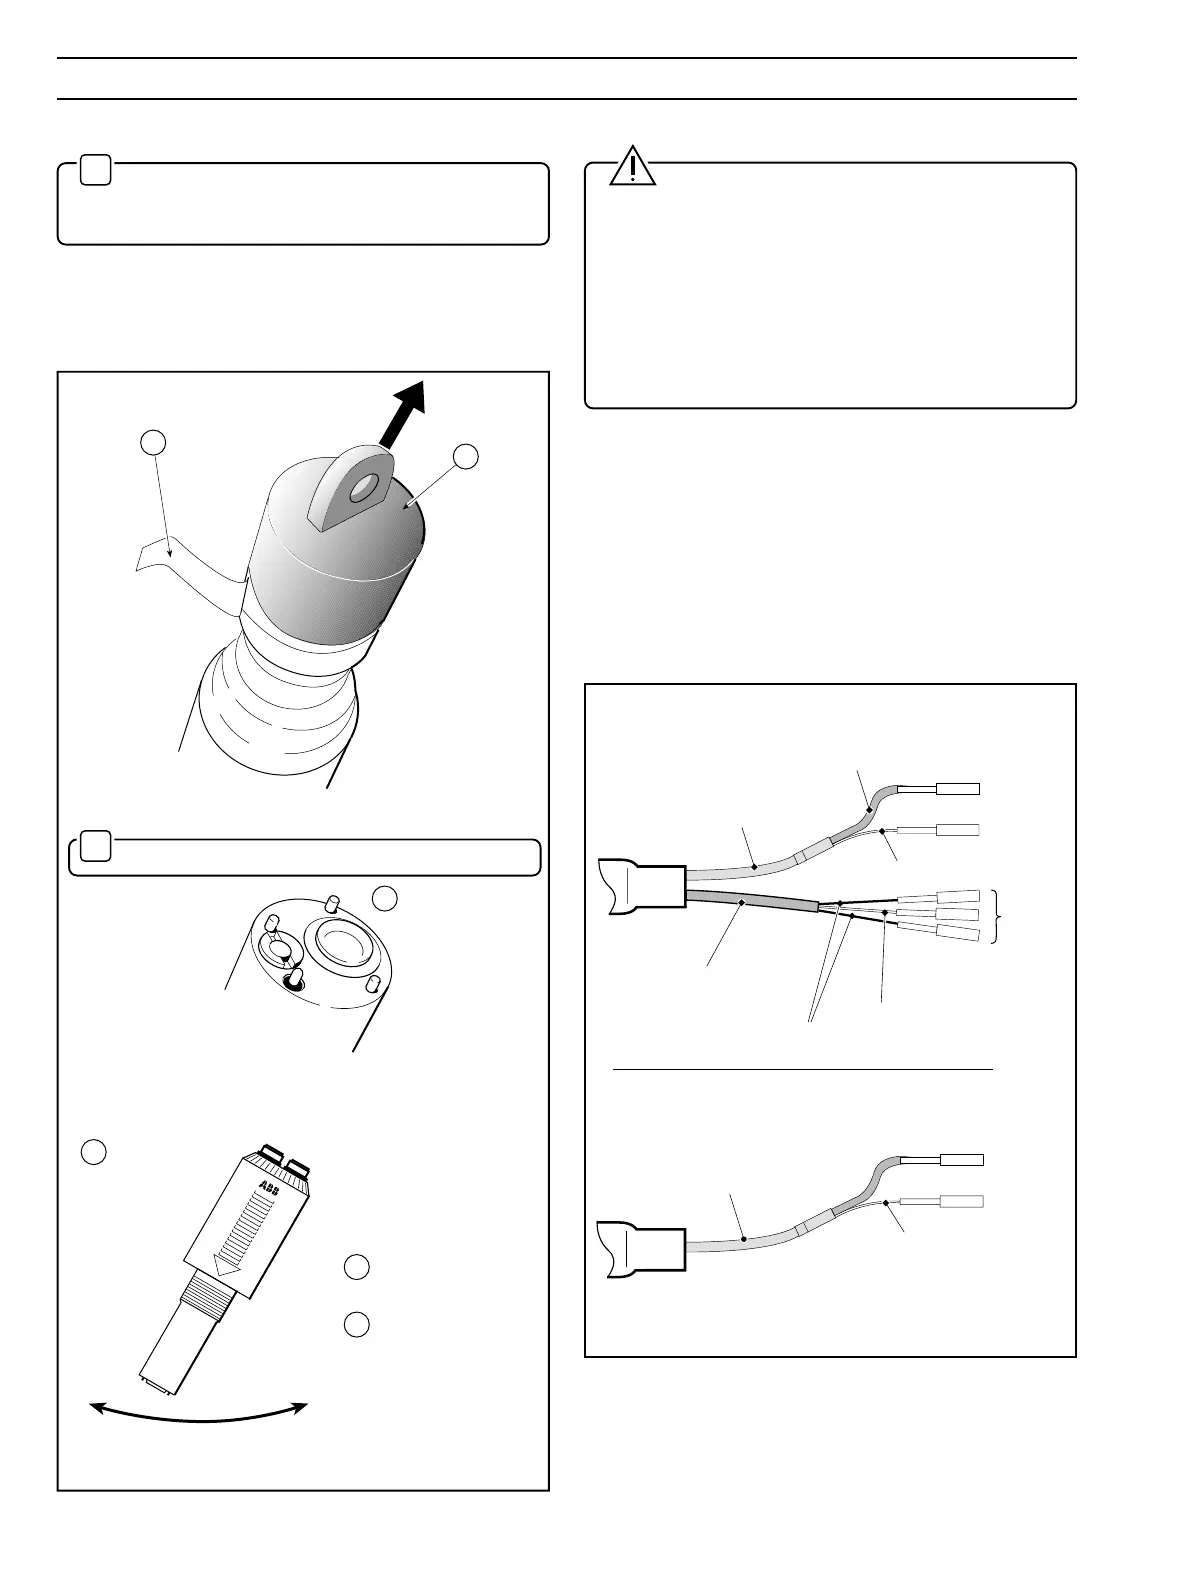
2.3 Preparing the Electrode Cartridge – Fig. 2.6
✶
Important Note. Before preparing the electrode
cartridge, read through Section 2.4 to become familiar
with the appropriate installation procedure.
The procedure in Fig. 2.6A is appropriate for both pH and
redox (ORP) electrode cartridges. The cartridge is supplied
with a protective cap filled with a 7 pH buffer solution and
should not require pre-conditioning; it is ready for immediate
use.
…2 INSTALLATION
2.4 Installing the Electrode Cartridge – Fig. 2.6
Caution
• Ensure an ‘O’ ring is fitted to seal each cable connector.
• Tighten each plug to ensure a good seal. It is vital that
the terminations are kept dry at all times.
• Ensure the cable is fed through the dip system tube
before the cable is connected. To avoid the risk of damp/
corrosive air damaging the cable plugs, connect to the
electrodes as soon as possible.
2.4.1 In-line pH Systems
a) Fit the flow cell into the pipeline observing all safety
precautions. Fit isolating valves where necessary to
enable safe access to the sensor for maintenance
purposes.
b) Ensure that all connections are tight.
c) Connect the tagged end of the cable to the 4600 Series pH/
Redox meter – see Fig. 2.7 and Table 2.1.
Grey
Blue
Red
White
Measuring
Electrode
Reference
Temp.
Comp.
Measuring
Electrode
Reference
Grey
Co-ax Inner
Co-ax Inner
A – pH Systems
B – Redox (ORP) Systems
Black
Fig. 2.7 Cable Termination – 4600 Transmitters
Fig 2.6 Removing the Protective Cap
✶
Note. Retain protective cap and tape for future use.
Fit cartridge –
see Section 2.4.
5
6
Calibrate –
see Section 3.
3
Rinse with
demineralised
water.
Unwind adhesive tape.
Pull off
protective
cap.
1
2
Shake gently
to dislodge air
bubbles.
4