To charge your charger, follow these steps:
1. If the charger is in the charging apparel, remove the charger from the apparel before1.
charging.
NOTE: The charging apparel is not intended to be used while charging the charger.
2. Plug the power adapter into an electrical outlet.2.
NOTE: While the charger is charging, it should be placed on a stable surface, such
as a table, counter, or oor.
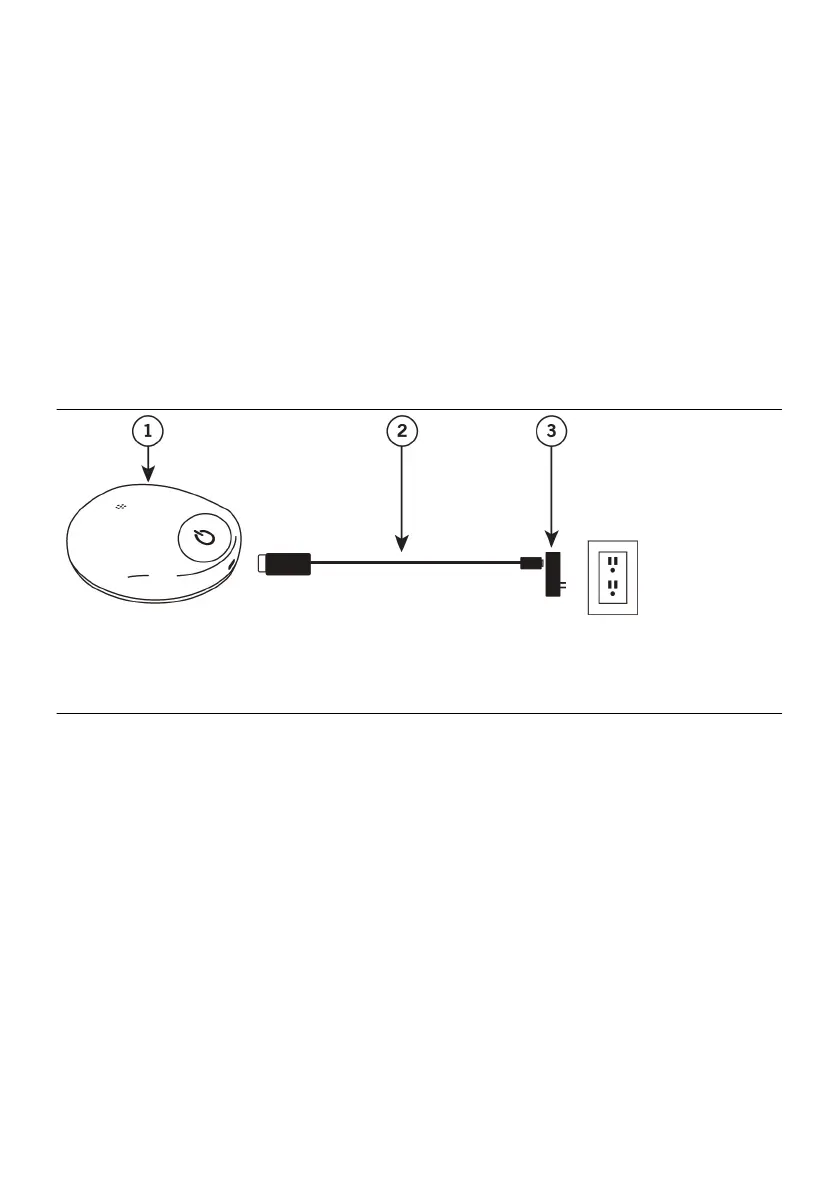
3. Connect the charging cable and power adapter.3.
4. Plug the charging cable into the charger. If the charger is connected successfully to4.
the charging cable and power adapter, the charger beeps once and a segment of the
baery icon blinks and then turns o. Once the charger is fully charged, all the
segments of the baery icon illuminate for 60 seconds and then turn o.
Figure 3. Connecng components to charge the charger
1. Charger1.
2. Charging cable2.
3. Power adapter3.
NOTE:
▪ While the charger is charging, it cannot be used to charge the generator.▪
▪ If your charger is not charging, you may be using an incorrect cable or power▪
adapter. Refer to the appendix for technical specicaons.
5. When you are ready to use the charger, unplug the charging cable from the charger.5.
The power adapter connected to the charging cable can remain plugged into the
electrical outlet.
While the charger is being charged, the charger is able to communicate with the paent
controller. The paent controller indicates the charger baery level and when the
charger is being charged.
Seng Up the Charging Apparel
Your charging system comes with reusable charging apparel that you can use, if desired,
to help stabilize the charger over your generator during a charging session. Depending on
the implant locaon of your generator, you will receive either pectoral charging apparel
or lumbar charging apparel. The charging apparel can be congured to be worn in
dierent ways, depending on your preference and implant locaon. For example,
8