EasyManua.ls Logo

Abbott FreeStyle Lite - User Manual

Abbott FreeStyle Lite
80 pages
Print Icon
To Next Page IconTo Next Page
Loading...
Blood Glucose Monitoring System
Sistema de control de glucosa en sangre
Owners Booklet
Manual del usuario

Table of Contents

Questions and Answers

  • J
    Jennifer SmithJul 26, 2025
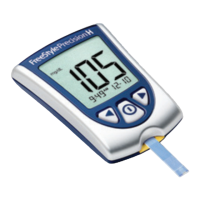
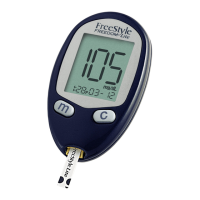
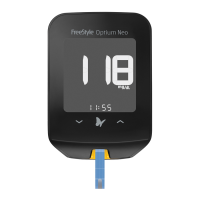
    What to do if the test doesn't start after applying blood on Abbott Blood Glucose Meter?
    • S
      Sarah OrtizJul 26, 2025
      If the test doesn't start after applying a blood drop to your Abbott Blood Glucose Meter, it might be due to several reasons. A common cause is that the blood drop is too small. In this case, you can add more blood to the same area within 60 seconds. Alternatively, you can repeat the test using a new test strip and ensuring a larger blood drop. Another possibility is a defective test strip; try repeating the test with a new one, making sure to wait for the appropriate symbols to appear before applying the blood. Also, ensure you apply the sample before the meter turns off. If the issue persists, it could indicate a defective meter.
  • J
    Jonathan MurphyAug 1, 2025
    Why Abbott FreeStyle Lite Blood Glucose Meter doesn't enter test mode?
    • T
      Tyler CooperAug 1, 2025
      If your Abbott Blood Glucose Meter doesn't enter test mode after inserting a test strip, several factors could be at play. First, ensure that the test strip is correctly inserted with the print side up and the top end in. Also, verify that a battery is installed correctly with the (+) side facing up, or replace it if it's dead, and reset the date and time if necessary.
  • K
    kjamesAug 5, 2025
    What to do if test doesn't start after applying blood sample on Abbott Blood Glucose Meter?
    • T
      Terry BoltonAug 5, 2025
      If the test doesn't start after applying the blood sample, it could be due to several reasons. The blood sample might be too small; you can add more blood to the same area of the FreeStyle Lite Test Strip within 60 seconds of the first application. If that doesn't work, repeat the test with a new FreeStyle Lite Test Strip and a larger blood sample. Another possibility is a defective test strip, in which case you should repeat the test with a new one. Also, the meter might have timed out (after two minutes); in this case, repeat the test with a new test strip, ensuring you apply the blood sample when you see the Blood and Test Strip symbols on the display.
  • C
    Christopher CrawfordAug 10, 2025
    Why Abbott Blood Glucose Meter does not enter test mode after inserting test strip?
    • S
      Sara MooreAug 11, 2025
      If your Abbott Blood Glucose Meter doesn't enter test mode after inserting a test strip, the battery might be dead, so replace it, resetting the date and time if necessary. Check that the battery is installed correctly with the positive (+) side facing upward. Ensure the FreeStyle Lite Test Strip is inserted with the printed side up and the top of the strip in the meter. Blood or foreign objects in the test strip port can also cause this issue.
  • J
    Jacqueline Porter DDSAug 15, 2025
    What to do if Abbott Blood Pressure Monitor test does not start after applying blood?
    • J
      jenniferortizAug 15, 2025
      If the test on your Abbott Blood Pressure Monitor doesn't start after applying a blood drop, it might be due to several reasons. The blood drop could be too small; try adding more blood to the same area within 60 seconds, or repeat the test with a new strip and a larger drop. The test strip itself may be defective, so try a new one. Also, make sure you apply the sample while the device is active, waiting for the appropriate symbol to appear before application.
  • T
    toddwebbAug 20, 2025
    Why Abbott Blood Pressure Monitor does not enter test mode?
    • E
      Ernest WilsonAug 20, 2025
      If your Abbott Blood Pressure Monitor doesn't enter test mode after inserting a test strip, ensure the test strip is inserted correctly with the print side up and the top end in. Also, check that the battery is installed correctly with the (+) side facing up, or replace the battery if it's dead, remembering to reset the date and time if needed.

Summary

The FreeStyle Lite Meter and How It Works

Meter Components and Functions

Describes the meter's display, buttons, ports, and sample areas for operation.

Important Information About Your Blood Glucose Monitoring System

Intended Use and System Limitations

Specifies the purpose and restrictions of the blood glucose monitoring system for accurate use.

Critical Safety Warnings

Highlights essential safety advice for using the meter and its components to prevent harm.

Setting Up the Meter

Purpose of Setup

Explains the goal of configuring the meter's sound volume, time, and date for proper function.

Set Sound Volume

Adjusting Meter Sound Volume

Guides on how to set or silence the meter's audible alerts for user preference.

Set Time

Setting the Time and Format

Details the steps to set the meter's hour, minutes, and preferred time format (12/24 hr).

Set Date

Setting the Date

Provides instructions for setting the meter's month and day for accurate record keeping.

Set Date

Setting the Date Format and Year

Guides on selecting the date format and setting the year for the meter.

Using Meter Lights

Controlling Display and Port Illumination

Explains how to activate and manage the meter's backlight and test strip port light.

Testing Your Blood Glucose

Purpose and Preparation

Outlines the objective of testing and essential preparation steps for accurate results.

Selecting Test Sites and Warnings

Illustrates test sites and provides warnings for low blood glucose testing scenarios.

Prepare to Test

Hand Hygiene and Test Strip Checks

Emphasizes proper hand washing, drying, and verifying test strip expiry for accuracy.

Important Test Strip Information

Test Strip Handling and Storage Guidelines

Details correct procedures for handling, storing, and using test strips to ensure performance.

Drying Agent Warning

Alerts users to potential hazards from drying agents in the test strip vial if inhaled or swallowed.

Performing a Blood Glucose Test

Blood Glucose Test Procedure Steps 1-4

Covers inserting the strip, confirming the system check, and obtaining a blood drop.

Performing a Blood Glucose Test

Blood Glucose Test Procedure Steps 5-7

Details applying blood to the strip, viewing results, and removing the strip.

Understanding Blood Glucose Test Results

Meter Display Range and Medical Significance

Explains the meter's measurement range and the importance of low/high results.

Normal Blood Glucose Level Guidelines

Provides reference values for normal fasting and post-meal blood glucose levels.

Low and High Blood Glucose Results

Interpreting Low Blood Glucose Readings

Explains what low blood glucose means and the recommended actions to take.

Interpreting High Blood Glucose Readings

Explains what high blood glucose means and the recommended actions to take.

Low and High Blood Glucose Results

Understanding the LO Display

Describes the 'LO' display for severe low glucose, symptoms, and actions.

Severe Dehydration and Test Results

Warns about dehydration causing false low results and advises medical consultation.

Low and High Blood Glucose Results

Understanding the HI Display

Describes the 'HI' display for severe high glucose, symptoms, and actions.

Error Codes

Error Code Er1: Causes and Solutions

Explains potential reasons for Er1 and steps to resolve them.

Error Codes

Error Code Er2: Causes and Solutions

Details causes for Er2, including high glucose and temperature issues, with solutions.

Error Codes

Error Code Er3: Incorrect Procedure

Covers Er3 related to incorrect sample application or meter errors.

Error Code Er4: Meter or Strip Issues

Explains Er4, typically indicating a problem with the test strip or meter.

Troubleshooting

Meter Fails to Enter Test Mode

Lists reasons for the meter not starting and troubleshooting steps.

Troubleshooting

Test Fails to Start After Blood Application

Addresses issues with small blood samples or defective test strips/meter.

FreeStyle Control Solution

Purpose of Control Solution Testing

Explains why control solution tests are performed to ensure meter accuracy.

Control Solution Usage and Information

Provides guidelines for using, storing, and understanding control solution results.

Out of Range Control Solution Results

Identifying and Addressing Out-of-Range Results

Lists common causes for control solution results outside the expected range.

Performing a Control Solution Test

Control Solution Test Steps 1-3

Covers checking expiry, removing the strip, and inserting it into the meter.

Performing a Control Solution Test

Control Solution Test Steps 4-5

Details confirming the system check and applying control solution to the strip.

Performing a Control Solution Test

Control Solution Test Steps 6-9

Covers viewing results, comparing to range, marking, and removing the strip.

Using Your Meter Memory

Purpose of Meter Memory Review

Explains the function of reviewing stored test results and averages.

Viewing Blood Glucose Averages

Guides on how to access and view 7-, 14-, and 30-day glucose averages.

Viewing Test Results in Memory

Interpreting Memory Display Symbols

Explains the meaning of various symbols shown in the meter's memory.

Setting Reminder Alarms (optional)

Purpose of Reminder Alarms

Explains the function of setting up optional reminder alarms for testing.

Setting Reminder Alarms Steps

Details the process of setting up the hour and minutes for reminder alarms.

Setting Reminder Alarms (optional)

Setting Alarm Sound Volume

Guides on adjusting the sound volume for reminder alarms.

Transferring Test Results To a Computer

Connecting Meter to Computer for Data Transfer

Explains how to connect the meter to a PC to download test results.

Maintaining the Meter

Battery Status Indicators

Explains the indicators for low battery and when to replace it.

Battery Replacement Considerations

Provides advice on replacing the battery and potential data loss.

Maintaining the Meter

Battery Replacement Procedure

Details the step-by-step process for replacing the meter's battery.

Cleaning the Meter

Meter Cleaning Instructions

Provides guidance on cleaning the meter's exterior safely and effectively.

Specifications

Technical Specifications Overview

Lists key technical details of the meter, including assay method, shutoff, battery life, calibration, hematocrit, units, storage temp, memory, and humidity.

Specifications (continued)

Additional Technical Specifications

Covers operating temperature, power source, result range, sample type, sample size, dimensions, and weight.

Definition of Symbols

Symbol Definitions

Explains the meaning of various symbols used in the manual and on the device.

Abbott FreeStyle Lite Specifications

General IconGeneral
Sample Size0.3 µL
Test Time5 seconds
CodingNo coding required
Operating Humidity10% to 90% non-condensing
Measurement Range20 to 500 mg/dL
Storage Conditions-20°C to 60°C (-4°F to 140°F)
Memory400 tests
Battery Type1 x CR2032
Battery LifeApproximately 1, 000 tests
Weight40 g (1.4 oz) (including battery)

Related product manuals