This manual contains important safety instructions. Please follow all instructions during installation. Read this manual thoroughly before unpacking,
installing or operating.
Caution: Risk of Electric Shock
• The UPS contains batteries. The output outlets may be electrically live even when the UPS is disconnected from the AC mains.
• The UPS contains potentially hazardous voltages. Do not open the units as there are no user serviceable parts. All maintenance and
servicing should be performed by qualified service personnel.
• Risk of electric shock, Battery Circuit is not isolated from AC input, hazardous voltage may exist between battery terminals and ground. Test
before servicing and use insulated tools.
NOTE: The UPS is designed to be for use with computer loads only.
Caution:Do not connect a laser printer to the UPS.
A laser printer draws significantly more power than other types of equipment and may overload the UPS.
1 Inspection
Inspect the UPS upon receipt.
Notify the carrier and dealer if there
is damage. The package is
recyclable; save it for reuse or
dispose of it properly.
Inspect accessories:
① Power cable 1PCS
USER MANUAL 1PCS
2 Choose an installation location
- Avoid locations that are excessively humid, near water,
near heat sources or in direct sunlight
- Allow 1inch (2.5cm) clearance on each side of the UPS
3 Connecting Equipment and Power to the UPS
4 Connect Modem/ Phone / Network for Surge Protection (Optional)
5 Connect Interface Device
6 Turn ON/OFF the UPS
Turn on the UPS: Press the UPS
On/OFF Switchfor approx. 3
seconds, then the Buzzer sounds
twice, the UPS will start-up.
Turn off the UPS: Press the UPS
On/OFF Switch for approx. 3
seconds, then the Buzzer sounds
twice, the UPS will shutdown.
7 Cold Start Function
When the UPS is OFF and no utility input
power is present, use the “Cold Start”
feature to apply power to the loads from
UPS‘s battery. Press the “ON/OFF” switch
until the UPS beeps.
8 Software Download and Installation
Please follow steps below to download and install monitoring software:
1. Go to the website http://www.ablerex.com.sg/downloads.html
2. Depending on the computer OS, select Emily software (for Win 7&8 OS, select Emily2) and click download.
3. Follow the on-screen instructions to install the software.
4. When the computer restarts, the monitoring software automatically search and connects to the UPS.
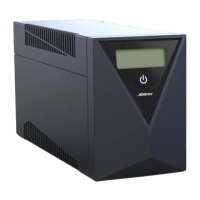
GR600/GR800–LEDFRONT
PANEL(STANDARD)
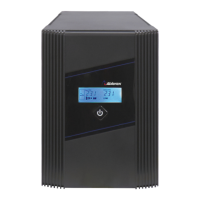
GR600/GR800/R1200/GR1800/GR2000
– LCD FRONT PANEL(OPTION)
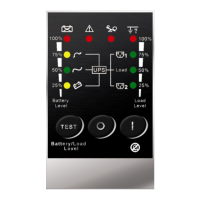
Lit: Line mode
Dim: Abnormal input
voltage and frequency
Lit: Battery mode
Flashing: Battery Low
8.Tack switch for
Turn-on/Turn-off
6.Measurement
Target & Value
Lit: System malfunction
or abnormal
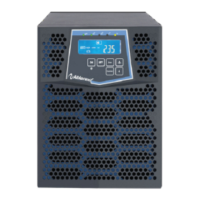
GR1200/GR1800/GR2000 – LED
FRONT PANEL(STANDARD)
GR600/GR800 REAR PANEL
1. AC Input Outlet
2. Fuse
3. Output Connector:
4x Thailand Outlets
4. USB (Standard)
GR1200/GR1800/GR2000 REAR PANEL
1. AC Input Outlet
2. Fuse
3. Output Connector:
6x Thailand Outlets
4. USB (Standard)
5. Fan
Lit: Line mode
Flashing: Battery mode
Lit: System malfunction or
abnormal
Load Percentage/
Battery Capacity
Step1: Connect the UPS to the
AC mains.
Step2: Connect the equipment
to the UPS output outlets.
Step3: Switch on the AC Mains,
follow by the UPS then the
equipment last.
*Plug the UPS into the AC
Mains to charge for 8 hours
before using the UPS.
- For modem/phone line protection,
connect equipment to the RJ11
port using RJ11 cable.
- For surge protection, connect
equipment to the RJ45 port using
Ethernet/RJ45 cable.
The UPS is equipped with
two interface ports: a USB
port (Standard) and a 9-pin
RS232 port (Optional)
allowing advanced
communication network
between the UPS and a
computer (network).