14
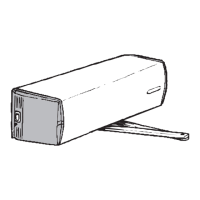
8 COMMISSIONING
1 Check the free movement of the door.
2 Turn mode switch to MAN. The mode switch is located in the head panel.
3 Plug in the mains.
4 Choose the type of the
arm.
5 Choose the size of the door.
ARM
standard
sliding
Jumpers are located on the control board.
Jumper is connected.
Jumper is disconnected.
DOOR
small
medium
large
sealed
custom
S, M and L settings defi ne door weight in ratio to door width. Always select
at fi rst S in to guarantee maximum safety. If there is not enough force on
the operator for moving the door then shift setting from S to M. If the door
behaviour is satisfactory then the chosen value is right. If not then shift to next
setting point L.
small
medium
large
sealed
custom
DOOR
”Sealed” enables motorised closing pull before opening and hold closed force.
Select this to ensure the proper function of the lock when prepull is needed.
small
medium
large
sealed
custom
DOOR
Jumper in block ”Custom” together with S, M or L gives you more power.
S + Custom, force between S and M.
M + Custom, force between M and L.
L + Custom, force more than L.
6 Check the PREPULL.
0,5 s
1,0 s
1,5 s
Push&Go
PREPULL
PREPULL
0,5 s
1,0 s
1, 5 s
Push&Go
For ”Sealed” it is possible to select different prepull times. By changing jumper, the
prepull time changes for example from 0,5 to 1,0 second.
Operator opens the door to adjusted opening angle and closes the door after
a 5 second of hold open time.
TEACH CLOSED
TEACH OPEN
POWER ON
7 Teach door open and closed position.
(is functional in program selector positions MAN and AUTO)
TEACH
- Push TEACH-button to enter learning mode.
- Teach the door closed position:
Yellow led blinks: close the door and push TEACH-button.
- Teach the door open position:
Green led blinks: open the door to the desired angle and push TEACH-
button.
- Yellow ”TEACH CLOSED” led blinks: close the door manually.