6. Mounting/installation
6.1. Mounting the camera
IMPORTANT!
The camera must be disconnected from the power supply during installation.
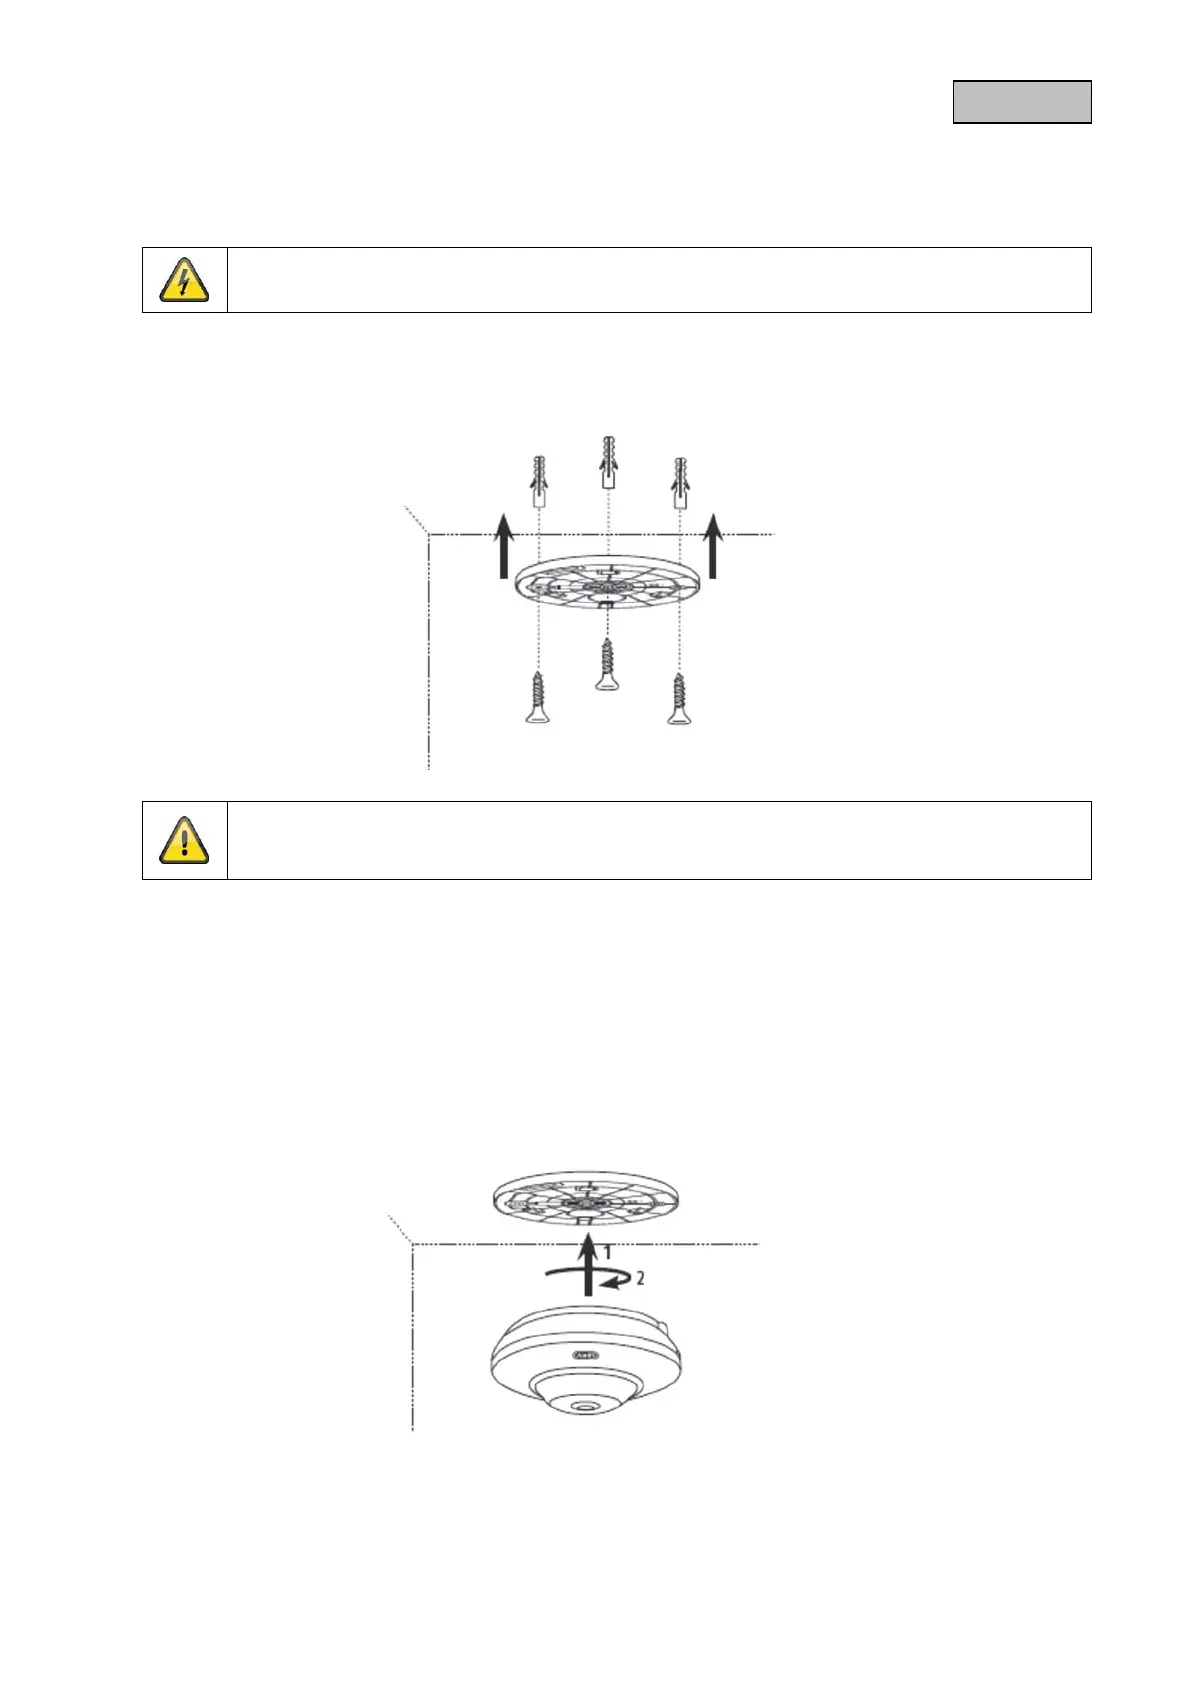
Use the accompanying drilling template or mount for drilling the mounting holes.
Drill the holes in advance and insert the accompanying screw anchor.
Use the accompanying screws to fasten the ceiling bracket in place.
6.2. Orientation of the camera
Now place the camera onto the ceiling bracket, bearing in mind that the arrow on the camera must be
lined up with the arrow on the ceiling bracket. Latch the camera in place by rotating it clockwise. In
order to remove the camera from the ceiling bracket, you need to press the button on the side of the
camera.
Please note that the arrow and the label "FRONT" on the ceiling bracket points in the right
direction.
73
 Loading...