Local setup wizard
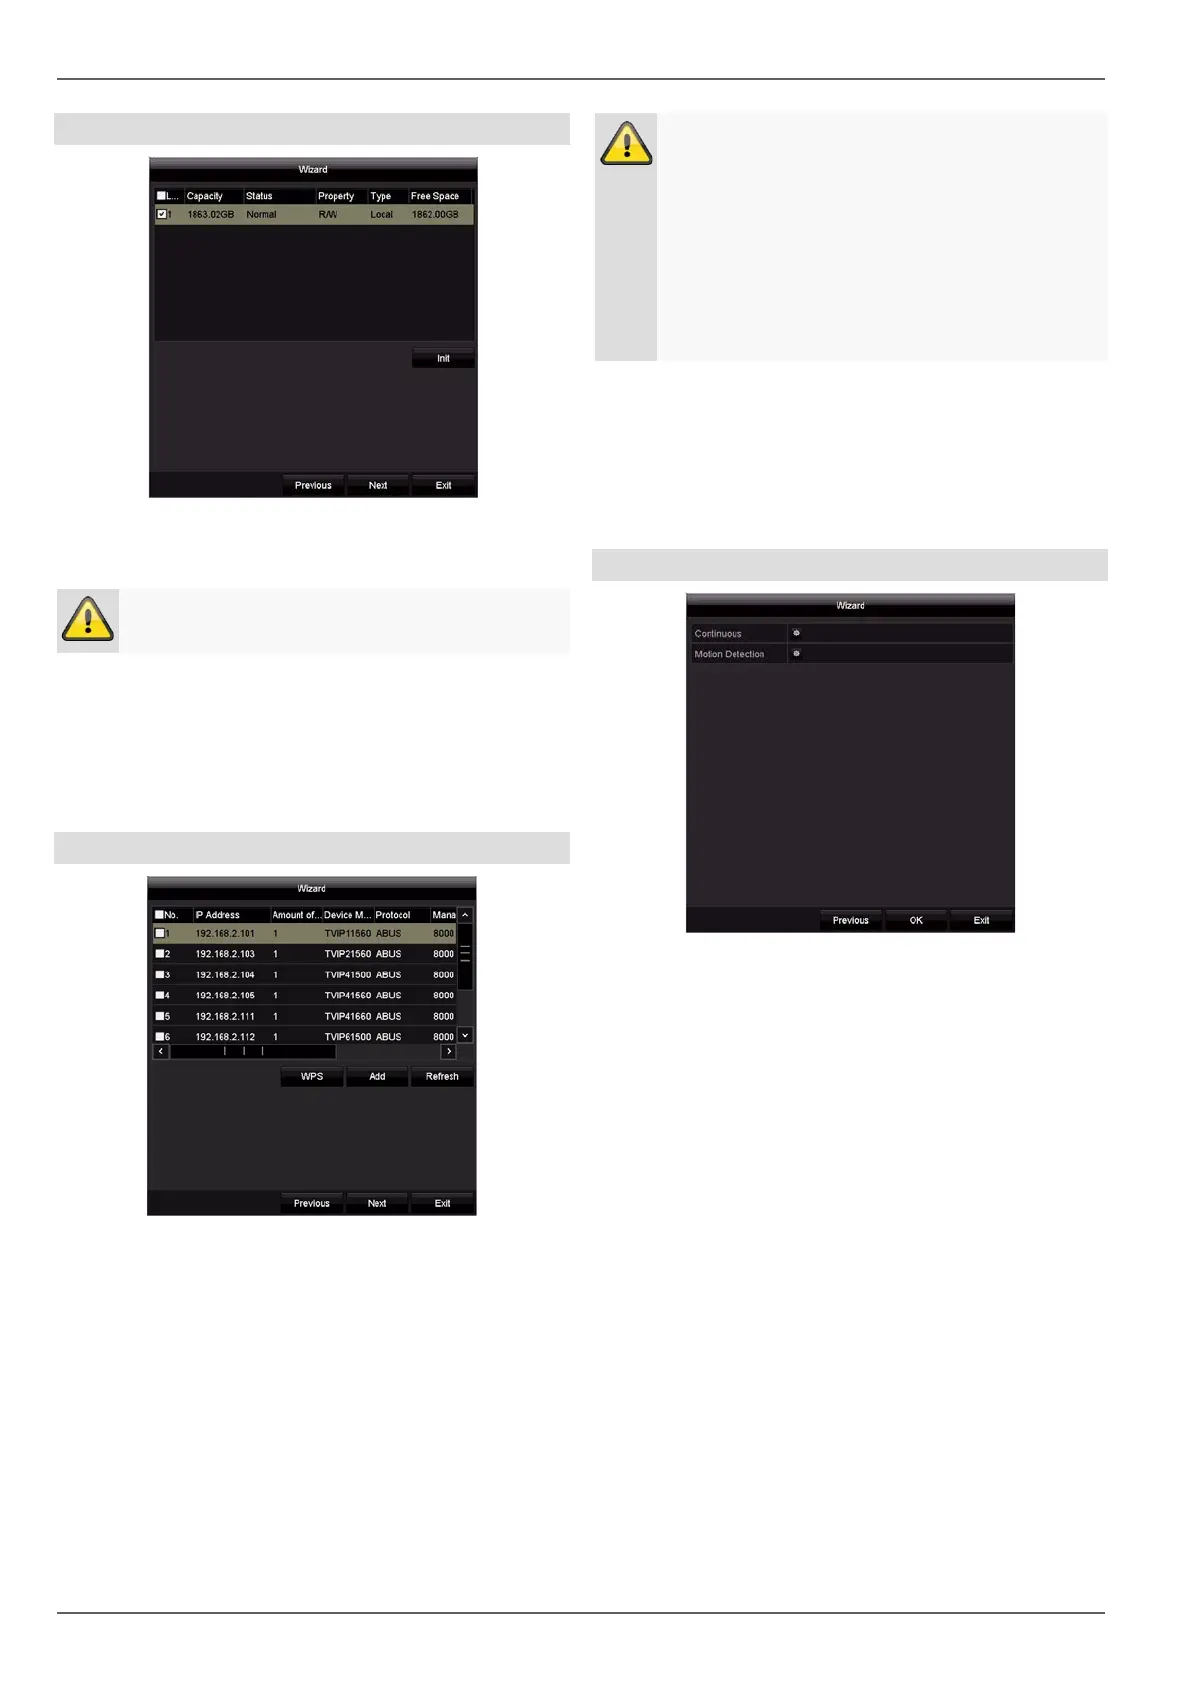
Hard disk drive management
1. To set up a hard disk drive, enable the ‘checkbox’
with a left click and then click on Init.
Warning
This will delete all data found on the disc.
2. Click on OK to acknowledge the security prompt.
The hard disk drive is set up for use. Progress is
shown on the status bar.
3. Complete the setting by selecting OK and then click
on Next.
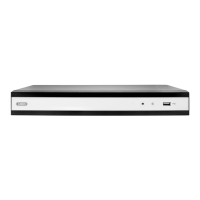
Camera assistant
1. Using WPS you can quickly and easily establish a
Wi-Fi connection between a camera and the re-
corder. To do this, click on WPS and follow the in-
structions. Before you can then search for and add
the camera, wait the two minutes as displayed until
the camera has established a connection with the re-
corder. Only one camera can be connected during
each WPS procedure
Note
If the installation via WPS function was not
properly functioning for a camera, the alternative
ist to connect the camera with a network-cable
with on of the three LAN-Ports of the recorder.
Use then a PC to gain access of the Webinterface
of the camera. There you can setup the WiFi-con-
nection to the recorder manually in the Configura-
tion -> advanced settings -> network -> WiFI
menu.
2. Click on Search to display the network cameras in
your network.
3. To add network cameras, arm the desired cameras
and click on Add.
4. Click on Next to continue with the setup.
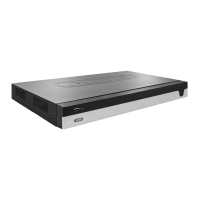
Camera recording
1. Choose continuous recording to activate continuous
recording for all channels.
5. Choose motion recording to activate motion-detec-
tion-based recording for all channels.
6. Finish the setting and the setup wizard with OK.
17