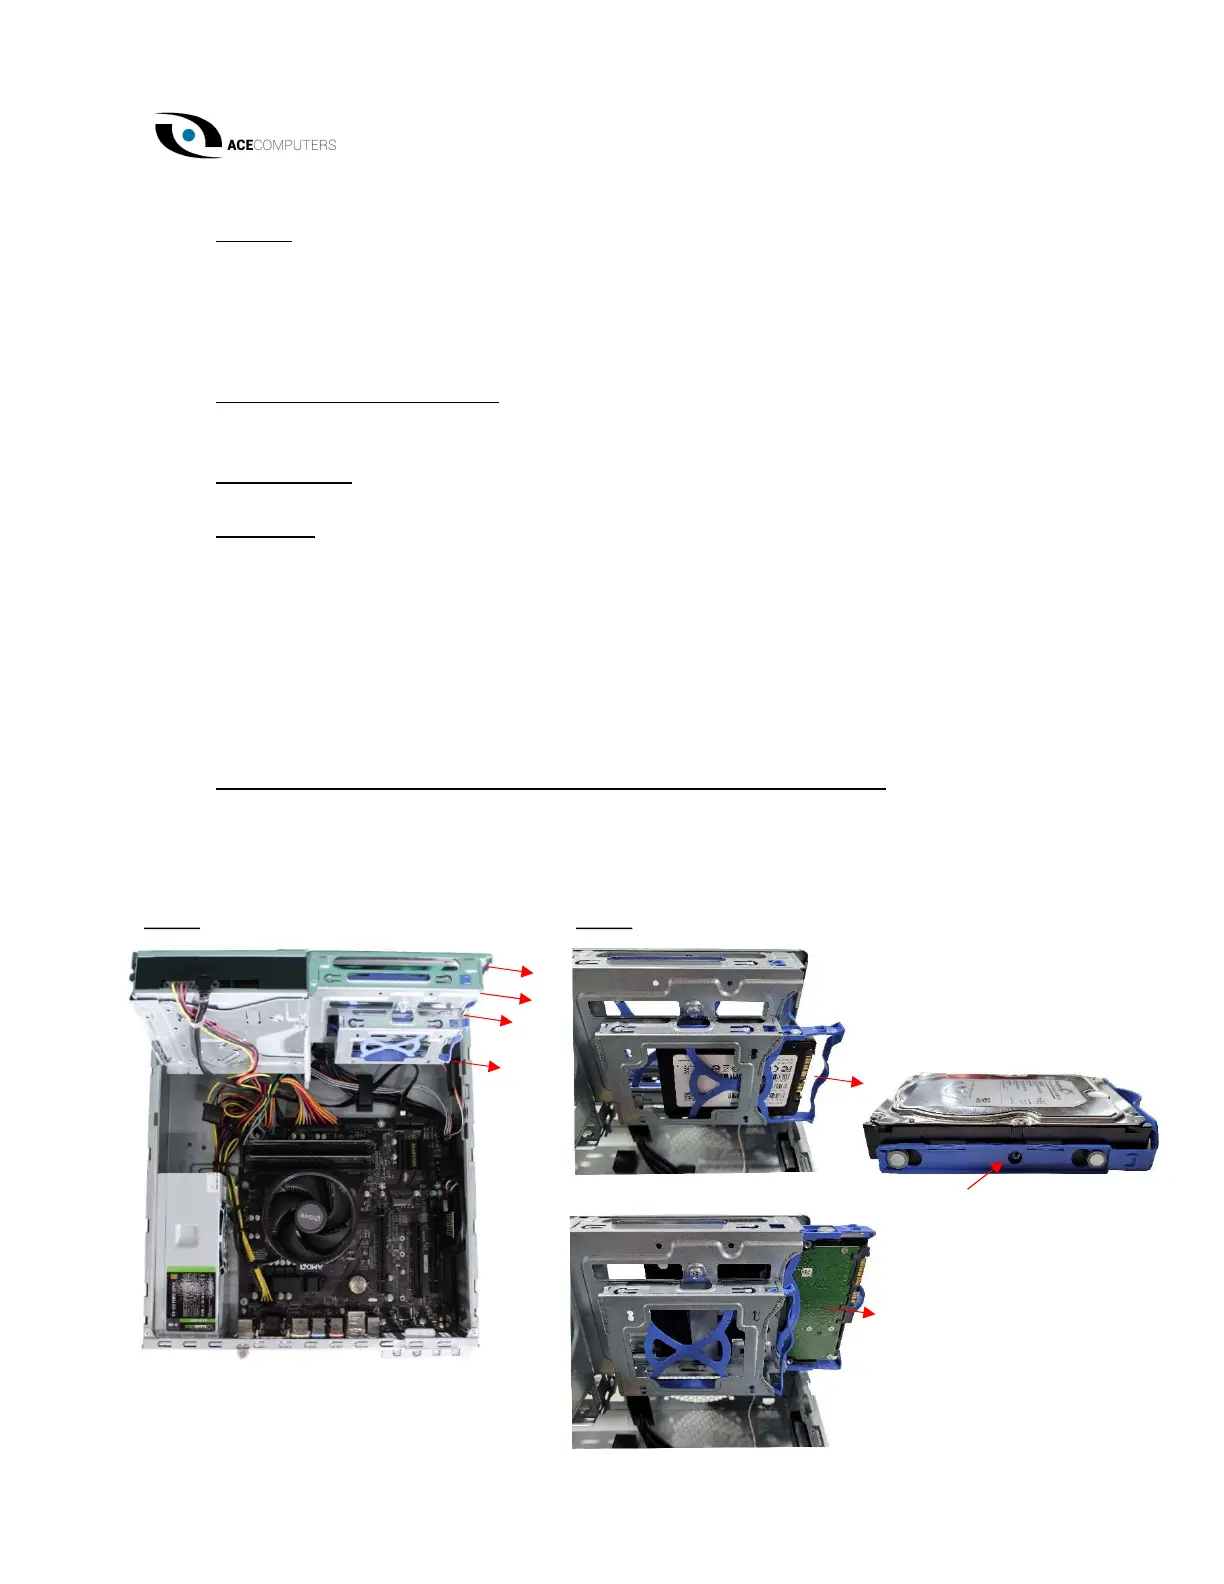
ACE095 Page 6 of 17 Rev Date: 12.7.2021
1. Data Storage Devices
Location: Desktops utilize interchangeable storage. These storage hard drives are located as
indicated in the photos below. Some desktops also have SSD storage, this type of storage can be
found on the motherboard. It generally lays flat, parallel to the board, rather than at a right
angle. Most common applications insert one end of the SSD into a slot on the motherboard
while the alternate end is held in place with a small screw.
Type and number of fastenings: HDD = One (1) latch and four (6) Phillips screws, SSD = (1)
Phillips screw.
Tools required: Screwdriver with PH2 bit.
Procedure:
Step 1: Lift chassis carriage into the upright position.
Step 2: HDD (3.5") = Push the release button on the carrier. Swing the handle fully. Grasp the
handle and pull the drive carrier out of its bay, once the drive carrier is out of the bay, the
Phillips screws can be removed.
Step 3: SSD (2.5") = Identify the SSD on the motherboard, remove the screw, and pull straight
back in a parallel position to remove the SSD from the slot on the motherboard.
Selective Treatment/Special Handling Per Annex VII, Directive 2012/19/EU: Any printed circuit
boards within the data storage devices must be removed separately from the data storage
devices and shall be disposed or recovered in compliance with Directive 2008/98/EC.
Step 1 Step 2