EasyManua.ls Logo

Acer H7532BD - User Manual

Acer H7532BD
58 pages
Print Icon
To Next Page IconTo Next Page
Loading...
Acer Projector
H7532BD/E152D/HE-812 Series
User's Guide

Other manuals for Acer H7532BD

Questions and Answers

  • P
    paynetabithaAug 19, 2025
    Why does my Acer H7532BD Projector have no image on screen?
    • A
      Ashley MillerAug 19, 2025
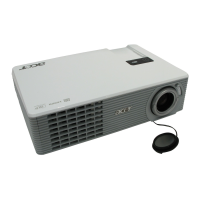
      First, ensure the projector is connected as described in the 'Getting Started' section and that none of the connector pins are bent or broken. Also, verify that the projector lamp is securely installed. Finally, confirm that you have removed the lens cap and the projector is switched on.
  • M
    matthewmonroeAug 21, 2025
    What to do if the image is stretched on my Acer H7532BD Projector when displaying a widescreen DVD?
    • N
      Nicholas BennettAug 21, 2025
      If you are playing a DVD encoded in anamorphic or 16:9 aspect ratio, you may need to adjust the following settings: If you play a 4:3 format DVD title, change the format to 4:3 in the projector OSD. If the image is still stretched, adjust the aspect ratio and set up the display format to 16:9 (wide) aspect ratio on your DVD player. If you play a Letterbox(LBX) format DVD title, change the format to Letterbox(LBX) in the projector OSD.
  • D
    Debra JacobsAug 23, 2025
    How to fix an unstable or flickering image on my Acer H7532BD?
    • R
      ronaldloweryAug 23, 2025
      To correct an unstable or flickering image, adjust the 'Tracking'. You can also try changing the display color depth settings on your computer.
  • J
    jeanhamiltonAug 26, 2025
    What to do if Acer H7532BD image is too small or too large?
    • G
      gardnerbarbaraAug 26, 2025
      Adjust the zoom ring on the top of the projector. You can also move the projector closer to or further from the screen. Alternatively, press 'MENU' on the remote control or on the control panel, go to 'Image --> Aspect Ratio' and try different settings.
  • D
    Daniel GrayAug 30, 2025
    How to fix partial or incorrectly displayed image on Acer H7532BD Projector with notebooks?
    • K
      kimpatriciaAug 30, 2025
      Press 'RESYNC' on the remote control or control panel. For an incorrectly displayed image: Follow the steps for item 2 (above) to adjust the resolution of your computer. Press the toggle output settings. Example: [Fn]+[F4], Compaq [Fn]+[F4], Dell [Fn]+[F8], Gateway [Fn]+[F4], IBM [Fn]+[F7], HP [Fn]+[F4], NEC [Fn]+[F3], Toshiba [Fn]+[F5 ]. If you experience difficulty changing resolutions or your monitor freezes, restart all equipment including the projector.
  • M
    Mckenzie ReeseSep 1, 2025
    Why is the notebook screen not displaying presentation on Acer H7532BD Projector?
    • D
      Dawn KellySep 1, 2025
      If you are using a Microsoft® Windows® based notebook: Some notebook PCs may deactivate their own screens when a second display device is in use. Each has a different way to be reactivated. Refer to your computer's manual for detailed information. If you are using an Apple® Mac® OS based notebook: In System Preferences, open Display and select Video Mirroring "On".
  • K
    Kathleen LaneSep 4, 2025
    How to fix if Acer Projector image is out of focus?
    • C
      Colleen FrazierSep 4, 2025
      First, ensure that the lens cap is removed. Then, adjust the focus ring on the projector lens. Also, verify that the projection screen is within the required distance of 4.9 to 32.7 feet (1.5 to 10.0 meters) from the projector.
  • D
    Dylan LoganSep 6, 2025
    How to correct slanted sides on Acer H7532BD Projector image?
    • A
      Anna SmithSep 6, 2025
      If possible, reposition the projector so that it is centered on the screen. You can also press the 'Keystone / ' on the OSD or the remote control until the sides are vertical. If the 'Keystone' button is unavailable on the remote control, press 'MENU' on the remote control, go to 'Image -> Auto Keystone' and choose 'Off' on the OSD.
  • R
    Ronnie MitchellSep 8, 2025
    Why is my Acer Projector image reversed?
    • X
      xwilliamsSep 9, 2025
      Select 'Image --> Projection' on the OSD and adjust the projection direction.
  • L
    lindsay04Sep 12, 2025
    What to do if my Acer H7532BD Projector stops responding?
    • J
      Jeffrey GoodmanSep 12, 2025
      Turn off the projector, then unplug the power cord and wait at least 30 seconds before reconnecting power.

Summary

Information for your safety and comfort

Using electrical power

Guidance on operating the projector safely using electrical power.

Product servicing

Information on when to refer servicing to qualified personnel.

Additional safety information

Important safety guidelines for projector operation and placement.

Getting Started

Connecting the Projector

Guide to connecting various devices to the projector using different cables.

Turning the Projector On;Off

Step-by-step instructions for powering on the projector and source devices.

Adjusting the Projected Image

How to optimize image size and distance

Finding optimal image sizes based on projector-to-screen distance.

How to get a preferred image size by adjusting distance and zoom

Adjusting projector position and zoom for desired image size.

User Controls

Installation menu

Using the OSD for projector installation, maintenance, and settings adjustment.

Onscreen Display (OSD) Menus

Guide to navigating and using the projector's OSD for image adjustments.

Color

Adjusting display mode, wall color, brightness, contrast, saturation, and tint.

Image

Settings for projection mode, location, aspect ratio, keystone, and sharpness.

Setting

Configuring closed caption, auto screen, reset, and security settings.

Appendices

Troubleshooting

Guide to solving common image and projector operational problems.

Replacing the Lamp

Step-by-step instructions for safely replacing the projector lamp.

Acer H7532BD Specifications

General IconGeneral
BrandAcer
ModelH7532BD
CategoryProjector
LanguageEnglish

Related product manuals