Installation Guide
7
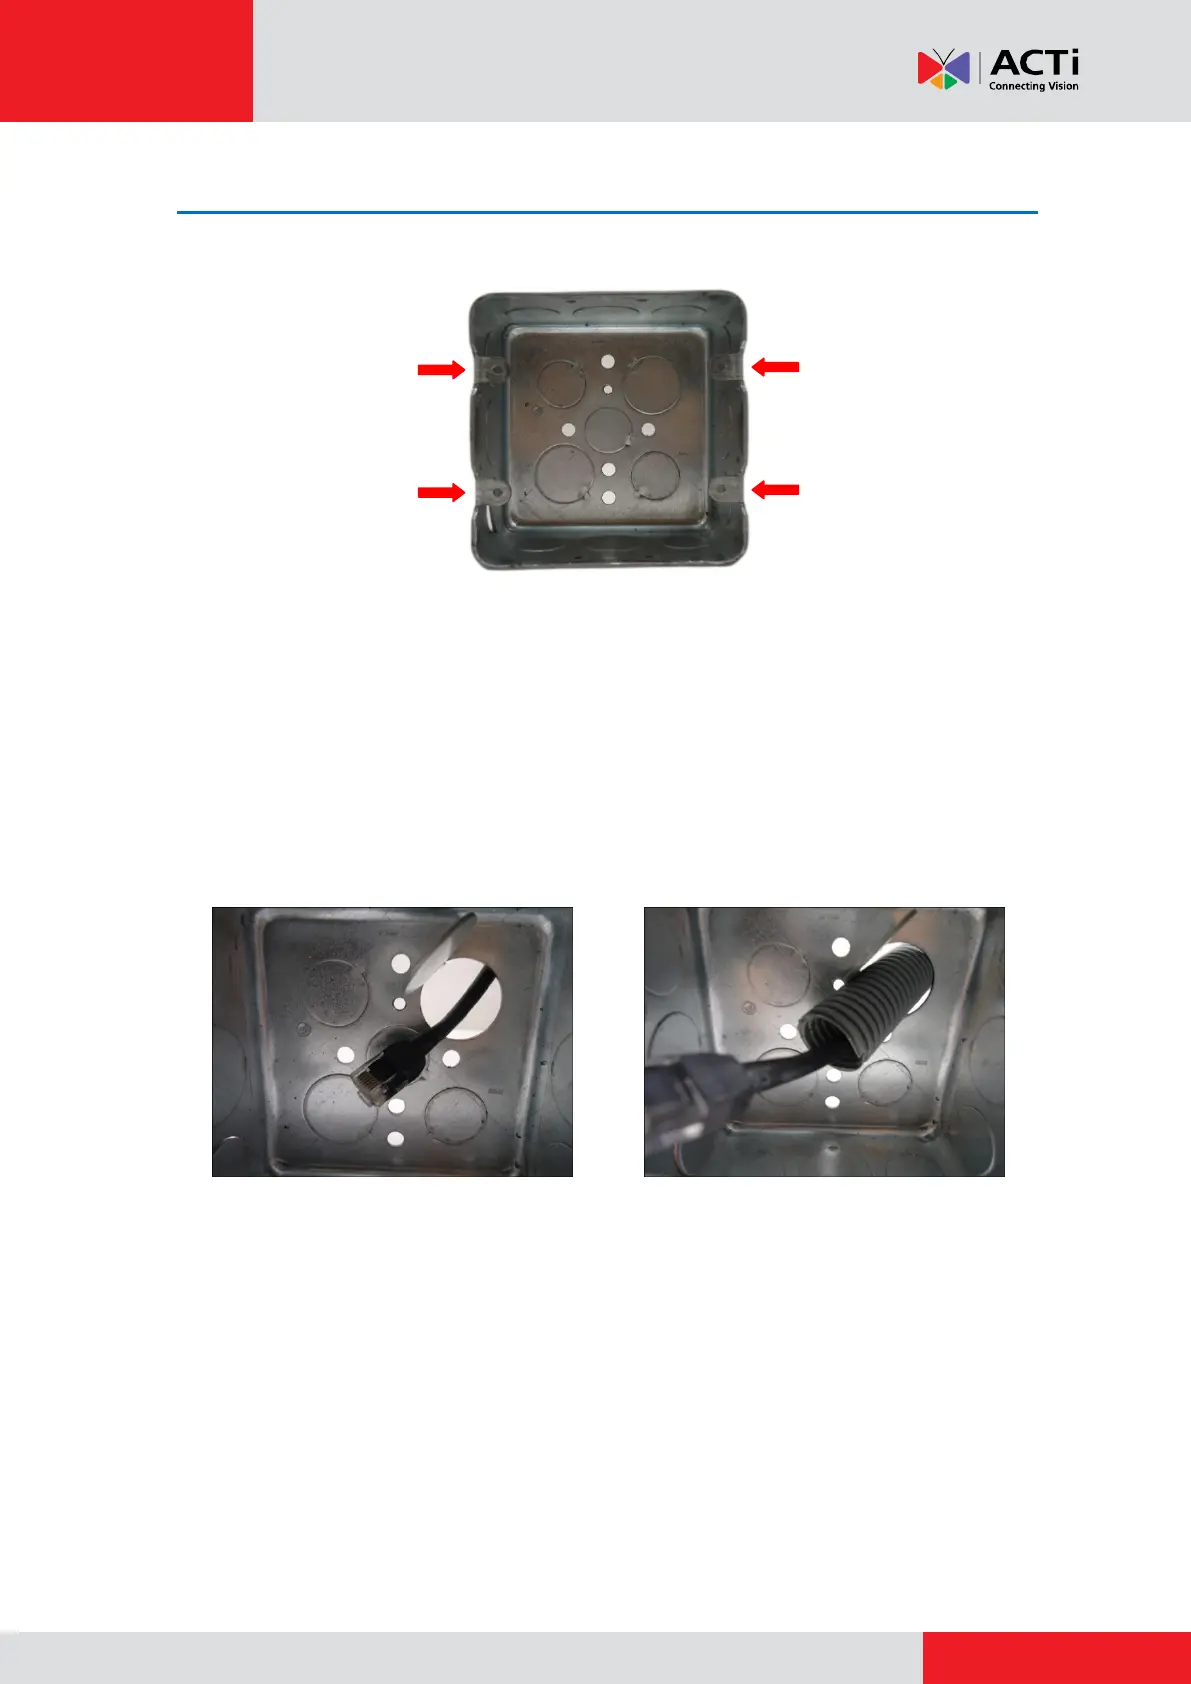
Step 3: Install the Gang Box
Before installation, note that the gang box must be installed with the orientation as shown below:
Depending on your installation environment, the gang box can be installed on the wall or inside
the wall. If the gang box will be installed in the wall, route enough length of network cable or
flex conduit inside the wall to pass through the gang box slot.
NOTE: The succeeding procedures and images show how to do the camera installation with a
gang box installed inside the wall; same procedures apply if the gang box is on the wall.
1. Remove a knockout on the gang box where you want to route the network cable. If the gang
box will be installed in the wall, insert the network cable through this knockout at this point.
Using the Naked Cable Solution Using the Flex Conduit Solution
2. Install the gang box on or inside the wall with the orientation as shown above. If the gang
box is installed on the wall, insert the network cable through the knockout after installing
the gang box on the wall.