11
c) DEVICE SETUP
Once the device is connected, the device number(s) will be displayed in the right-hand side panel and the
battery level. Select which device(s) are to be configured. A tick box will appear next to the relevant device
serial number. At least one device must be selected. It can be useful to configure multiple devices together
when a trial subject will wear several GENEActiv devices on different body locations.
This process will overwrite any data onboard the device. It is important that any previous data collected has
been successfully extracted. Device configuration will take about 10 seconds and a pop-up message will
automatically appear to confirm that it has been set up successfully and the device is ready for deployment. The
device will record for the given data collection period. There is no need for any additional charging (this should be
avoided due to the important note below).
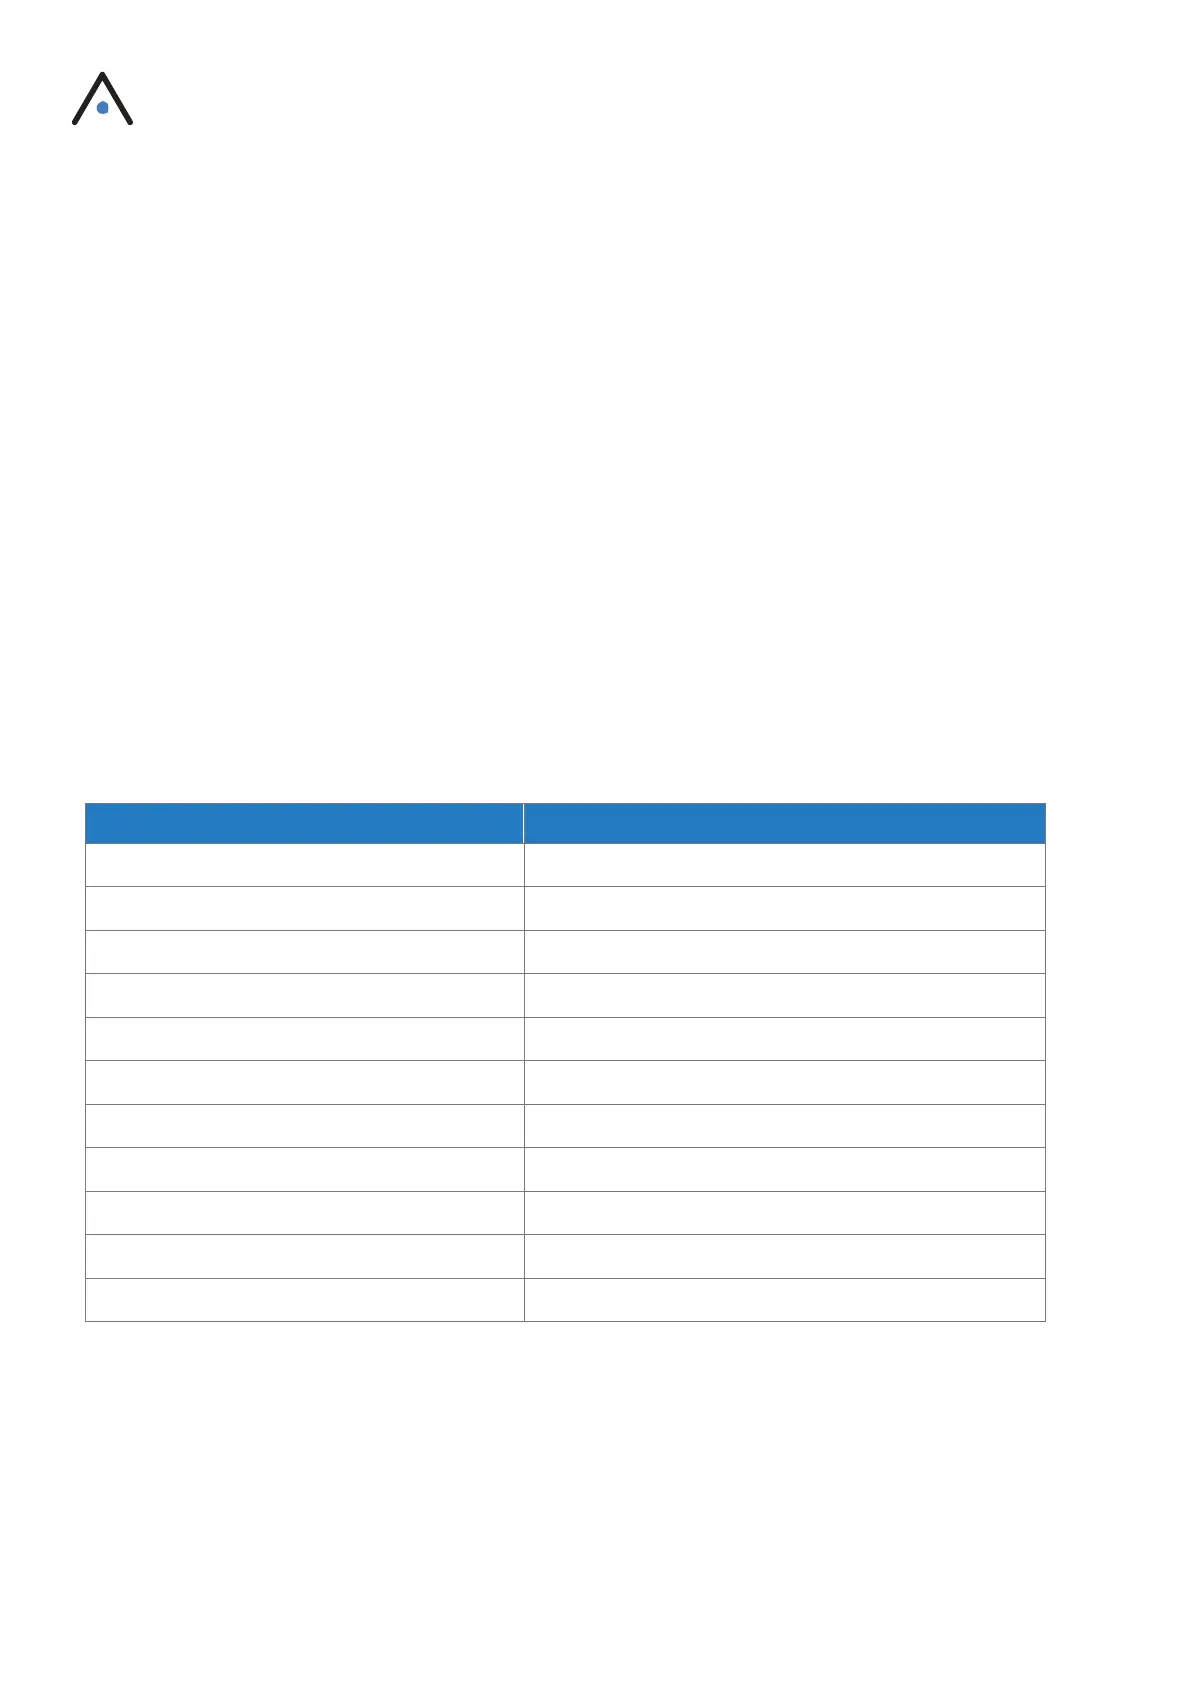
i. Measurement Frequency
Select the device, click the “Configure” tab at the bottom of the page, and choose your Measurement Frequency
(Hz). The Maximum Measurement Period will be automatically calculated. The Maximum Measurement Period is
dependent on the frequency selected as shown in the table below.
 Loading...