AP3000
CLEANING THE PURIFIER PLATE:
Remove the rear lint screen (see pages 8 - 9). Carefully
remove the purifier plate from the card cage by grasping
the middle of the edge nearest to you, and slowly pull it
straight out.
If you are in an environment where there are fats, oils,
or grease, such as in a kitchen, start by cleaning with
denatured alcohol and a soft bristle brush. This will cut
the grease without leaving a residue.
For all applications - Clean with a mixture of one part
water and one part ammonia to remove contaminants.
Place the plate into a shallow dish, and pour enough of
the water/ammonia solution into the dish to just cover
plate. Allow the plate to soak for no more than 10 minutes.
CAUTION: Damage may result from soaking the purifier
plate in the ammonia solution longer than 10 minutes.
GENERAL MAINTENANCE (CONT.)
SEE PAGES 8 - 9 FOR REMOVAL AND INSTALLATION INSTRUCTIONS
* See next page for back cover removal instructions
7
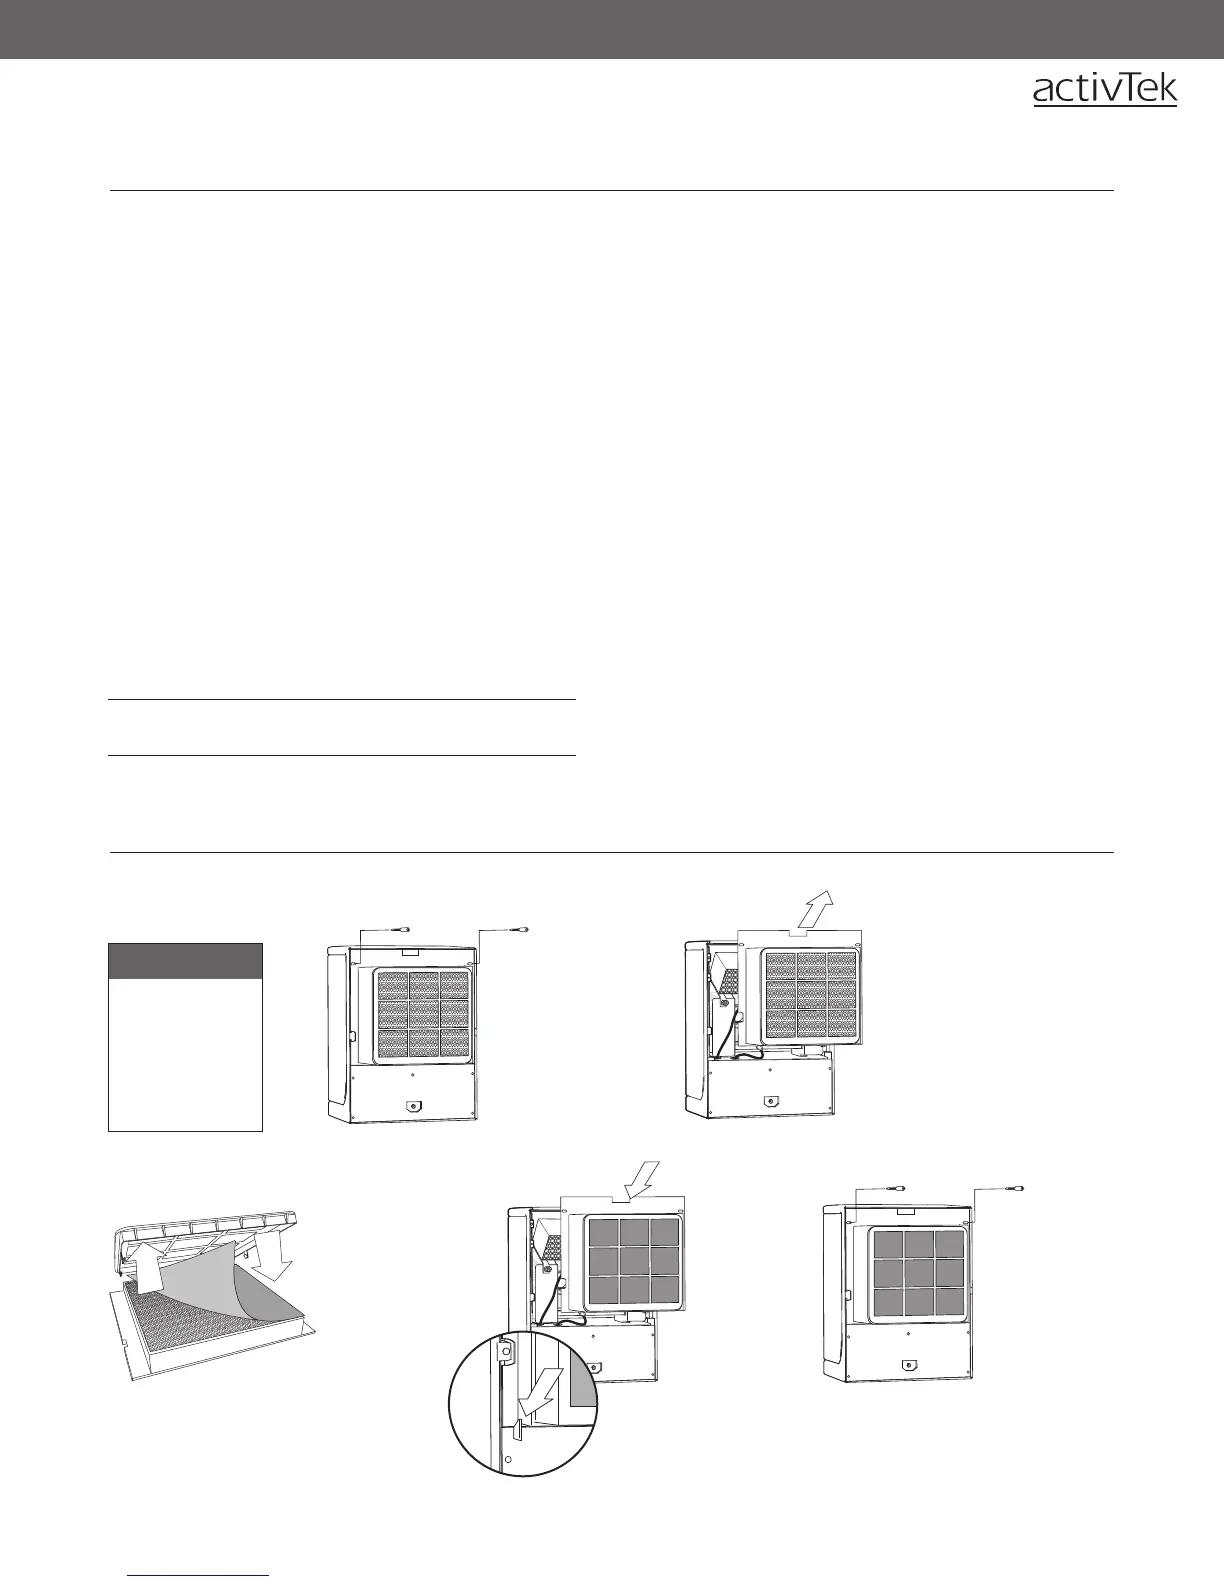
To Remove:
Rear Back Panel
follow steps 1 - 3,
pg. 8
Prefilter
follow steps 4 - 5
pg. 8
OPTIONAL PREFILTER
Remove plate and scrub with a soft bristle brush.
Rinse thoroughly. Let air-dry for 24 hours or use a
blow dryer to dry thoroughly.
The unit will display a REPLACE PLATE message if the
purification plate needs to be replaced.
CHANGING THE ACTIVEPURE (RCI) CELL:
The ActivePure (RCI) cell should be replaced every year if
used continuously, even if the unit does not display this
message. Replace every two (2) years if used less than
12 hours a day. To change the ActivePure (RCI) cell, follow
the instructions on pages 8 - 9.
2
2. Remove the lint
screen by pulling
back the top,
then lifting up
and out.
1
1. Remove the two
(2) thumbscrews
securing the
top of the lint
screen.
4
4. Replace
the rear
lint screen,
inserting
the bottom
of the lint
screen first.
5
5. Secure the
top of the
lint screen by
replacing the
two (2) lint
screen holder
thumbscrews.
3
3. (a) For first install,
lay Optional
Prefilter on filter.
(b) For replacing,
remove Optional
Prefilter and
replace with a
new one.
Note: The bottom of the rear lint
screen is held into place by two
alignment guides (see inset).