RANGE
HIGH
LOW
POWER OFF
Engine KNOCK
2-27
Knock Sensor Test Procedure
Sensor may be tested on or off vehicle.
Warning: Observe all safety precautions (see page ii) if testing sensor on vehicle.
1) Verify ignition key is OFF.
2) Check Tester battery (refer to page 1-4).
3) Disconnect wiring harness from sensor - Inspect for
damage.
4) Connect test leads to sensor.
One-wire connector:
• YELLOW test lead to signal pin (top of sensor).
• BLACK test lead to body of sensor (off-car) or nearby
ground (on-car).
Two-wire connector:
• YELLOW test lead to either sensor pin.
• BLACK test lead to remaining sensor pin.
5) Set RANGE switch to LOW.
6) Set FUNCTION switch to VOLTS.
7) Operate sensor - Watch TEST light for results.
(Note: Ignore any RICH/LEAN light flashes.)
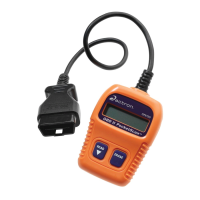
On-car test: Lightly tap surface near sensor using a
socket extension (or similar tool) and a light hammer.
Do not tap directly on sensor!
Off-car test: Grasp sensor firmly. Gently tap sensor tip
with a light hammer.
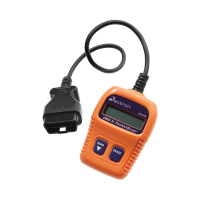
– Good sensor:
TEST lights flash upward from the
bottom of the TEST light column during a tap. (Only a
few lights may flash. This is O.K.) Range of TEST light
movement varies with sensor type and tapping force.
– Bad sensor:
TEST lights do not flash during a tap.
8) Testing is complete.
FUNCTION
VOLTS
OHMS
FREQUENCY
TEST