10
Problem Possible Solution
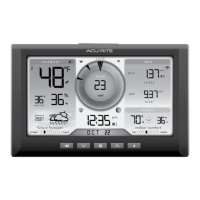
Inaccurate
temperature or
humidity
• Make sure both the display and 5-in-1 sensor are
placed away from any heat sources or vents
(see page 7).
• Make sure both units are positioned away from
moisture sources (see page 7).
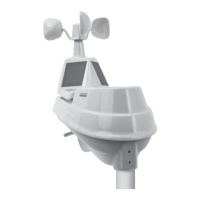
• Make sure 5-in-1 sensor is mounted at least 5 ft off of
the ground.
• Calibrate indoor and outdoor temperature and
humidity (see page 11).
No rainfall
• Check to ensure the rain gauge stabilizer (plastic tab)
has been removed from the bottom of the sensor.
• Clear debris, such as leaves, out of the rain collector
funnel and debris screen.
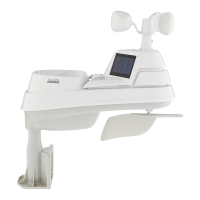
Inaccurate wind
readings
• What is wind reading being compared to? Pro
weather stations are typically mounted at 30 ft high
or more. Make sure to compare data using a sensor
positioned at the same mounting height.
• Check location of the sensor. Ensure itʼs mounted a
minimum of 5 ft in the air with no obstructions around
it (within several feet).
• Ensure wind cups are spinning freely. If they hesitate
or stop try lubricating with graphite powder or spray
lubricant.
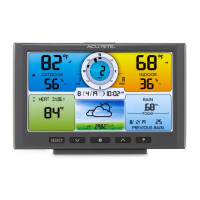
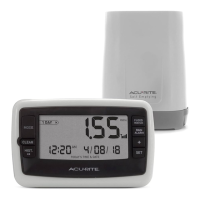
Display screen
not working
• Check that the power adapter is plugged into the
display and an electrical outlet.
• Check that the batteries are installed correctly.
Batteries may need to be replaced.
• Reset the display by pressing and holding the
RESET button, located in the bat
tery compartment
of the display. Date and time will need to be entered
after a reset.
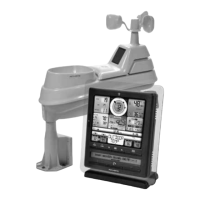
Troubleshooting
If your AcuRite product does not operate properly after trying
the troubleshooting steps, visit www.AcuRite.com or email
support@chaney-inst.com for assistance.
11
Care & Maintenance
Display Care
Clean with a soft, damp cloth. Do not use caustic cleaners or abrasives. Keep away
from dust, dirt and moisture. Clean ventilation ports regularly with a gentle puff of air.
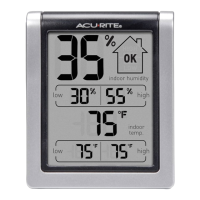
Calibration
The indoor / outdoor temperature and humidity readings, and barometric pressure can
be calibrated on the display to improve accuracy. Calibration can improve accuracy
when sensor placement or environmental factors impact the data accuracy.
2. To adjust the currently selected (flashing) item, press and release the “
V
“ or “
V
“
buttons to calibrate the data value higher or lower from the actual reading.
3. To save your adjustments, press and release the “ ” button to adjust the next
preference. The “ ” icon will remain illuminated next to calibrated values.
The preference set order is as follows:
OUTDOOR TEMPERATURE
OUTDOOR HUMIDITY
INDOOR TEMPERATURE
INDOOR HUMIDITY
BAROMETRIC PRESSURE (must be set to MANUAL mode to calibrate)*
*To change from AUTO to MANUAL pressure mode and vice versa, press AND
HOLD the “ ” button for at least 10 seconds. The display indicates the current
pressure mode selected,“AUTO” or “MANUAL”.
After 20 seconds of inactivity, the display will save the adjustments and exit calibration
mode. Note: Calibrations will be erased if the display is reset or if batteries are
removed and the p
ower adapter is unplugged.
1. To access calibration mode, pressing “ ”, “ ” and “ ” buttons simultaneously
for at least 5 seconds.
V
V