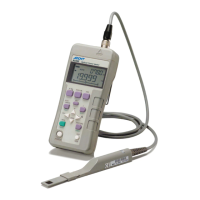
8230 Optical Power Meter Operation Manual
2.1.1 Function Description
2-2
3. ZERO Obtains the offset value to cancel the offset which depends on the
optical sensor.
Press [ZERO] for 2 seconds after completely covering the optical
sensor. The 8230 displays “ZERO” for approximately 4 seconds,
obtains the offset value, and returns to the normal measurement
mode. Press [ZERO] when turning on the power. If the sensor is
not completely covered when [ZERO] is pressed and an over-
range occurs, “Err 1” is displayed.
If “Err 1” is displayed, the measured value in the range in which
the over-range occurs, becomes fixed as “overrange”.
4. RATIO/dBr Displays the ratio (relative value) of each successive power mea-
surement to the power which is measured when “W” is displayed
and [RATIO/ dBr] is pressed. No unit is displayed. This function
can be canceled by re-pressing [RATIO/ dBr].
Also displays the relative value of each successive power mea-
surement to the power which is measured when “dBm” is dis-
played and [RATIO/ dBr] is pressed. “dBr” is displayed in unit.
This function can be canceled by re-pressing [RATIO/ dBr].
5. W/dBm Switches the measurement unit setting between W and dBm.
6. HOLD Stops the measurement. The HOLD indicator is lit while the mea-
surement is stopped. The display retains the value of the stopped
measurement. The measurement is re-started by pressing
[HOLD] again.
7. AUTO/MANUAL Switches the measurement range setting between AUTO and
MANUAL.
When AUTO is set, the measurement range is switched automat-
ically so that the maximum significant digit is displayed. When
MANUAL is set, the measurement range can be selected by using
the [UP ] and [DOWN ] keys.
PREV When the MENU mode is set, the MENU setting item returns to
the previous item.
Refer to Section 3.1, “Menu Map.”
8. This key is used to enter the wavelength of the measurement light
and to correct the wavelength sensitivity characteristics of the
sensor.
When [] is pressed, the least significant digit of the wavelength,
which is displayed on the upper 4-digits of the LCD, blinks and
the correction coefficient is displayed on the lower 6-digit LCD.
Move the blinking digit of the wavelength by using the [ ] or
[ ] key and change the value by using the [UP ] or
[DOWN ] key. The wavelength can be changed in steps of 1
nm. The correction coefficient display is changed in accordance
with the change of the wavelength. The function can be returned
to the normal measurement mode by pressing [] again. Up to
four frequently used wavelengths can be set. For more informa-
tion, refer to Section 3.5, “Wavelength Preset.”
The correction coefficient C is defined as follows: C = Sensor
sensitivity at the arbitral wavelength n / Sensor sensitivity at the
reference wavelength c.
NEXT When the MENU mode is set, progresses the MENU setting item
to the next item.
Refer to Section 3.1, “Menu Map.”
9. UP /DOWN Normal mode: Manually changes the measurement range up or