welcome contents
installation
operation
rter
inormation
8
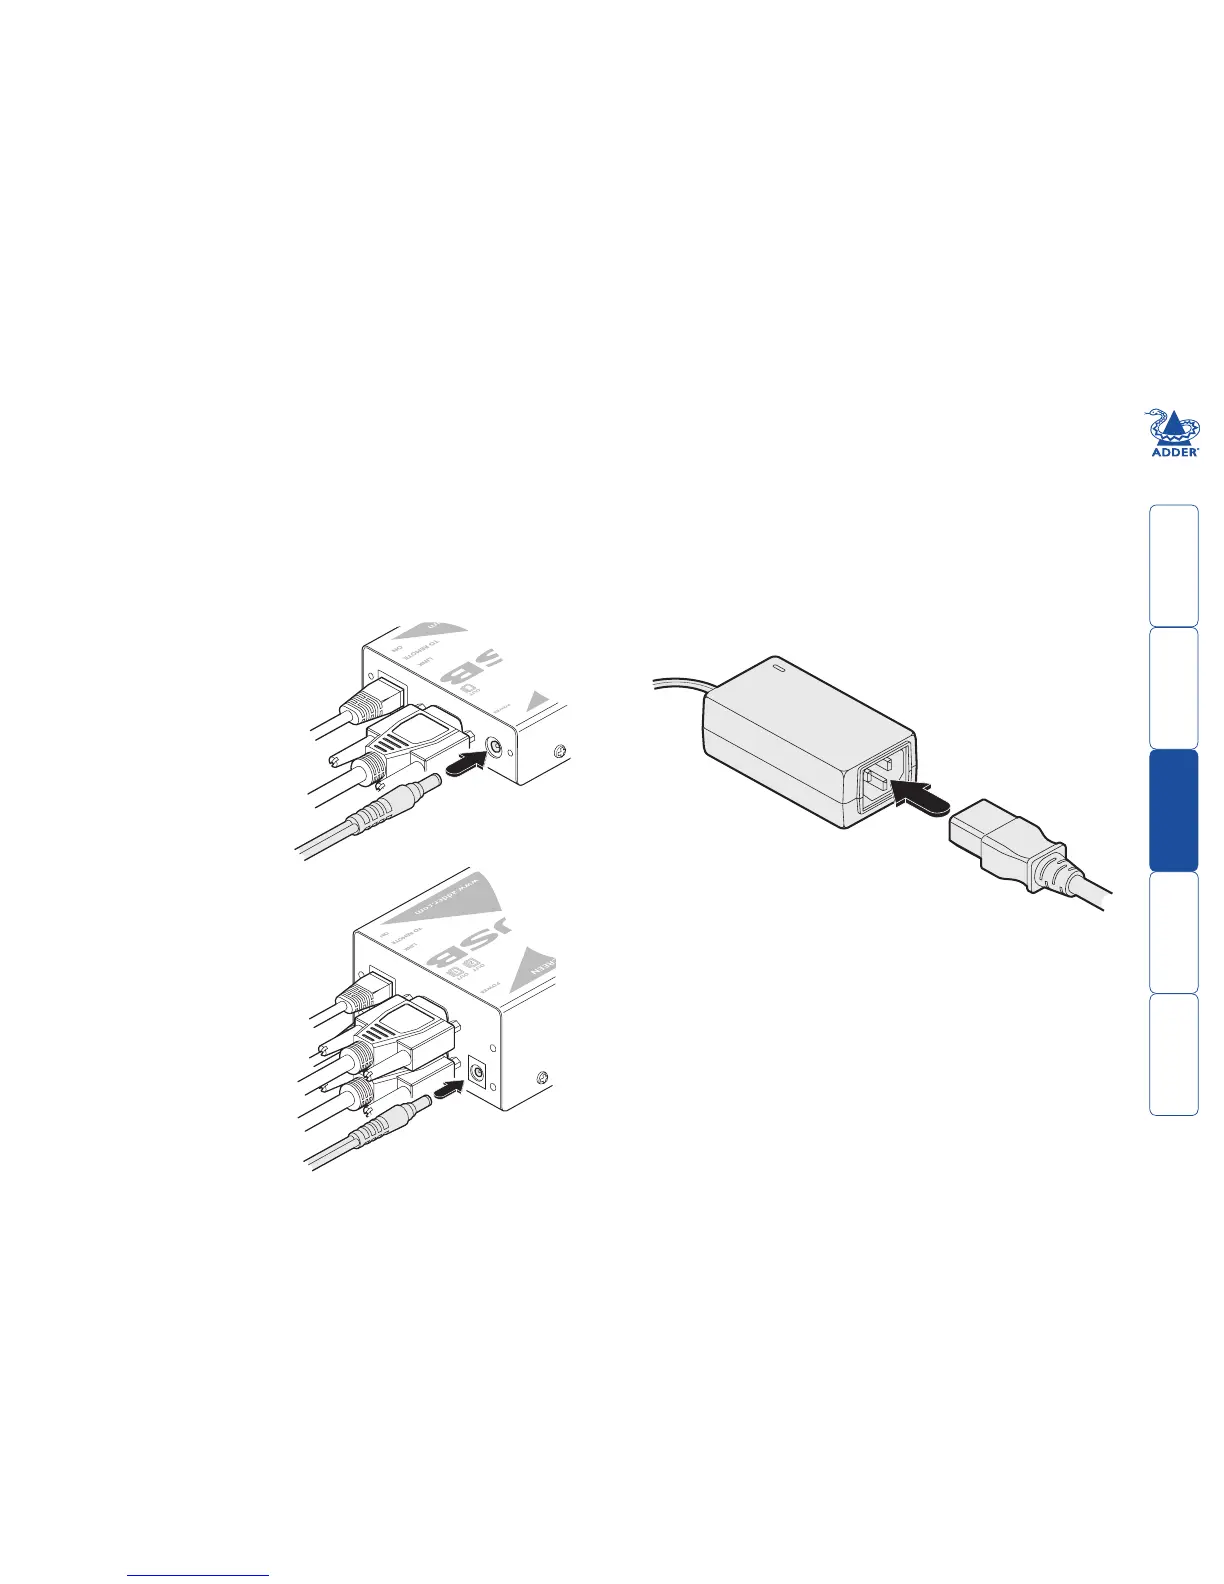
Local module power connection
The standard X-USBPRO and the X-USBPRO-MS local modules differ in the way
that they are powered:
• TheX-USBPROlocalmoduleisdesignedtoderiveitspowerfromthehost
computer via the USB connection. If this is not possible, then use an optional
Adder power adapter (part number: PSU-IEC-5VDC-2.5A), available from
your Adder stockist
• The X-USBPRO-MS2 local module always requires the use of a power adapter
and hence two power adapters are supplied with all X-DVIPRO-MS2 units.
For all X-USBPRO-MS2 and optionally for X-USBPRO units:
1 Connect the output lead of the
optional power adapter to the
socket labelled ‘POWER‘ on the
local module.
2 Insert the IEC connector of the separate power lead into the corresponding
socket of the power adapter.
3 When all other connections have been made at the transmitter and receiver
modules, connect the other end of the power cable to a nearby earthed
power outlet.
X-USBPRO: Use an optional
power adapter only if
power from the host (via
USB) is not possible.
Note: After all connections
are made, power up the
monitor and the REMOTE
module first (followed by
the LOCAL module, if using
the X-USBPRO-MS2 variant)
and then switch on the
computer.
X-USBPRO-MS2: Use the
supplied power adapter for
all installations.