4.1 The Test Method Menu
1) Set Test Method - Toggle the 1) key to select one of the six test methods. The active method is displayed on the Live Indicating
Screen in the upper left hand corner of the LCD. For example, "M2", would mean that test method 2 is active. A test method includes
all of the user-specified parameters in the Data Acq, Analysis and Control menus. In general, it is used to define how a test is run and
what results are calculated and displayed.
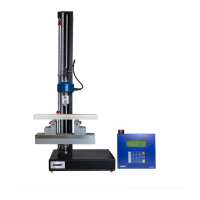
2) Set ABS Zero Pos- Usually used in compression test to define absolute zero position as the point when the two platens touch. This
is required for free height measurements. The absolute zero position is stored to permanent memory so that it is remembered on
power cycles. The plates of the testing machine move till they reach a preset force value, then retract to the user set Home position.
The Absolute Zero Function will determine the zero position to be used for subsequent measurements.
4.2 The Data Acq Menu
Press the <Data Acq> key with the LCD in the Live Indicating mode to enter the Data Acq Menu. Use the <ARROW> keys to scroll to
other menu items. Use the number keys to select options. The following functions are provided in the Data Acq Menu.
1) Threshold - Set the Start Test Threshold in units of force. Data logging for test starts when load crosses threshold. Once the
START Button is pressed on the front panel and the load exceeds the Start Test Threshold the Test Status will change to "T" and
the eP2 Controller will begin logging data.
2) Sample Break - Used to specify the end of test. User specifies sample break as a percentage drop from maximum load. The
controller must record the percentage drop on three consecutive collection points before a break is registered. Setting sample
break to 100% disables it.
3) Specimen Type - Set the specimen geometry and dimensions for stress calculations. Select specimen geometries by tapping the
#1 key, choices are NONE, ROUND, FLAT, BEAM CTR, BEAM CTR - RECT TUBE, BEAM 3RD, AREA and WIDTH. After selecting the
shape of the specimen you are given the opportunity to enter the specimen's dimensions. Dimension selections vary with
specimen shape (type).
4) Log Rate - Set the data logging rate/test length AND specify whether to stream XY data to USB during test. Change log rate/test
length by pressing 1) key: