7
Chapter 2
Basic Setup
This chapter provides details for installing and configuring the mini
dome camera.
Installation
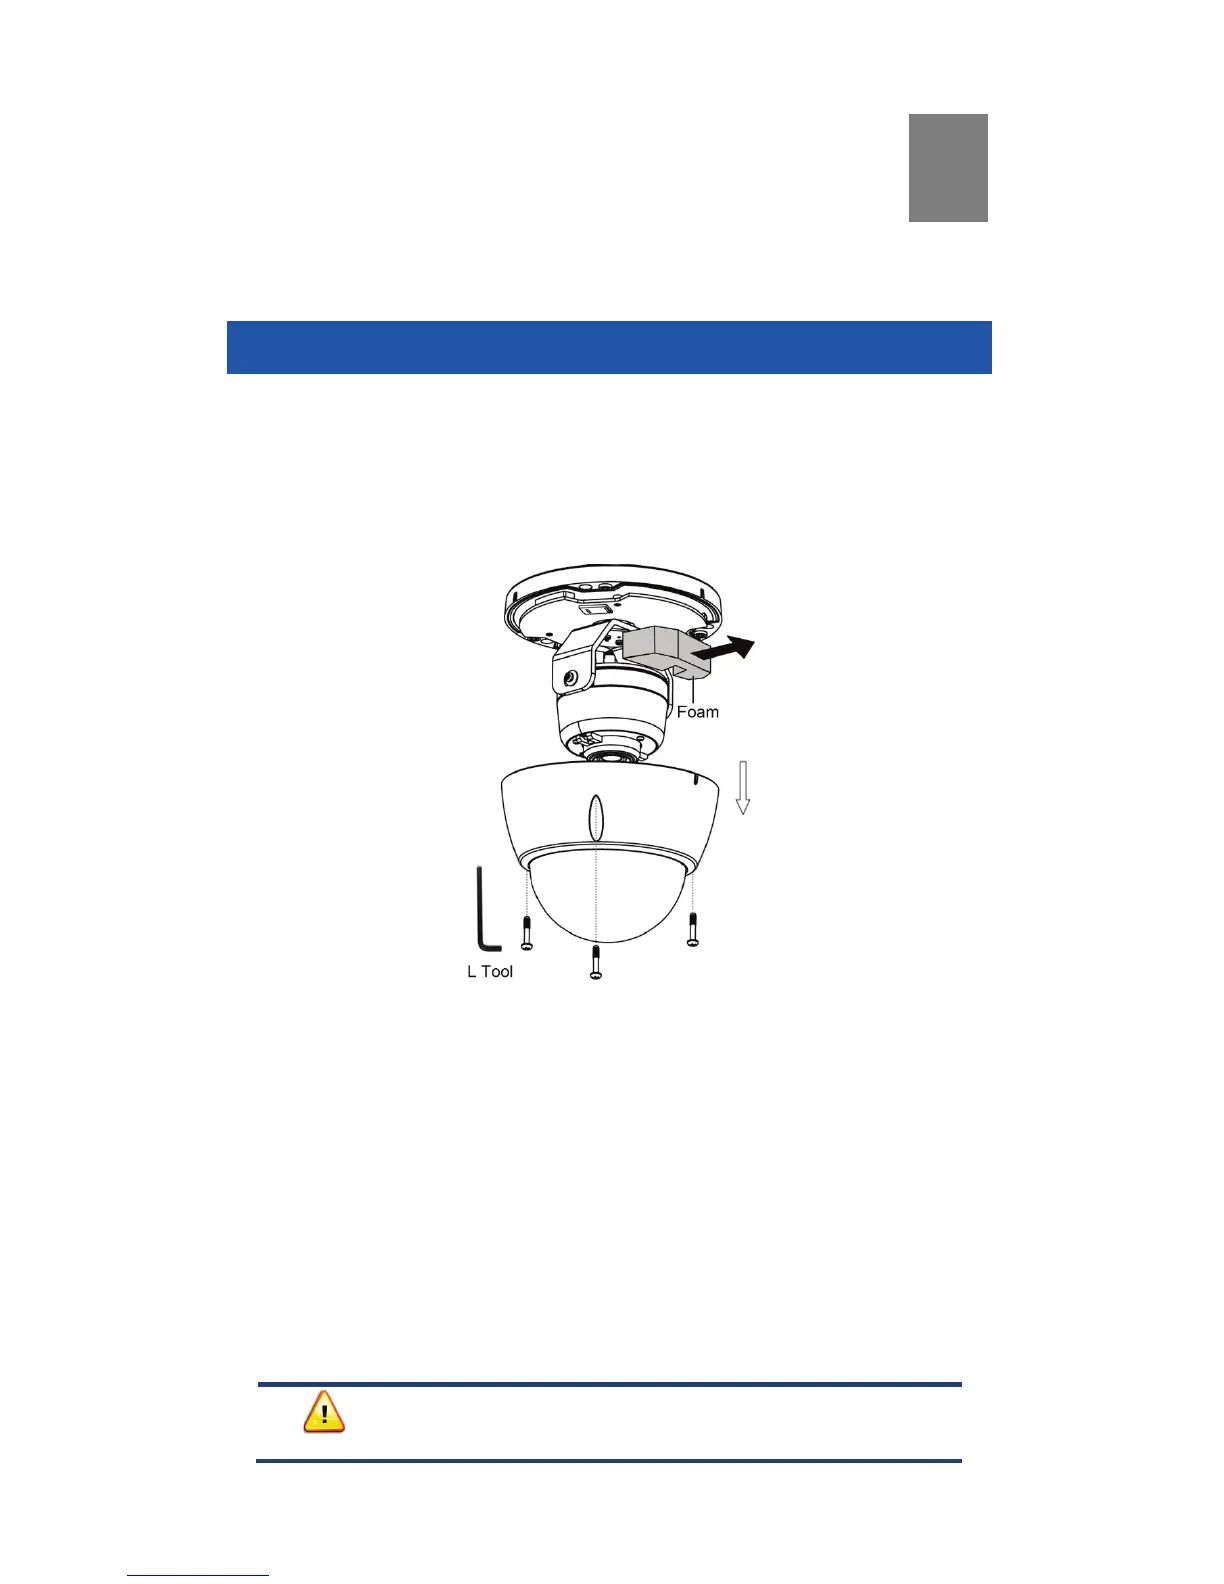
1. Remove Bubble and Protective Foam
a. Use the L tool to remove the three retaining screws and bubble.
b. Remove the protective foam as shown in the figure below.
Note: Leave the bubble detached for later access to the WPS button
(Chapter 3) and for ceiling mounting (Chapter 4).
Figure 3: Removing the Bubble and Protective Foam
2. Power Up
a. Remove the green terminal block from the plastic bag and insert
into the Power connector on the camera cable (see figure below).
b. Insert the red and black wires from one end of the power cable
(not included) into the terminal block, ensuring that like-colored
wires (+ and –) are aligned with those on the Power connector.
Secure both wires by tightening the screws on the terminal block.
c. Similarly, secure both wires from the other end of the power cable
onto the screw terminals of the power adapter, ensuring that like
wires (+ and –) are aligned with the others.
d. Plug the power adapter into an AC power outlet.