8
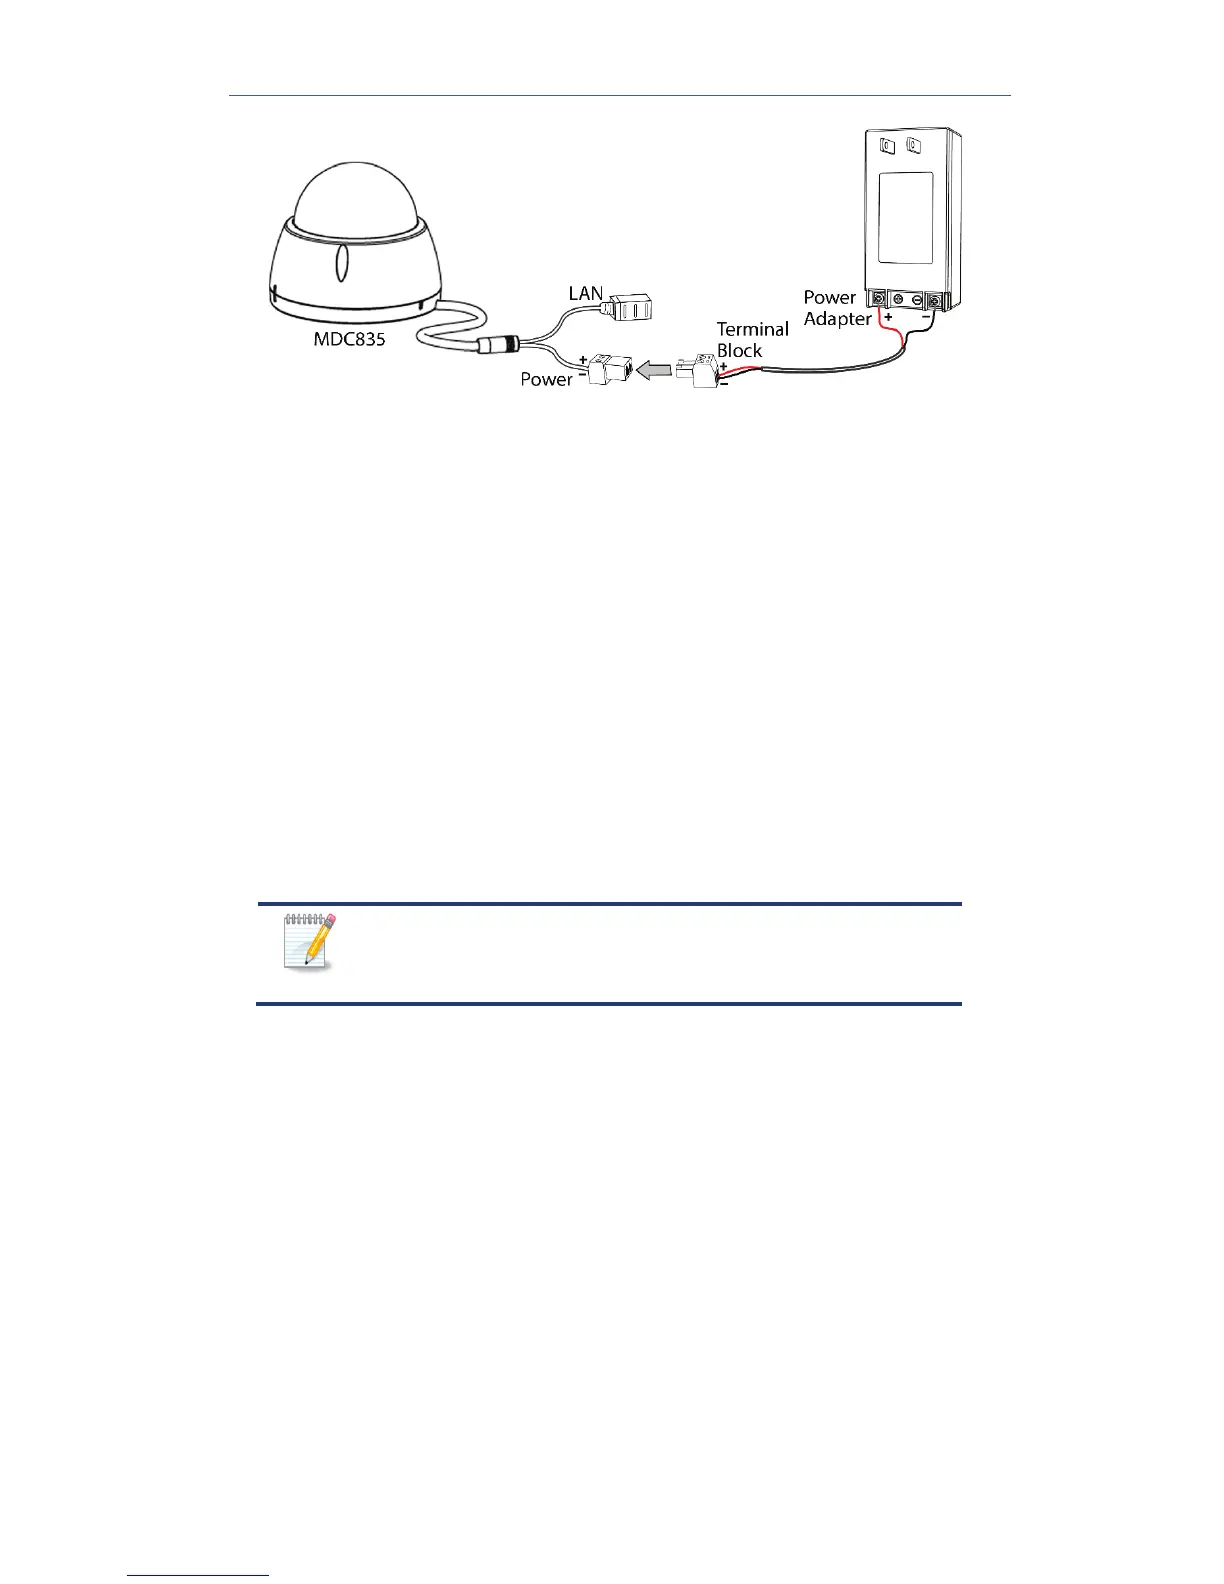
Figure 4: Power Connection
3. Check the Status LED
The Status LED turns on solid green during startup, which takes 60 to
90 seconds. After startup is completed, the LED begins to blink green.
For location of the Status LED, refer to Figure 2.
4. Make the Network Connection
Using a Wired Connection
If you are using a wired connection to the MDC835, connect a
standard Ethernet cable (not included) from the LAN port of the
camera cable to the Device LAN port on the Pulse gateway.
Using a Wireless Connection
The wireless (WPS) connection between the camera and the Pulse
gateway is performed during the Pulse enrollment. See Chapter 3 for
more details.
The Wireless and LAN interfaces cannot be used
simultaneously. Making a wired LAN connection
disables the wireless interface.
5. Enroll the Camera in ADT Pulse
This process is described in the next chapter, ADT Pulse Enrollment.
After the enrollment, check the image orientation. You can rotate the
image 180° by double-clicking the WPS/Reset/ Image Flip button.
6. Mount the Camera
Place the camera in a desired location near a power source. For
details on mounting the camera on the ceiling with the mounting
plate, see Chapter 4.
Mounting Suggestion
To get the best video quality for targets at night, make sure that the
camera’s field of view does not include a foreground object, such as
side wall or roof. Once installing on a ceiling, angle the camera so
that a minimal portion of the wall is visible.