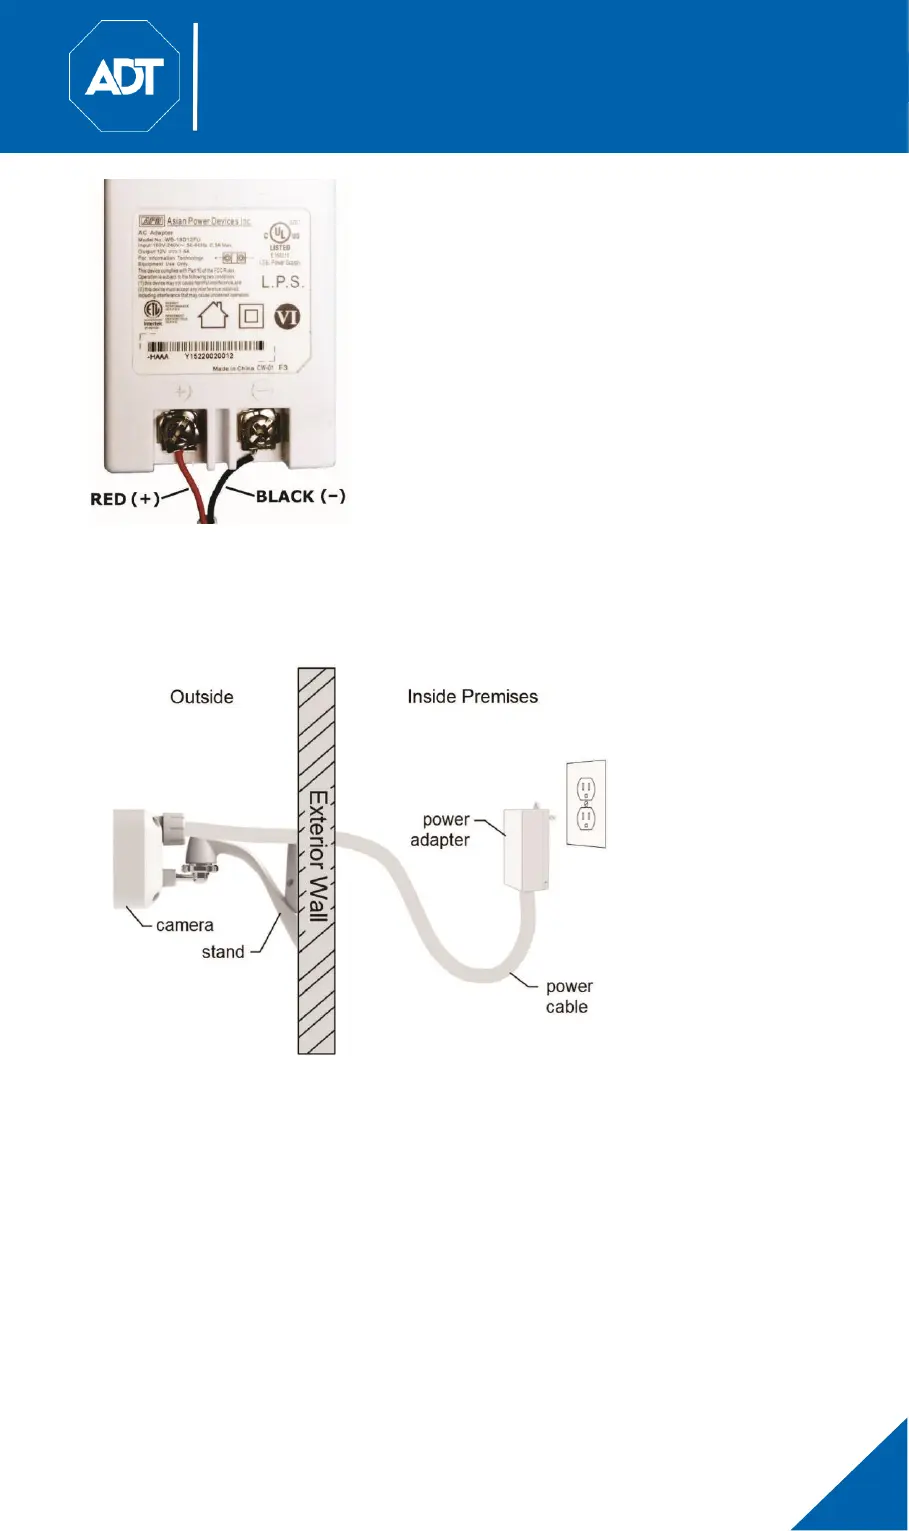
• Remove the retaining screw from the receptacle plate and plug the power
adapter into the lower power outlet.
• Insert the retaining screw through the opening at the top of the power
adapter and reinstall it into the receptacle, securing the adapter to the wall.
• Adjust the camera to a desired position and secure it firmly.
• Verify that the camera is active on the wireless network and is recognized
by the platform.
5.1 Smart IR and Mounting Suggestion
To get the best video quality for targets at night, make sure that the camera’s
field of view does not include a large foreground object, such as tabletop,
side wall or column. If installing on a tabletop, place the camera as close to
the edge as possible. If installing on a wall, angle the camera so that a
minimal portion of the wall or column is visible, as demonstrated in the
photos in row 2 below.