Do you have a question about the Advanced Diagnostics BRAVO III and is the answer not in the manual?
Machine is packed in a durable cardboard box for storage and transport.
Machine must be moved in its original packaging with the carriage secured.
Procedure to safely remove the machine from its packaging and check contents.
Instructions for lifting and placing the machine on a workbench safely.
Crucial safety features, including motor protection and operational precautions.
Detailed technical specifications of the machine, including electrical and physical properties.
Electrical schematic and identification of circuit components.
Verifying the machine for any damage incurred during transport or unpacking.
Optimal operating conditions, including temperature and humidity levels.
Guidelines for placing the machine on a stable surface with adequate clearance.
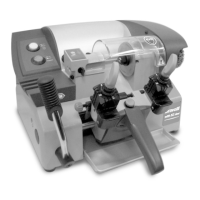
Overview of the machine's controls and operator interface.
Explanation of warning symbols and labels for safe operation.
Instructions for installing separately packaged components onto the machine.
Safe procedures for connecting the machine to the electrical power supply.
Procedures for verifying and adjusting machine settings before operation.
Detailed steps for performing depth and axis calibration for accuracy.
Step-by-step guide for securing keys and performing basic key cutting operations.
Specific instructions for cutting pin keys using the machine's clamps.
Essential preliminary steps before undertaking any maintenance tasks.
Detailed instructions for replacing a worn cutting tool safely.
Procedure for replacing the brush used for deburring key cuts.
Steps to replace the tracer point and recalibrate the machine.
Procedure for setting the maximum depth of carriage travel.
Instructions for safely replacing the machine's fuses with correct types.
Steps to access the lower section of the machine for maintenance.
Procedure for safely replacing the main power switch.
Steps to replace the motor's condenser unit.
Procedure for replacing the microswitch.
Detailed steps for replacing various operational switches and buttons.
Procedure for replacing or adjusting the drive belt.
Comprehensive guide to safely replacing the motor unit.
Procedure for replacing the carriage spring.
| Brand | Advanced Diagnostics |
|---|---|
| Model | BRAVO III |
| Category | Power Tool |
| Language | English |