Operating manual - English BRAVO III with EZ-Jaw
Copyright Silca 2010 27
7.14 Replacing carriage spring
1) Turn the machine off and unplug it.
2) Release the carriage and leave it in the working position (towards the tracer point).
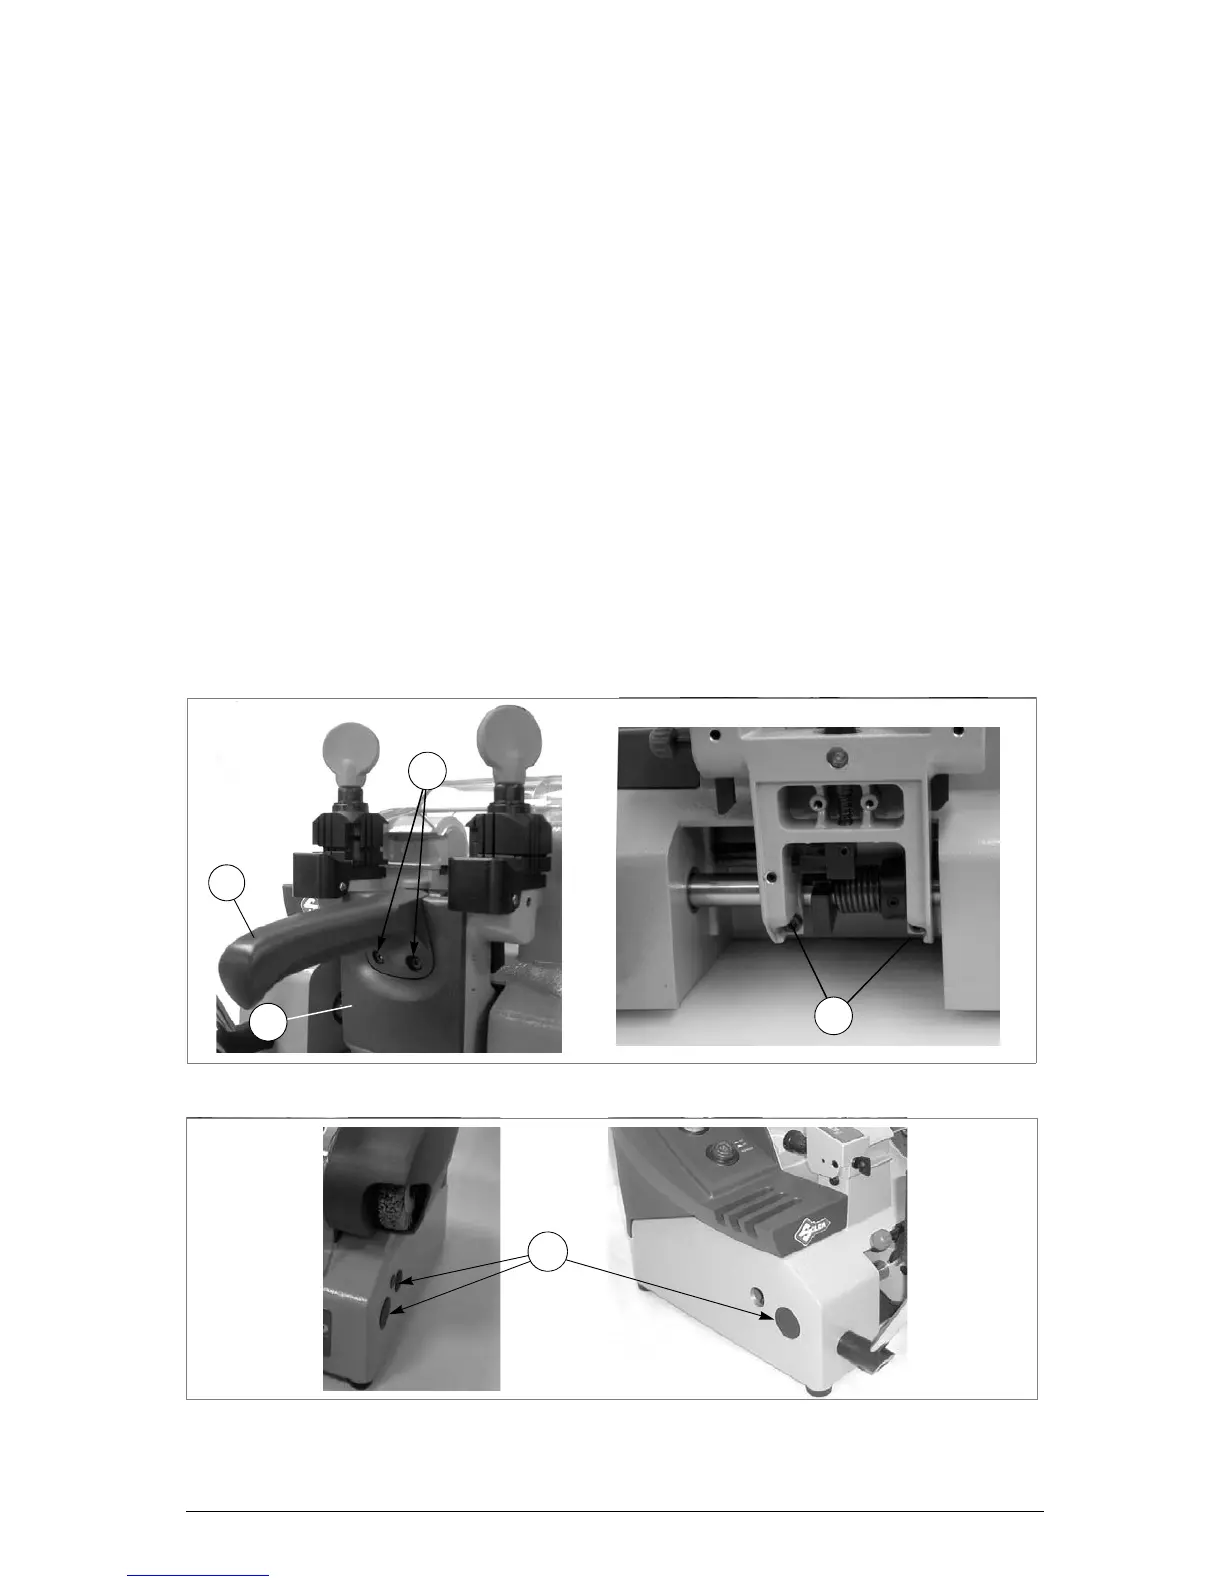
3) Loosen the 2 screws (V1) on the carriage knob (V) (fig.38).
4) To remove the knob (V), raise a little and pull off.
5) Remove the plastic safety shield (D1) on the carriage.
6) Loosen the 2 screws (D2) on the carriage.
7) Remove the caps (D3) from the base (fig. 39, page 27).
8) Remove the swarf tray (N).
9) Turn the machine onto its back.
10)Loosen the 7 screws (W) and 2 feet (W1) and remove the bottom panel (W2) (ch.7.7, page 21).
11)Loosen the screw (N1) on the cam (N2) (fig. 40, page 28) and pull the cam to the right to remove.
12)Loosen the grub screw (Q1) on the spring ring nut (Q2) (fig. 41, page 28).
13)Push the carriage rod from right to left so that the spring can be removed.
14)Fit the new spring into its seat and push the carriage rod from left to right. Tighten the 2 screws
(D2).
15)Use a pivot to turn the ring nut (Q2), adjust spring tension and tighten the grub screw (Q1).
16)Take the carriage to the locked position (towards the operator).
17)Replace the cam (N2) so that it pushes the plate (N3) hard up against the microswitch; tighten the
screw (N1) (fig. 40, page 28).
18)Replace the bottom panel and fix with the 7 screws (W) and 2 feet. Fit the swarf tray.
19)Place the machine upright again (working position).
20)Fit the caps (D3).
21)Replace the carriage safety shield (D1) and fit the knob (V), pressing it downwards.
22)Tighten the 2 screws (V1).
Fig. 38
Fig. 39