Once the shifts have been defined as required, the information must be sent to the server using
the “Send update to Server” button . When the server has received the update, both the “Send
update to Server” and the “Synchronise with server” button will be greyed out.
If, after defining the shifts, the decision is made to return to the shifts already defined on the
server, press the “Synchronise with server” button .
4.5.4 Text
The text used in the email
notifications can also be configured
through the ipGateway.
Click on the “Show email event text”
button .
There are two text areas displayed
on this page.
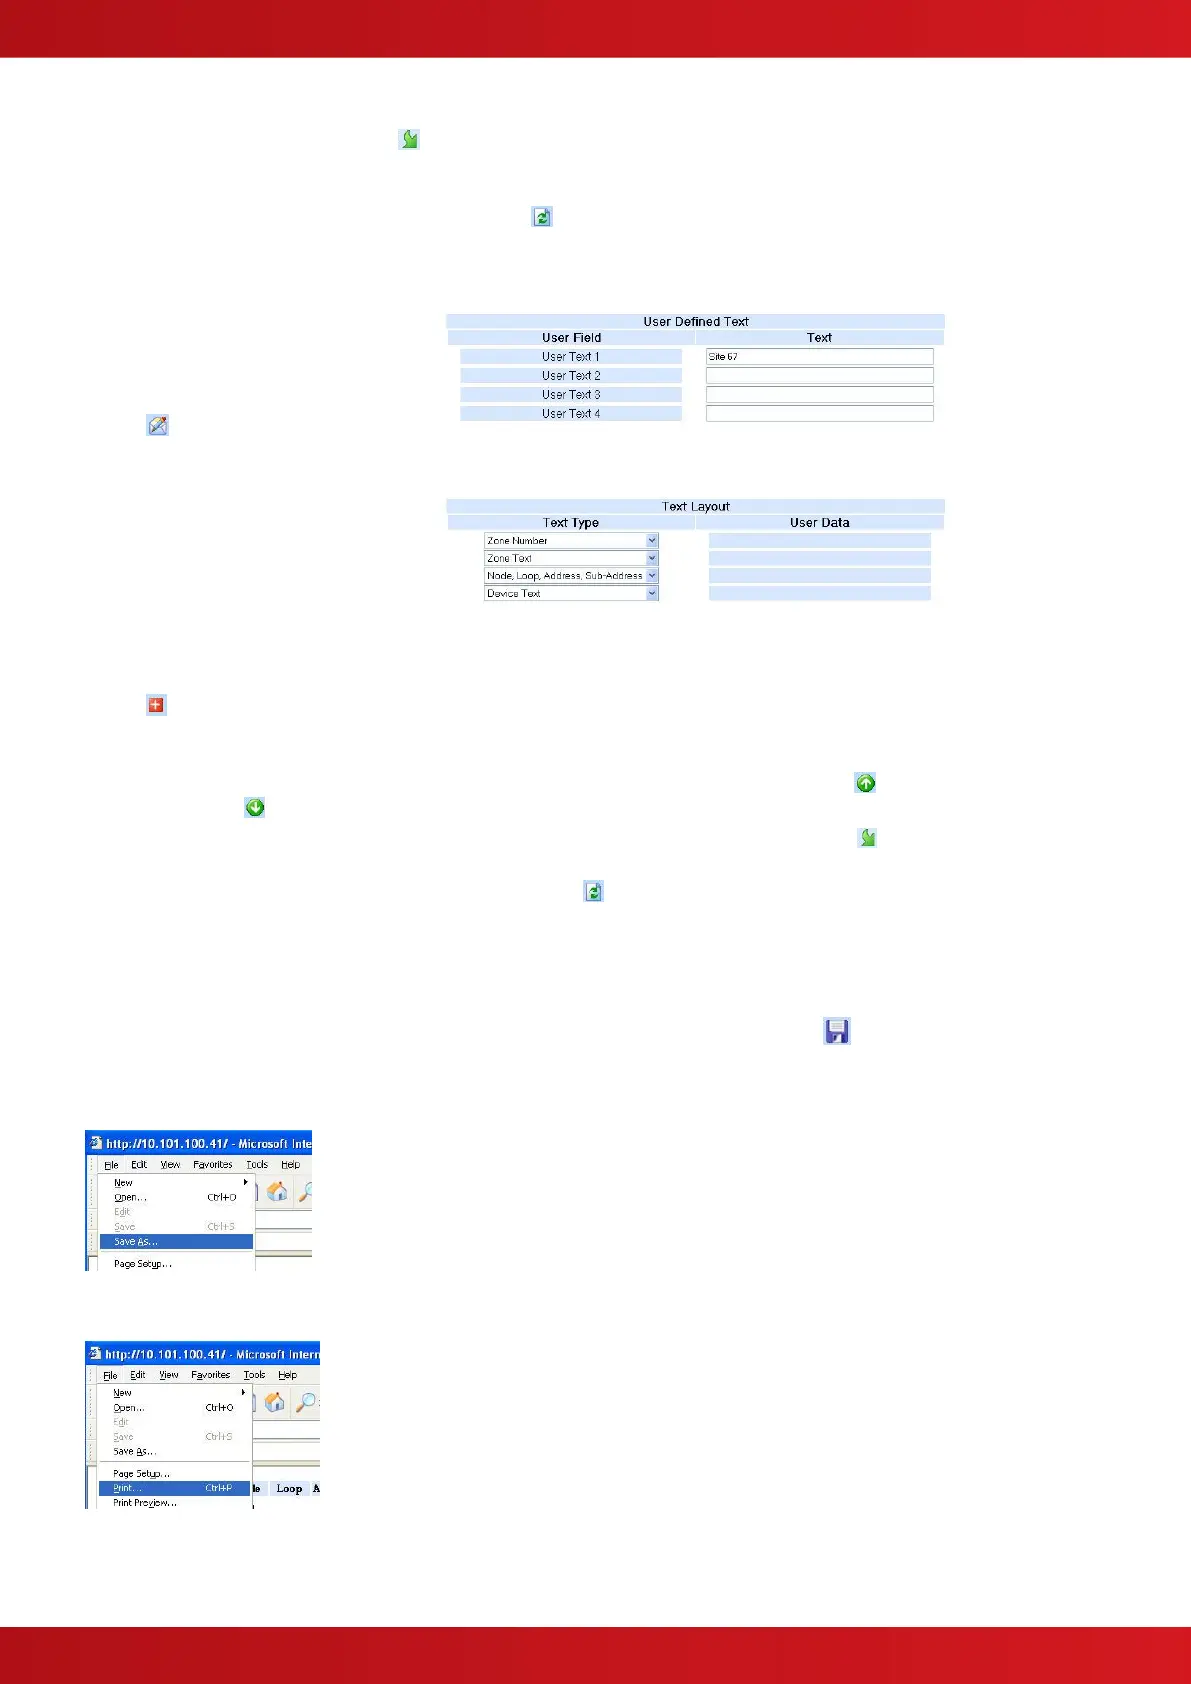
The first is the “User Defined Text”.
This area allows four user specific
strings to be defined.
The second area is the “Text Layout”. This area defines what text will be included in the body of
any email notification. To add an item of text to the email notification click on the “Add new email”
button . A new row will be added to the table. Select the required text type from the drop down
list. Where a “User Text” field is selected, the resulting user text will be displayed in the “User
Data” column.
Text rows can be moved up and down the “Text Layout” table using the “Move text up” and
“Move text down” buttons.
When the text layout is defined as required, click on the “Send update to server” button .
If, after defining the text layout, the decision is made to return to the text layout already defined on
the server, click on the “Synchronise with server” button .
4.6 Event Log
The ipGateway allows access to the Ad-Net fire network event log.
To save or print the event log click on the “Open event log in a new window” button .
A new window will be opened containing the event log.
This window can be saved using the browsers File->Save As menu.
Likewise, the event log can be printed by using the browsers File->Print menu.