7 USM-110 User Manual
Chapter 2 Installation
2.2 Installation Procedures
2.2.1 Connecting the Power Cord
USM-110 only supports DC power (12 VDC, 3A, 36 W). When plugging/unplugging
the power cord, hold the cord at the plug end.
2.2.2 Activating the Power Source
Verify that the power cord is connected to the power input port of the device. Then
connect the plug end of the power cord to the power source outlet.
2.3 Device Mounting
To ensure flexible installation, the USM-110 digital signage player supports five
mount options - wall, magnet, VESA, pole, and DI-rail mounting.
Learn more about USM-110 mount options by watching the video at the links below.
YouTube: https://youtu.be/c_yWG_WvkmQ
Youku: http://v.youku.com/v_show/id_X-
MzgyMTY4NDE4MA==.html?spm=a2h3j.8428770.3416059.1
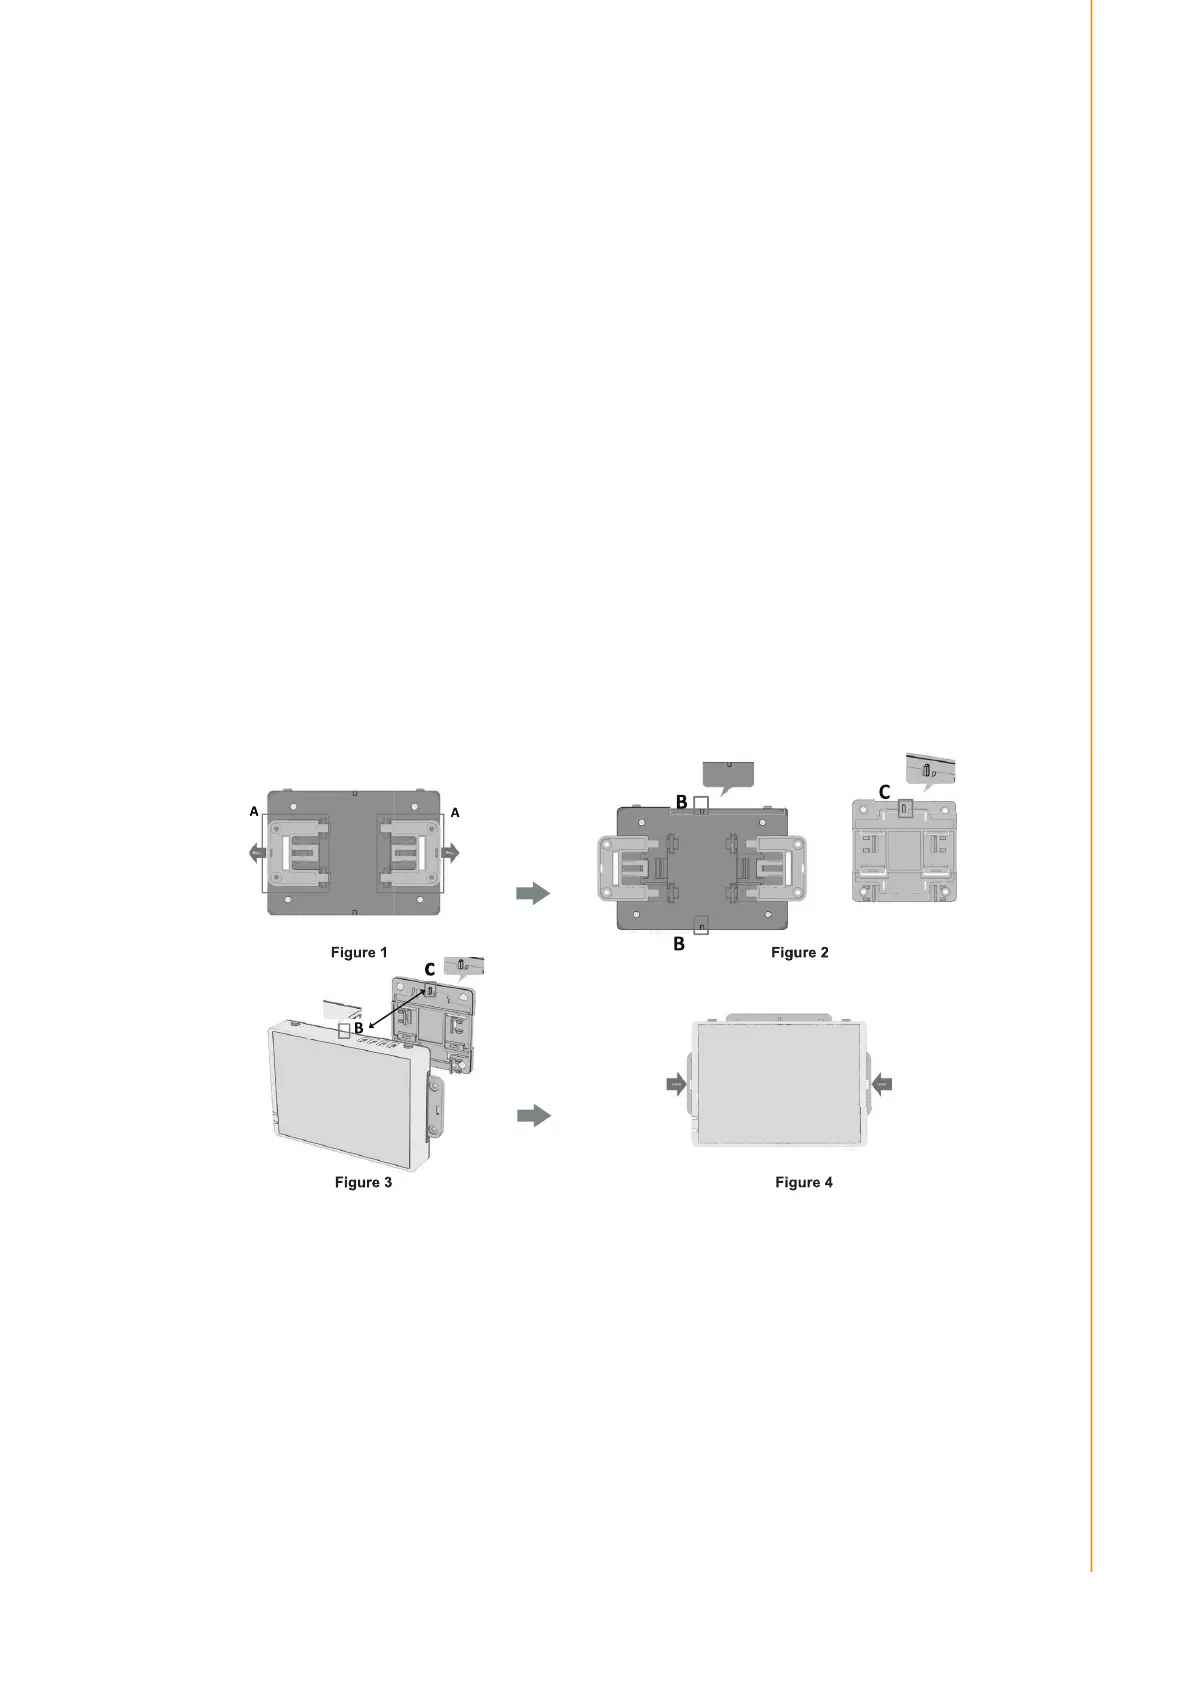
2.3.1 Module Assembly (for VESA, Pole, and DIN Rail Mounting)
Step 1.Pull out the two side wings (A) located at the rear of the device (Figure 1).
Step 2.Align the anchor of the mount bracket (C) with the mount holes at the rear of
the device (B) (Figure 2).
Step 3.Carefully press the bracket until the anchor clicks into place (Figure 3).
Step 4.Return the two side wings (A) to their original position (Figure 4).