For contractors
Alternative installation methods are shown in gures
J
-
O
.
4.1 Power supply – unfinished walls - below
K
a Push the cable grommet over the power cable.
b Break out the cable grommet knock-out in the back panel.
c Movetheterminalstripfromthetoptothebottom;forthis,undothescrewandretitintotheterminal
strip moved to the bottom.
d Slide the back panel over the studs and the cable grommet, pull the cable grommet with a pair of pliers
against the locking hooks and let both hooks audibly click into place.
e Pushthebackpanelrmlyandushagainstthewallandlockwiththexingtoggle.
4.2 Power supply – finished walls
• Cut/breakaholeintothebackpanelsuitableforthepowercable(forpossibleknock-outssee
J
).
• Withpowersupplyonnishedwalls,theprotectionratingisreducedtoIP24(splash-proof).
Please note:
Mark the type plate with a permanent marker:
Cross out IP 25 and tick the IP 24 box.
4.3 Priority control
L
When used in conjunction with other electrical equipment, e.g. electric storage heaters, use the maximum
demand relay:
a Maximum demand relay (see "8. Special accessories").
b Control cable to the contactor of the second device (e.g. electric storage heater).
c Control contact, opens when switching the instantaneous water heater on.
The relay trips as soon as the instantaneous water heater starts.
Only connect the automatic maximum demand controller to the central phase of the equipment terminals
(mains power).
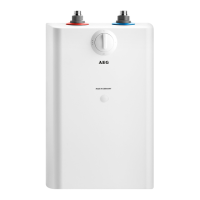
4.4 Undersink installation, water connections from the top
Undersink installation with water connections from the top can be achieved with the additional pipe assembly
for undersink devices (part no. 18 44 21). Cleanly break out the water pipe knock-outs in the back panel and
tthepipeset.
4.5 Temperature limit
If the maximum temperature is to be limited to 43 °C, this is done on the
inside of the device cap. For this, change the switch from 60 (°C) to 43 (°C).
You can still adjust the temperature selector across its entire range.
The outlet temperature will be permanently limited to 43 °C. A temperature
range between 30 °C to 43 °C can be selected.
4.6 Taps for finished walls
AEG-Haustechnik - pressure tested tap for nished walls
ADEo 70 WD
N
(part no. 18 39 34):
• FitplugG½"withgaskets(a)
(part of the standard delivery of the pressure tested tap ADEo 70 WD).
• Fitthetap.
• Insertthesupportplateintothelowerpartofthebackpanel.Thesupportplateispartofthestandard
delivery of the tap and is designed to hold the tap pipes in the designated location as well as to ensure
the necessary protection against moisture (
M
31).
•
Push the tap pipes from above through the support plate up to the lower part of the back panel.
• Pushtheopenendofthepipesintothevalve.
• Clickthelowerpartofthebackpaneltogetherwiththesupportpanelandthepipesintotheupperpart
of the back panel.
• Securetheconnectionpipesonthedevice.
The device cap needs to the prepared tor this installation:
Cleanly break out the knock-outs in the device cap (
M
a),usealeifnecessary.
Device xing:
Secure the back panel in the lower part of the device with two additional screws (
M
24).
4. Alternative installation methods for contractors
Power supply: Unfinished walls - below, maximum demand relay; undersink installation, water
connections - top; water: finished walls

 Loading...