1.3
1.3-04
!!!!!য়ߢ0XBSOJOH
൩ඓԍୟഗ࿋ᇀཌቄ࿋ዃLj֡ፕኸ๖ഗ၂๖ྺ!PGGDŽݴ
ቄDžLjႁڑࣟئీᅙྜඇݣă
༵ื้Ljփڥথةୟഗ߰ةۅă
ٗ؏ዐൽୟഗ
૧ᆩଇ֨դDŽ!2!/!4Dž༵ืۗܺDŽ2/5Džୟഗ
ٗኧࣂࡆዐൽă
ୟഗҾጎڟ؏ዐ
2/! ඓԍ؏࿋ዃኸ๖ഗ၂๖! EJTDPOOFDUFEDŽ
DžLjᄩդᅙྃăDŽ!2/6Dž
3/!؊ݴકቛ؏؏๕ኧࣂࡆLjڟഄٳڟമڔӱă
4/! ๑ᆩฉຎ༵ืݛ݆ยԢইگڟ؏๕ኧࣂࡆฉăၭ
႐ֱԨยԢᅎۯևฉҾጎڦࡐዡޏᇑࣂࡆኟඓౚ
ࢇăDŽ!2/7Dž
5/! ୟഗླྀ؏Ljഄٳڟമڔӱăୟഗُ้࿋
ᇀ!EJTDPOOFDUFEDŽDž࿋ዃă
6/!ᆩஅີژຩ้ኍገۯᄩդڔӱدۯጎዃDŽ!2/8DžLj
֭ᄩդժຩ้ኍገۯLjୟഗࠦۨሞ؏ዐăୟ
ഗথৎ! UFTUDŽ֪Dž࿋ዃ้Ljֱْܾۉୟ߰ةۅࠦ
ۨࢅᅎۯևڦܔዐጒă
7/Ⴤຩ้ኍገۯᄩդăཉدۯኸ๖ഗٗ!
EJTDPOOFDUFEDŽDžᅎۯڟUFTUDŽ֪Dž࿋ዃLj
ፌዕᅎۯڟ! DPOOFDUFEDŽথDž࿋ዃăᅎۯևڦ
ፇ๔ᇑ؏ฉڦةۅౚࢇ้LjገۯᄩդႴڦ૰ࣷ
ሺٷă
BREAKER
ୟഗ
Please ensure that the breaker is placed in tripped posiƟon, that
the operaƟon indicator shows OFF and that the mechanisms
springs are fully discharged.
Whilst liŌing, do not touch the circuit breakers isolaƟng
contacts.
Circuit Breaker Removal from the CasseƩe
LiŌ the circuit breaker clear of the draw out support slides using the
hand grips on either side (Fig. 1.3) or the liŌing eyes (Fig. 1.4).
Circuit breaker MounƟng in the CasseƩe.
1. Ensure the casseƩe posiƟon indicator shows DISCONNECTED
and racking handle is disengaged. (Fig. 1.5).
2. Fully extend the casseƩe draw out support slides unƟl they
reach a posiƟve stop.
3. Lower the device on to the drawout support slides making use
of the liŌing methods described here. Carefully verify that the
rollers ĮƩed to the mobile part of this device are correctly
engaged on the slides. (Įg. 1.6)
4. Push the circuit breaker into the casseƩe unƟl it reaches a
posiƟve stop. The circuit breaker is now in the DISCONNECTED
posiƟon.
5. With a screwdriver, turn the racking handle shuƩer drive
clockwise (Fig. 1.7), insert the racking handle and rotate
clockwise to rack the circuit breaker into the casseƩe. As the
breaker approaches the TEST posiƟon check the alignment of
the Įxed and moving parts of the secondary circuit isolaƟng
contacts.
6. Keep on rotaƟng the racking handle clockwise. The racking
drive indicator will move from the DISCONNECTED to TEST and
Įnally to the CONNECTED posiƟon. As the cluster of the mobile
parts start engaging with the contacts on the casseƩe the force
required to turn the racking handle increases sharply.
Ҿጎ
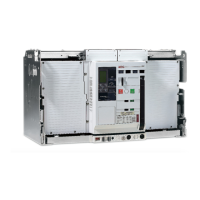
!2/6ǖ࿋ᇀ!EJTDPOOFDUFEDŽDž࿋ዃڦ؏ᄩ߇ጎዃ
Gjh/!2/6;Sbdljoh!Esjwf!jo!uif!EJTDPOOFDUFE!Qptjujpo
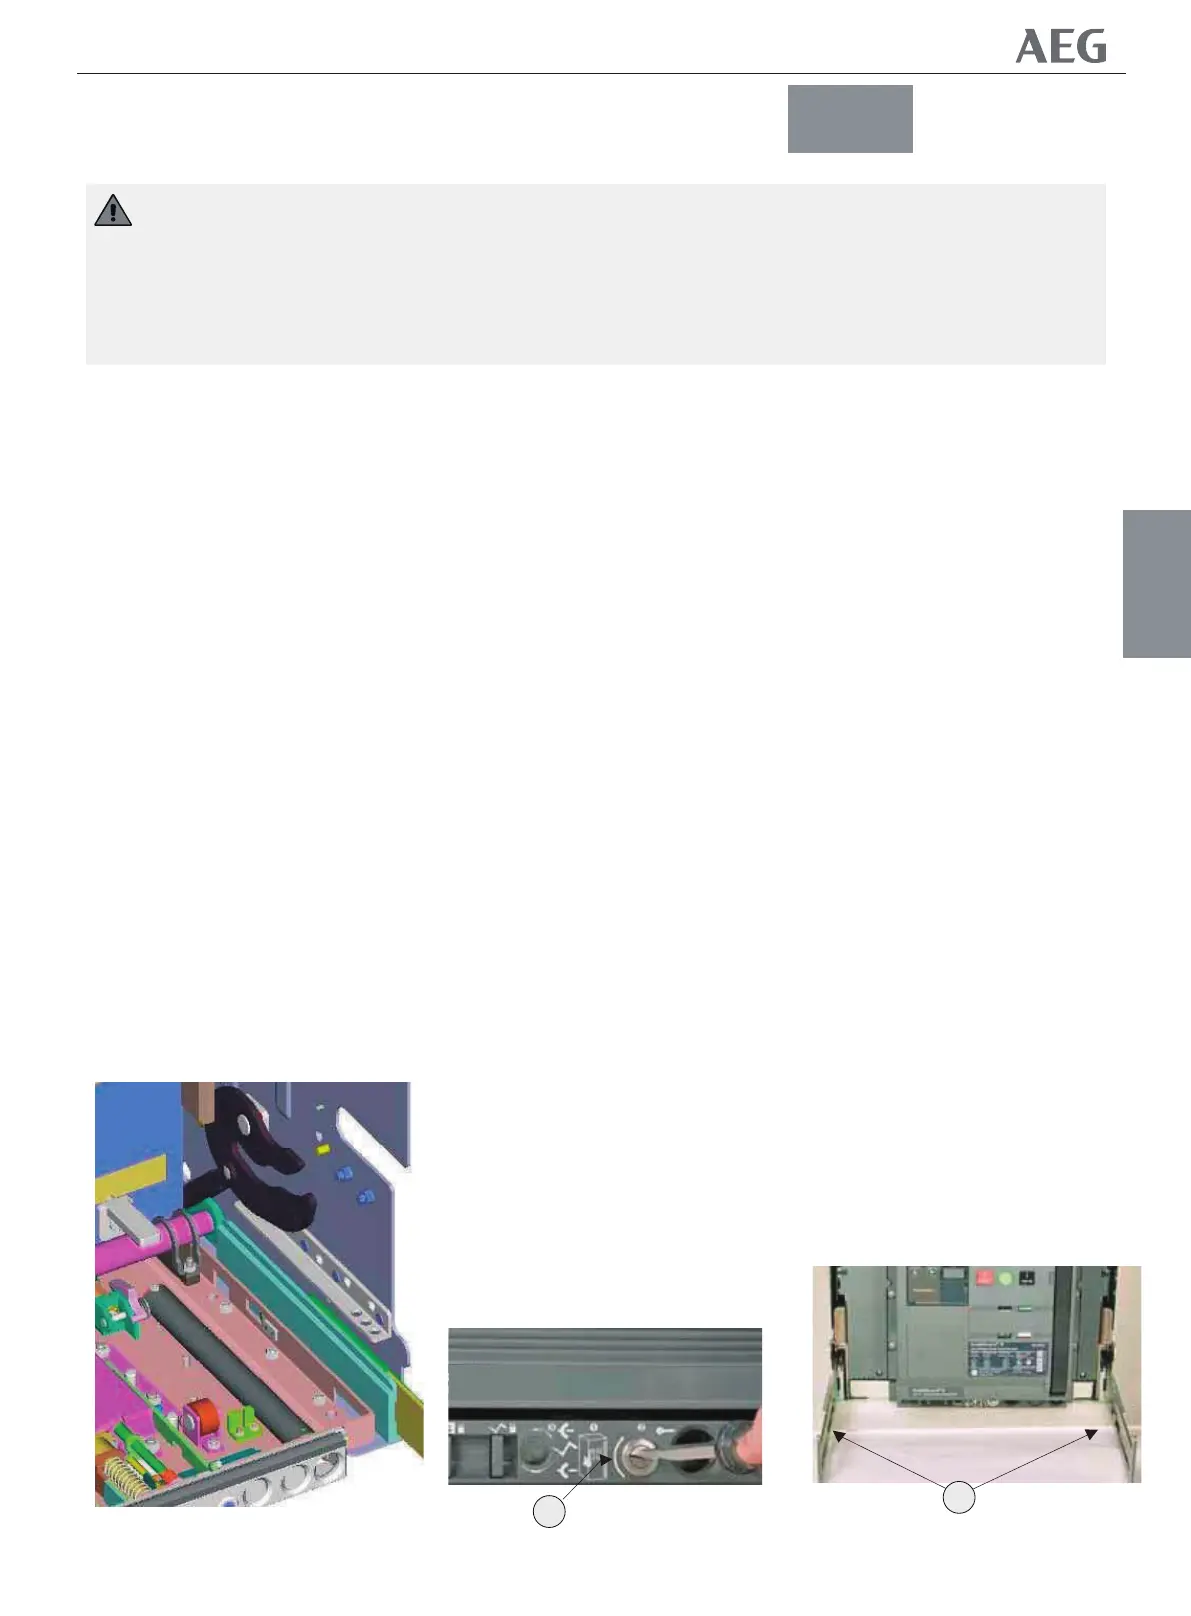
!2/7ǖࣂࡆ
ୟഗࡐዡՂႷౚࢇሞࣂࡆฉă
Gjh/!2/7;!Tmjeft
//po!xijdi!uif!csfblfs!spmmfst!nvtu!fohbhf
!2/8ǖ࿋ዃڦ؏ᄩ߇ጎዃ
B*!؏ᄩ߇ጎዃڔӱٶጎዃGjh/!
Gjh/!2/8;!Sbdljoh!Tdsfx!Mpdbujpo
B*!Sbdljoh!Tdsfx!Tivuufs!Esjwf
A
A
NF1:ဣଚگუഘୟഗ