Do you have a question about the AerAtron AE2 and is the answer not in the manual?
Fan must be installed by a licensed and qualified electrician per local regulations.
Test the fan motor before installing motor housing and blades.
Read all warnings and safety information provided in the manual carefully.
Proof of purchase and licensed installation required for warranty claims.
Appliance requires supervision for users with reduced capabilities; supervise children.
Follow instructions carefully, be mindful of all warnings and safety information.
Ensure minimum floor clearance for fan blades as per regional regulations.
Ensure sound ceiling joists and secure mounting bracket to load-bearing structure.
Disconnect power before electrical work; avoid bending drive shaft.
Unpack fan, check contents against list, and retain packaging for warranty.
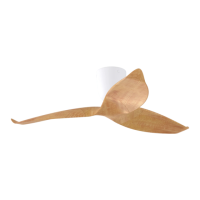
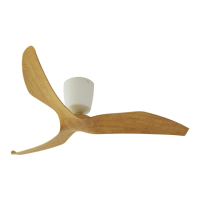
List of components specific to the AE2 ceiling fan model.
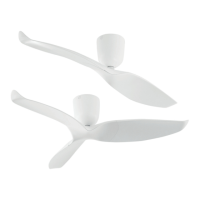
List of components specific to the AE3 ceiling fan model.
Check ceiling condition and prepare for fan installation, turn off power.
Install mounting bracket securely to ceiling joist or embedded mounting box.
Adjust motor housing screws to provide clearance for proper installation.
Slide remote control receiver into hanger bracket and position aerial.
Ensure motor housing screw covers are in full open position before assembly.
Connect mains power, receiver, and motor wiring to the terminal block.
Set dip switches for individual fan control or group control up to 8 fans.
Match transmitter with receiver by pressing ON/OFF within 3 minutes of power-up.
Align and install motor housing using clockwise bayonet action and tighten screws.
Ensure all three screw covers are closed properly after housing installation.
Line up blade holes with hub upper, use medium torque for secure assembly.
Fasten the AE2 lower hub to the fan assembly using specified hub screws.
Line up blade holes with hub upper, use medium torque for secure assembly.
Fasten the AE3 lower hub to the fan assembly using specified hub screws.
Align shaft and connector profiles, slide fan blades onto drive shaft.
Insert pivot lock, tighten screw, and ensure fan assembly is vertical.
Align LED light pins with ceramic holder, push until safety clip engages.
Install extension rod for raked ceilings up to 17 degrees.
Details on spacer thickness and clearance for raked ceilings up to 15 degrees.
Specifications for using extension kits with raked ceilings up to 40 degrees.
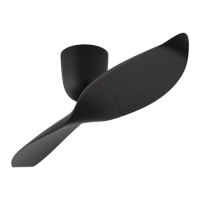
Specs for AE2/AE3 dimensions, weight, colour options, and remote control.
Table detailing fan speeds (rpm) and power usage (W) at different settings.
Clean fan with soft brush or lint-free cloth; do not use water.
Steps to resolve fan not operating, noisy, or low airflow issues.
Normal motor noise and slight fan movement are expected during operation.
Details warranty period, coverage, and requirements for claims.
Details damages and issues excluded from warranty coverage.
Requirements for making a warranty claim, including proof of purchase and installation.
Contact numbers for warranty claims and required customer/electrician details.
| Category | Fan |
|---|---|
| Model | AE2 |
| Number of Blades | 3 |
| Power Consumption | 30W |
| Voltage | 220-240V |
| Motor Type | DC Motor |
| Material | Aluminium |