4 | AC Series - Quick Start Guide
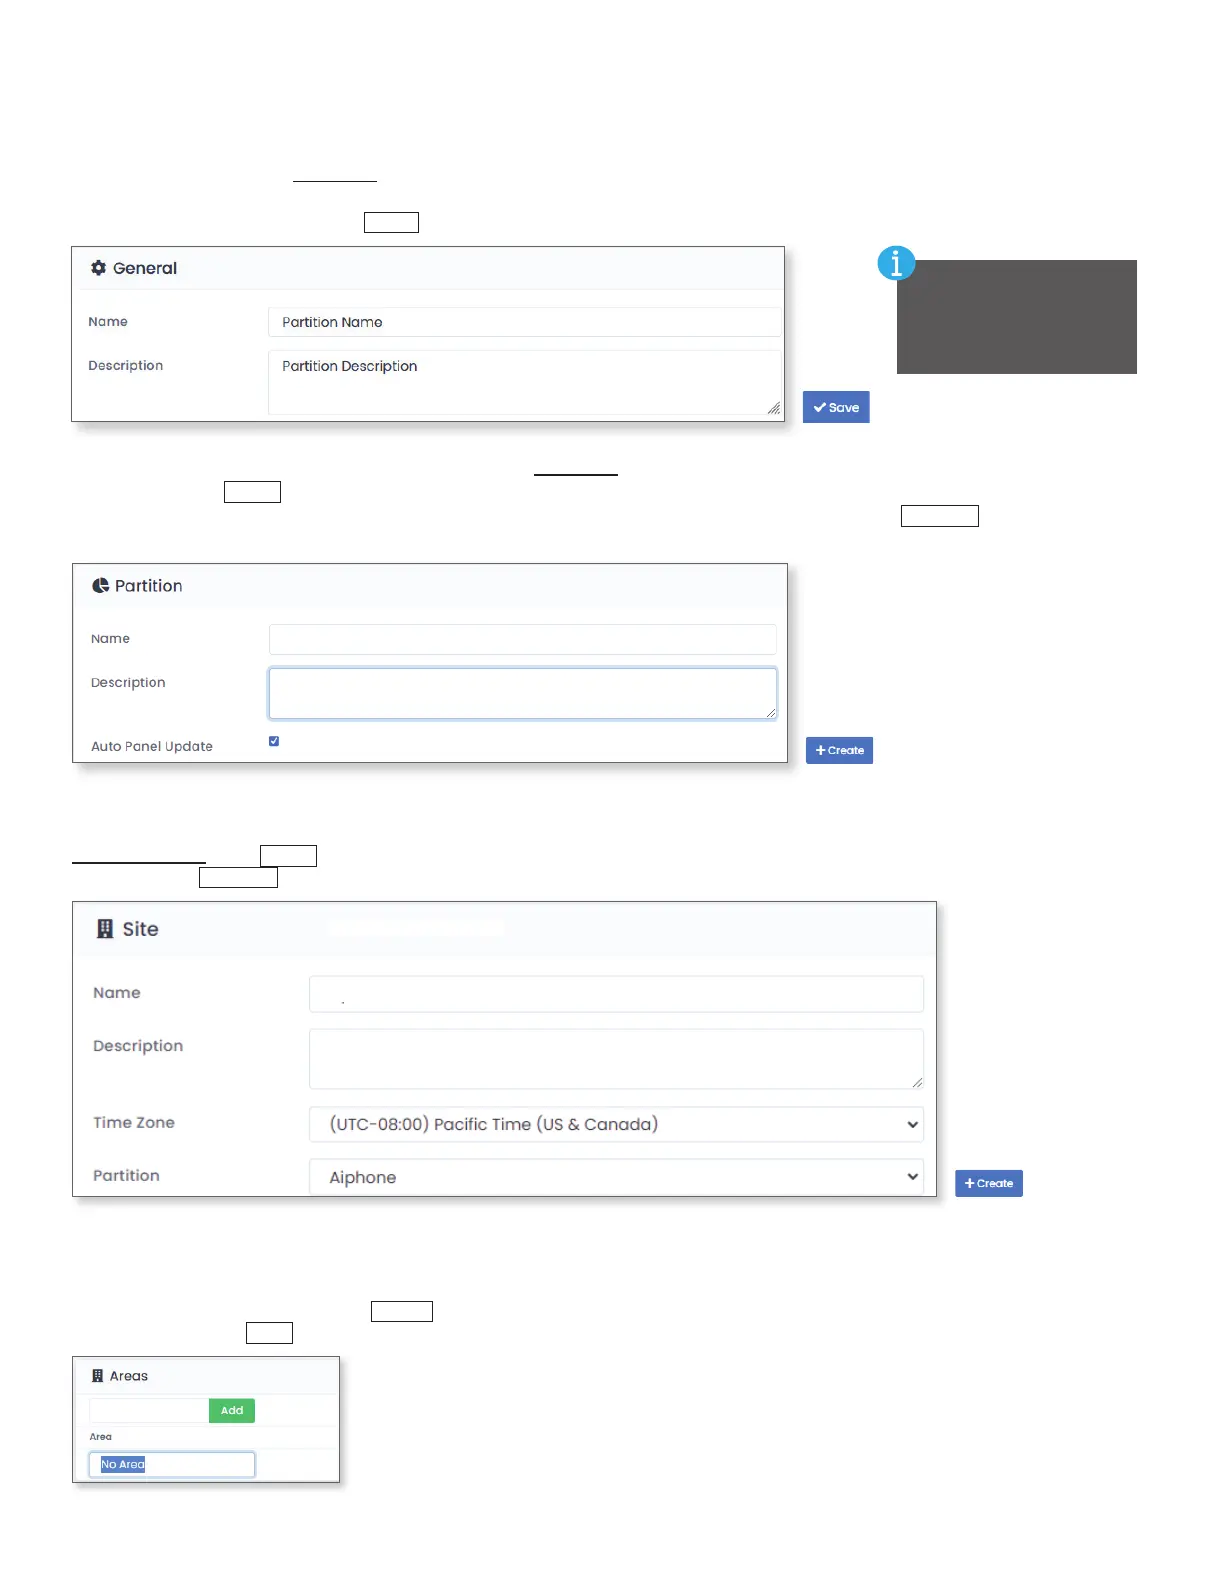
To create a new partition, navigate back to System, Partitions. Click the cog wheel next to the default partition to open a
new menu. Click
+Add
. Give the partition a Name and Description. If Auto Panel Update is checked, any panel that is
added to the partition will automatically be updated 15 minutes after changes are made. Click
+Create
to nish adding
the partition to AC Nio.
Partition Name
Partition Description
Creating Sites
If a new partition was created, a site must be added underneath it. In the System section in the left-hand side menu, select
Sites and Areas. Click
+Add
to add a new site to the system. Give the site a Name, Description, Time Zone and assign the site to a
Partition. Click
+Create
.
Site Name
Site Description
Partition Name
Creating Areas (optional, required for anti-passback/user tracking)
After a site has been created, Areas are created and assigned to doors so the system knows which readers grant access to dierent
parts of a building or campus. Areas are primarily used for anti-passback and user tracking via a Muster Report. To add a new area,
click on the cogwheel icon, then click
Areas
. For the rst area, rename the eld labeled No Area. If adding more than one area, enter
in the name and click
Add
.
Creating or Modifying Partitions (Optional)
Partitions are a way to separate buildings or areas in a system. Administrators can be assigned to specic partitions to
delegate system management. Partitions can be created or modied by going to the System section on the left-hand
side menu and selecting Partitions. To modify the default partition, click the cog wheel next to it. If Auto Panel Update is
checked, any panel that is added to the partition will automatically be updated 15 minutes after changes are made. Fill in
the desired information and click
Save
.
Sites using an Essential
License for AC Nio
do not support more
than one partition.